
Chicken Wire Stucco: Ultimate Guide 2025
Why Choosing the Right Chicken Wire Stucco Reinforcement Matters
Chicken wire stucco is actually a misnomer – what you really need is specialized stucco wire lath, not the lightweight chicken wire from your local farm store. Here’s what you need to know:
- Stucco wire (17-20 gauge): Heavy-duty galvanized steel mesh designed for cement plaster reinforcement
- Traditional chicken wire: Lightweight poultry netting unsuitable for structural stucco applications
- Key difference: Stucco wire provides proper tensile strength and corrosion resistance for lasting plaster adhesion
- Common sizes: 1″ to 1.5″ hexagonal mesh in 36″ x 150′ rolls with self-furring dimples
The confusion between chicken wire and stucco wire has led to countless failed installations over the years. True stucco reinforcement requires purpose-built galvanized steel mesh that can handle the weight and alkaline environment of cement plaster. When installed correctly with proper overlap and fastening, quality stucco wire creates the mechanical bond essential for crack-free, durable finishes.
Understanding this distinction is crucial for homeowners planning stucco projects or evaluating existing installations. Poor wire selection often contributes to the moisture intrusion problems I’ve seen in my two decades of stucco inspection work.
I’m Gabe Kesslick, an EDI Level 2 Certified Stucco Inspector who has investigated thousands of stucco failures since 2001. Through my work at Stucco Safe, I’ve seen how proper chicken wire stucco reinforcement – when done with the right materials – prevents the costly moisture damage that plagues so many homes.

What is Stucco Wire? More Than Just “Chicken Wire”
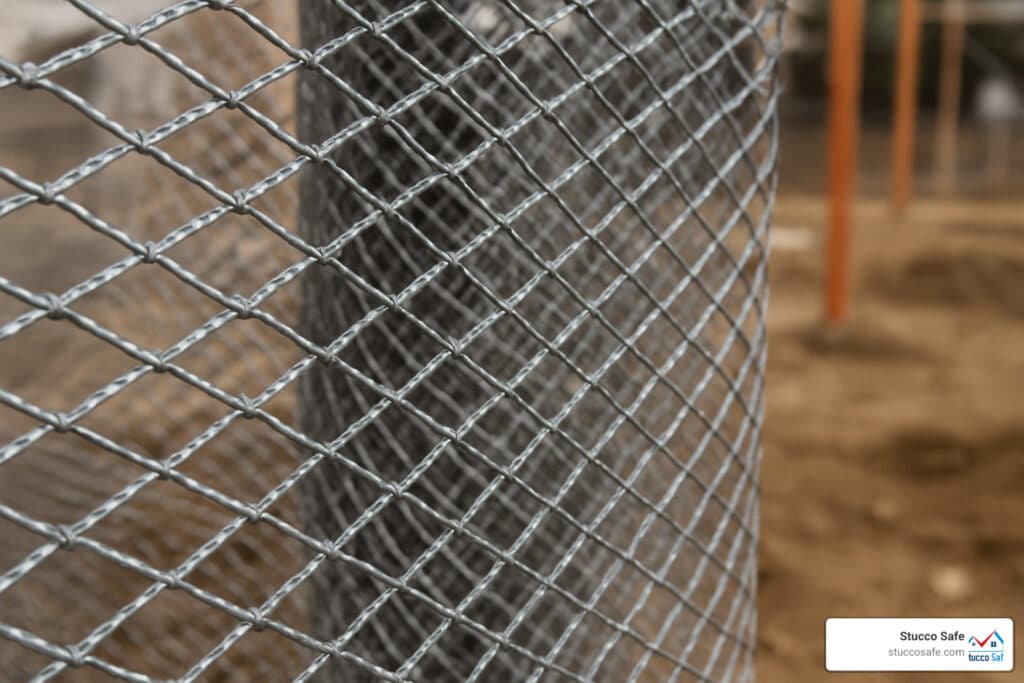
When most people hear “chicken wire stucco,” they picture the lightweight mesh from their local farm store. But here’s the thing – real stucco wire is a completely different animal. It’s a specialized galvanized steel mesh engineered specifically for the demanding world of cement plaster reinforcement.
True stucco wire features a robust hexagonal mesh pattern created through something called a reverse twist weave process. This isn’t just construction jargon – it’s actually brilliant engineering. When you cut this wire, it doesn’t solve like regular chicken wire would. Instead, it maintains its structural integrity throughout installation, which is exactly what you need when you’re dealing with heavy cement plaster.
The construction specs tell the real story. Quality stucco wire uses galvanized steel wire ranging from 0.6mm to 2.0mm in diameter, forming hexagonal openings typically measuring 13mm to 50mm across. For most residential stucco projects, you’ll want 1-inch hexagonal mesh made from 20 gauge galvanized steel wire. But if you’re dealing with a three-coat system, 17 gauge wire is the way to go – it’s got the superior strength to handle those multiple heavy coats.

What really sets professional stucco wire apart is its galvanization process. This isn’t your basic zinc coating – we’re talking about either electro-galvanized coating (50-60 g/m²) or hot-dipped galvanization (200-300 g/m²) for serious corrosion resistance. This heavy-duty protection is absolutely essential because stucco wire has to survive in the alkaline environment of cement plaster for decades without breaking down.
Stucco Wire vs. Traditional Chicken Wire
The differences between proper stucco wire and traditional chicken wire are like comparing a pickup truck to a bicycle – they might look similar at first glance, but they’re built for completely different jobs. Standard poultry netting typically uses much lighter gauge wire, often 22 gauge or even thinner, with minimal galvanization that won’t hold up under construction conditions.
Wire gauge makes a huge difference in real-world performance. Through years of inspection work, I’ve seen how 17 gauge stucco wire can support substantially more weight than 20 gauge wire. That’s why three-coat stucco systems specifically call for the heavier option. The galvanization levels tell an even more dramatic story – professional stucco wire gets heavy zinc coating up to 300 g/m², while poultry netting often has just a light protective coating that won’t last.
The construction method creates another critical difference. Stucco wire uses that reverse twist weave I mentioned earlier, which maintains structural integrity when cut. Regular chicken wire can solve at cut edges, creating weak points that spell trouble for your plaster down the road.
But here’s the most important point: stucco wire is purpose-built for construction applications. It’s engineered to create the mechanical bond that’s essential for proper stucco adhesion. Chicken wire is optimized for containing small animals – completely different engineering requirements. A brief history of lath and plaster shows how reinforcement materials have evolved specifically to meet these construction demands.
Key Specifications and Types of Stucco Lath
Understanding the different types of stucco lath helps you pick the right product for your specific situation. The three main categories each serve different purposes in modern stucco systems:
| Type | Material | Primary Use | Relative Cost | Installation Difficulty | Crack Resistance |
|---|---|---|---|---|---|
| Stucco Wire (Hexagonal) | Galvanized Steel | General stucco reinforcement | Moderate | Easy | Good |
| Expanded Metal Lath | Galvanized Steel | Patches, ceilings, detailed work | Higher | Moderate | Excellent |
| Fiberglass Mesh | Synthetic fibers | EIFS systems, repairs | Lower | Easy | Fair |
17 Gauge Stucco Wire is your heavy-duty option for three-coat stucco systems. With 1.5-inch hexagonal mesh patterns, these rolls typically come in 36″ x 150′ sizes and provide excellent strength for supporting multiple plaster coats. The heavier gauge wire resists sagging and keeps its shape even under the substantial weight of wet cement.
20 Gauge Stucco Wire offers a lighter alternative that works well for two-coat systems and general applications. Its 1-inch hexagonal mesh provides solid reinforcement while being easier to handle during installation. This gauge might look similar to traditional chicken wire stucco mesh, but it maintains the structural integrity needed for proper stucco work.
Self-Furred Netting includes built-in dimples or spacers that hold the mesh approximately 1/4-inch away from the wall surface. This furring is absolutely critical because it allows wet stucco to flow behind the wire, creating the mechanical “keying” that locks the plaster in place. You can get self-furred options with 3-inch and 6-inch spacing patterns to accommodate different plaster thicknesses.
Paperback Lath combines stucco wire with building paper backing, creating an integrated moisture barrier and reinforcement system. This product can streamline installation by eliminating the need for separate building paper application, though proper overlap and sealing remain critical for moisture protection.
The Benefits and Versatile Applications of Stucco Netting
When you invest in quality stucco wire, you’re getting much more than just mesh – you’re getting a system that protects your home for decades. The most important benefit is crack prevention. Think of stucco wire as the skeleton inside your plaster walls. Without it, cement plaster is like a brittle shell that cracks at the first sign of movement or stress.
The magic happens through proper load distribution. When stucco wire is correctly embedded in the base coat, it creates a continuous safety net that spreads stress across the entire wall surface. Instead of one small area taking all the pressure and cracking, the wire shares that load across a much wider area.
Flexibility is another game-changer, especially for homes with curved walls, arches, or decorative elements. I’ve seen contractors struggle with rigid reinforcement materials that create stress points at corners. Quality chicken wire stucco mesh bends and shapes to follow any surface contour without fighting back.
The durability factor can’t be overstated. Properly galvanized stucco wire maintains its strength for decades, even in the alkaline environment of cement plaster. The reverse twist construction means it won’t solve if you accidentally cut it during installation – a problem that plagued older lath systems.

Core Benefits for Stucco Systems
The secret to long-lasting stucco lies in something called mechanical bonding or “keying.” When wet stucco flows through and around the wire mesh, it creates thousands of tiny anchors that lock the plaster in place. Without this keying action, your stucco is just stuck to the wall surface – and surface adhesion alone won’t last.
Tensile strength reinforcement addresses stucco’s biggest weakness. Cement plaster is incredibly strong when you push on it (compression), but it’s brittle when you try to pull it apart (tension). Houses naturally expand and contract with temperature changes, creating tensile stress that would crack unreinforced plaster. The wire mesh provides the tensile strength that cement lacks.
Corrosion resistance from proper galvanization keeps your reinforcement working for the long haul. When stucco wire rusts, it actually expands and can push the plaster off the wall – a costly failure I’ve seen too many times in my inspection work. Quality galvanized mesh prevents this problem entirely.
The even stress distribution benefit becomes crucial around windows, doors, and corners where stress naturally concentrates. These areas are crack magnets without proper reinforcement. The continuous wire network spreads these loads across a wider area, preventing the localized failures that lead to Stucco Moisture Problems.
For homeowners dealing with existing issues, understanding these benefits helps explain why proper Plastering and Stucco techniques matter so much for long-term performance.
Beyond Stucco: Other Uses for Reinforcement Mesh
Stucco wire’s versatility extends far beyond house walls. DIY enthusiasts have finded its value for ferrocement projects – a technique where multiple layers of mesh create incredibly strong, thin concrete structures. I’ve seen beautiful outdoor pizza ovens, garden sculptures, and even small bridges built using this method.
The ferrocement technique works by layering stucco wire with cement mortar to create structures that are both lightweight and incredibly strong. Multiple layers of mesh create a reinforcement matrix that can support surprising loads with minimal concrete thickness. It’s like creating custom concrete that bends to your design needs.
Garden projects benefit from stucco wire’s weather resistance and flexibility. Unlike regular chicken wire that rusts quickly outdoors, galvanized stucco wire maintains its strength and appearance for years. You can shape it into custom plant supports, protective barriers, or decorative elements that actually improve with age.
For animal enclosures, stucco wire offers superior durability compared to lightweight poultry netting. However, the 1-inch mesh size may be too large for small animals like baby chicks. Many homesteaders combine stucco wire for structural strength with finer mesh for complete predator protection.
The homesteading community has acceptd stucco wire for various construction projects where strength and longevity matter more than initial cost. From greenhouse benches to compost bin reinforcement, the applications are limited only by imagination.
Whether you’re building a stucco wall or a backyard project, choosing the right mesh makes all the difference in long-term success and satisfaction.
A Practical Guide to Installing Chicken Wire Stucco
Proper installation of chicken wire stucco reinforcement requires careful attention to detail and adherence to established best practices. The installation process begins with substrate preparation and continues through final fastening and overlap verification. Success depends on understanding both the technical requirements and practical challenges of working with galvanized steel mesh.
Safety considerations must be addressed before beginning any installation. Stucco wire features sharp edges that can cause serious cuts, making heavy-duty gloves essential. The material’s spring-loaded nature means it can snap back unexpectedly when cut or released, requiring careful handling techniques to prevent injury.

Tool selection impacts both installation quality and worker safety. Tin snips work well for cutting standard stucco wire, while heavier gauges may require aviation snips or a small grinder with a metal cutting wheel. A heavy-duty staple gun or pneumatic nailer speeds fastening, though manual installation with galvanized nails remains acceptable for smaller projects.
Step-by-Step Application for Stucco Reinforcement
The systematic approach to stucco wire installation ensures proper performance and longevity. Each step builds upon the previous one, creating a complete reinforcement system that will support the stucco for decades.
1. Install Moisture Barrier: Begin by applying two layers of 60-minute building paper or approved house wrap over the sheathing. This moisture barrier is critical for preventing water intrusion behind the stucco system. Overlap horizontal seams by 6 inches and vertical seams by 4 inches, with upper layers lapping over lower ones to shed water effectively.
2. Unroll and Position Netting: Start at the bottom of the wall and work upward, positioning the stucco wire with the furred side facing outward. The dimples or spacers should hold the mesh approximately 1/4-inch away from the moisture barrier. This spacing is essential for proper keying of the base coat.
3. Fasten Securely: Attach the wire using galvanized staples or nails spaced 6 inches apart along the edges and 12 inches apart at intermediate studs. Drive fasteners through the wire into the structural framing, not just the sheathing. Proper fastening prevents sagging and ensures the mesh remains in position during plaster application.
4. Overlap All Seams: Horizontal and vertical seams must overlap by a minimum of 6 inches to maintain continuous reinforcement. Secure overlapped areas with additional fasteners to prevent gaps or movement. Proper overlap is crucial for preventing weak points in the reinforcement network.
5. Cut to Fit: Use appropriate cutting tools to trim the mesh around openings, corners, and architectural details. Make relief cuts at corners to prevent bunching, and ensure the mesh lies flat against the substrate. Avoid leaving sharp edges that could puncture the moisture barrier.
For comprehensive guidance on moisture protection, refer to our detailed article on Moisture Barrier Stucco.
Common Challenges with Chicken Wire Stucco Installation
Sharp edges present the most immediate challenge during installation. Quality stucco wire maintains its structural integrity through heavy-gauge construction, but this same strength creates cutting hazards. Proper personal protective equipment, including heavy-duty gloves and eye protection, is essential for safe handling.
Handling large rolls requires planning and often multiple workers. A 150-foot roll of 17 gauge stucco wire can be unwieldy and difficult to position accurately. Pre-cutting the mesh into manageable sections may improve installation quality, though this increases waste and requires careful measurement.
Achieving a flat, even surface becomes challenging on irregular substrates or around architectural details. The mesh must conform to the surface without creating gaps or high spots that could affect plaster thickness. This may require additional fasteners or careful manipulation of the wire to achieve proper contact.
Avoiding moisture intrusion behind the lath requires careful attention to the moisture barrier integrity. Every fastener creates a potential leak point, making proper sealing and overlap critical. Damaged moisture barriers must be repaired before proceeding with wire installation.
Potential for rust represents a long-term concern if the galvanization is compromised during installation. Cutting, excessive bending, or damage from fasteners can expose the underlying steel to corrosion. While minor damage is acceptable, extensive galvanization loss may require mesh replacement in affected areas.
For more information about preventing common installation problems, visit our guide on Hard Coat stucco Problems.

Frequently Asked Questions about Stucco Wire Lath
How much should stucco wire be overlapped?
The golden rule for chicken wire stucco overlap is 6 inches minimum for both vertical and horizontal seams. But here’s the thing – this isn’t just a suggestion. It’s a critical requirement that prevents your stucco from developing those hairline cracks that can turn into major moisture problems down the road.
Think of it like shingles on a roof. You wouldn’t leave gaps between shingles, right? The same principle applies to stucco wire. That 6-inch overlap creates a continuous reinforcement blanket that distributes stress evenly across your wall surface.
In my years of inspecting stucco installations, I’ve seen countless failures where contractors skimped on overlap to save material costs. What they saved in wire, homeowners later paid for in expensive repairs. Always check your local building codes too – some areas require even more overlap depending on wind loads and seismic conditions.
The overlap isn’t just about positioning either. You need to secure those overlapped areas with additional fasteners. I recommend placing fasteners every 6 inches along the overlap zone to prevent the mesh from shifting during plaster application. This is especially crucial at corners and around windows where stress concentrations are highest.
What does “furred” wire mean and why is it important?
Furred wire is like the secret ingredient that makes stucco actually stick to your wall long-term. Those little dimples or spacers built into the mesh hold it about 1/4-inch away from your wall sheathing. This tiny gap makes all the difference between a stucco job that lasts decades and one that fails within a few years.
Here’s what happens when you install furred wire correctly: as the wet stucco mix is applied, it flows through the mesh openings and spreads behind the wire. When it hardens, you get what we call “keying” – basically, the stucco forms little mechanical anchors that lock the entire system in place.
Without proper furring, your stucco just sits on the front surface of the wire like frosting on a cake. It might look fine initially, but it’s only held by adhesion, which isn’t nearly strong enough for the long haul. I’ve inspected homes where non-furred wire was used, and you can literally see sections of stucco pulling away from the wall.
The furring spacing – typically 3 inches or 6 inches on center – ensures uniform thickness across your entire wall. This prevents those thin spots that become weak points where cracks love to start. Self-furred netting takes the guesswork out of proper spacing, which is why most professionals prefer it.
Can I use regular chicken wire for a stucco project?
I get this question a lot, and my answer is always the same: absolutely not. I know it’s tempting – regular chicken wire costs less and looks similar to stucco wire. But using poultry netting for stucco is like using a bicycle tire on a truck. It might fit, but it’s not going to end well.
Standard chicken wire is typically 22 gauge or lighter, while proper stucco wire uses 17-20 gauge steel. That difference in thickness translates to dramatically different load-bearing capacity. Cement plaster weighs 10-15 pounds per square foot when cured, and lightweight chicken wire simply can’t support that load without sagging.
The galvanization difference is equally important. Poultry netting gets minimal zinc coating because it’s designed for temporary outdoor use. Stucco wire receives heavy galvanization – up to 300 g/m² – because it needs to survive in the alkaline environment of cement plaster for decades without corroding.
I’ve inspected hundreds of failed stucco installations where someone tried to save money using regular chicken wire. The results are always the same: sagging, cracking, and premature deterioration that requires expensive repairs. The wire often corrodes within a few years, expanding and causing the plaster to crack and spall.
Trust me on this one – spend the extra money upfront for proper stucco wire. Your future self will thank you when your stucco is still looking great while your neighbor’s chicken wire installation is falling apart. If you’re concerned about the quality of an existing installation, our stucco inspections can identify these issues before they become major problems.
Conclusion: Building a Lasting and Safe Stucco Finish
Getting your chicken wire stucco reinforcement right is just the beginning of a successful stucco installation. The real magic happens when you combine proper material selection with correct installation techniques and ongoing care. It’s like building a house – you need a solid foundation, quality materials, and skilled craftsmanship working together.
Proper material selection sets the stage for everything that follows. When you choose genuine stucco wire lath instead of lightweight poultry netting, you’re investing in a system that can handle decades of weather, temperature changes, and structural movement. The heavy-duty galvanized steel mesh we’ve discussed isn’t just marketing hype – it’s engineering that makes the difference between a beautiful, crack-free finish and a costly repair nightmare.
The importance of correct installation cannot be overstated. I’ve seen too many cases where homeowners bought the right materials but skipped crucial steps like proper overlap, adequate fastening, or ensuring the moisture barrier was intact. Even the best stucco wire will fail if it’s not installed according to manufacturer specifications and local building codes.
Long-term durability depends on understanding that stucco is a system, not just individual components. The moisture barrier protects the structure, the wire lath provides reinforcement, and the plaster coats create the finished surface. When these elements work together properly, you get a wall system that can last for generations. When any component fails, the entire system is compromised.
Protecting your investment requires both doing things right from the start and staying vigilant over time. Quality materials and proper installation give you the foundation, but regular inspection helps catch small problems before they become big ones. A small crack that gets sealed early might cost a few dollars to fix. The same crack left untreated could lead to thousands in moisture damage repairs.
While using the right wire is the first step, ensuring the entire system is installed correctly is vital to prevent costly future repairs. A professional inspection can verify that all components, from the moisture barrier to the lath, are properly in place. At Stucco Safe, we offer certified inspections throughout Southeastern Pennsylvania, New Jersey, and Delaware to give you peace of mind. Our stucco inspections vary in cost from $495 to $1595 or more for very large homes, but this investment can save thousands in potential repair costs.
Our EDI-certified inspectors use forensic testing methods to detect moisture intrusion and structural issues before they become visible problems. We’ve investigated thousands of stucco installations since 2001, and the patterns are clear – proper wire selection and installation prevent the majority of problems we encounter.
Learn more about protecting your stucco house and find how professional inspection can safeguard your investment. The old saying holds true: the cost of doing it right the first time is always less than the cost of fixing it later.