Mold Air Testing: Top 3 Crucial Options
Why Commercial Mold Air Testing Matters for Property Safety
Mold air testing is a scientific process that measures airborne mold spores in commercial buildings to identify potential health hazards and property damage risks. Here are your main testing options:
Key Mold Air Testing Methods:
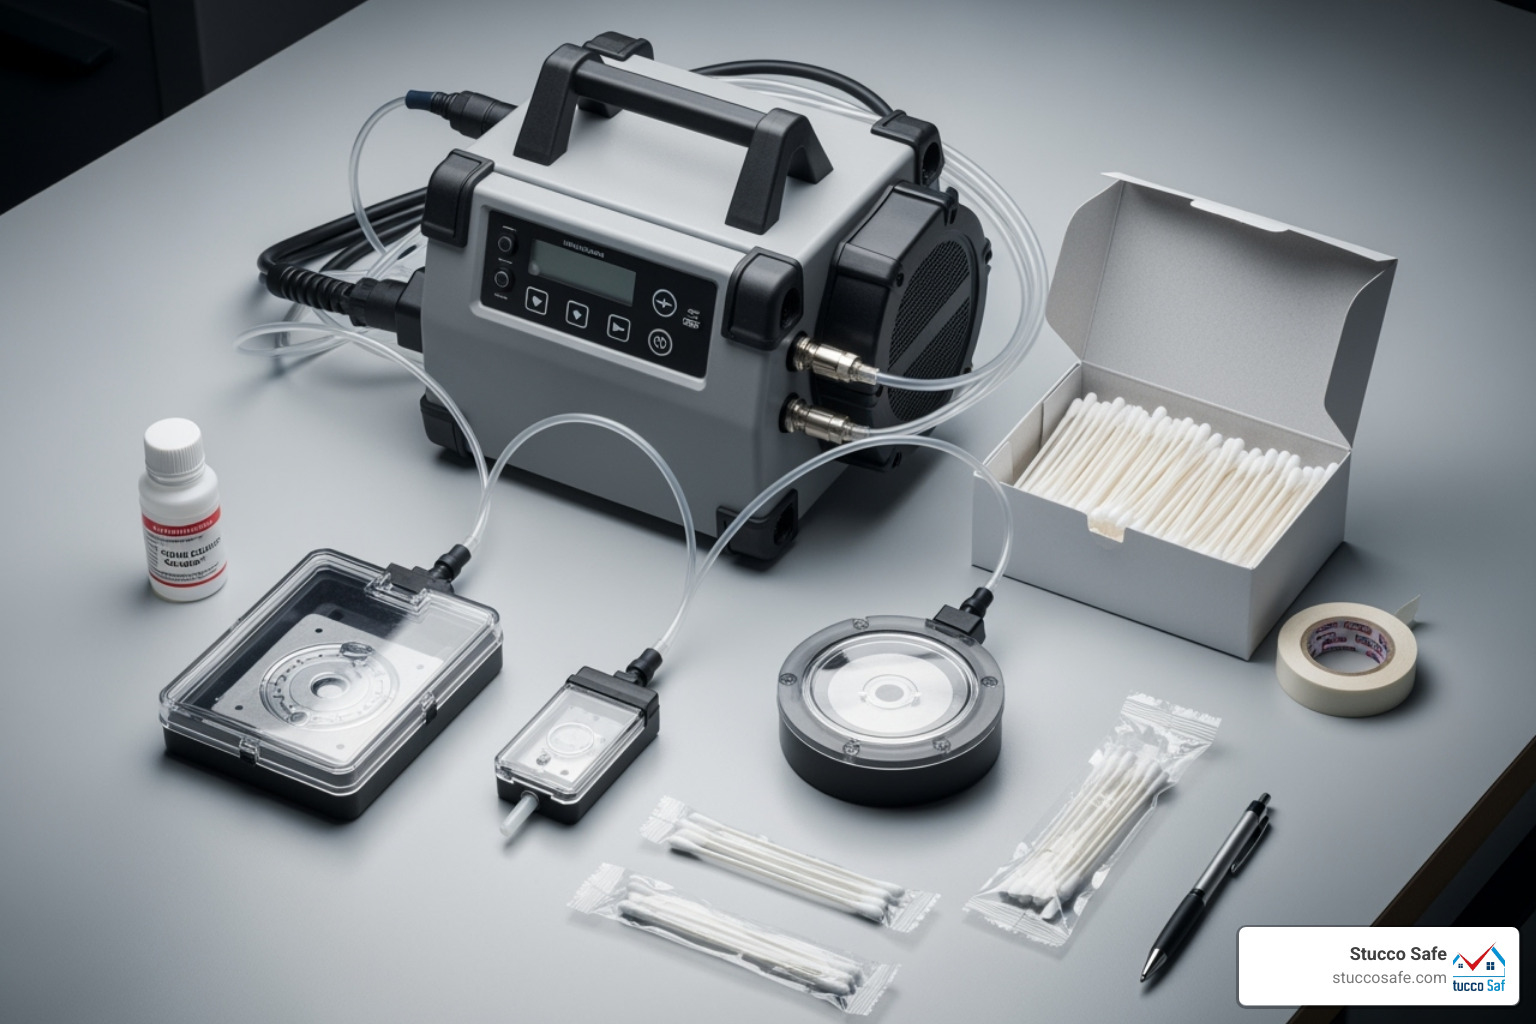
- Professional Air Sampling – Uses calibrated pumps and spore traps for laboratory analysis
- Surface Sampling – Tests visible mold growth or suspected contaminated materials
- Visual Inspection – Often more reliable than air testing according to NIOSH research
- DIY Test Kits – Limited accuracy but can provide preliminary screening
When Testing is Most Valuable:
- Post-remediation verification to confirm successful cleanup
- Hidden mold detection when musty odors exist without visible growth
- Baseline air quality assessment for tenant health protection
- Legal documentation for liability or insurance purposes
Commercial properties face unique mold challenges. Poor indoor air quality can trigger allergic reactions, respiratory problems, and asthma attacks among occupants. Even worse, some molds produce mycotoxins that pose serious health risks to employees and tenants.
The stakes are high. Mold problems can lead to costly lawsuits, decreased property values, and business disruptions. That’s why understanding your testing options is crucial for protecting both your investment and the people who occupy your building.
However, mold air testing has important limitations. According to the U.S. Environmental Protection Agency (EPA), a thorough visual inspection is often more reliable than air sampling for mold. Air samples provide only a snapshot in time and may miss mold growing inside walls or other hidden areas.
I’m Gabe Kesslick, a certified building envelope forensic inspector who has been investigating moisture and mold issues since 2001. Through my work at Stucco Safe, I’ve seen how proper mold air testing combined with comprehensive moisture detection can save property owners from expensive surprises and health liabilities.
Why Commercial Mold Air Testing is Crucial for Your Property
When you own a commercial property, you’re responsible for more than just collecting rent checks. The health and safety of everyone who walks through your doors matters—and that includes protecting them from invisible threats like airborne mold spores.
Mold air testing helps you stay ahead of problems that could seriously impact your bottom line and your peace of mind. Think about it: when mold starts growing in hidden places, it doesn’t just sit there quietly. It releases spores into the air that people breathe every day.
The ripple effects can hit you from multiple directions. Tenant health issues lead to complaints, doctor visits, and unhappy occupants. Employee productivity drops when people feel sick at work. Before you know it, you’re facing legal liability from lawsuits and insurance claims that could have been prevented.
Your property value takes a hit too. Nobody wants to lease space in a building with known air quality problems. And if you’re forced into emergency remediation, the business disruption can cost you months of lost income while tenants temporarily relocate.
The CDC explains that mold exposure symptoms range from annoying to serious. We’re talking about persistent coughing, sneezing, eye irritation, and headaches that seem to happen only when people are in your building. For folks with asthma or compromised immune systems, the effects can be much worse.
Here’s what makes this tricky: some molds produce mycotoxins—toxic compounds that can cause more severe health problems. While the mold itself isn’t poisonous, these byproducts definitely can be harmful when people breathe them in regularly.
Identifying Hidden Mold Sources
The sneaky thing about mold is how well it hides. You might walk through your property and everything looks fine, but behind that drywall or inside those air ducts, mold could be having a party.
This is where mold air testing becomes your detective tool. Maybe you’ve noticed that musty smell in the lobby but can’t pinpoint where it’s coming from. Or tenants keep complaining about stuffiness in certain areas, but you don’t see any obvious water damage or mold growth.
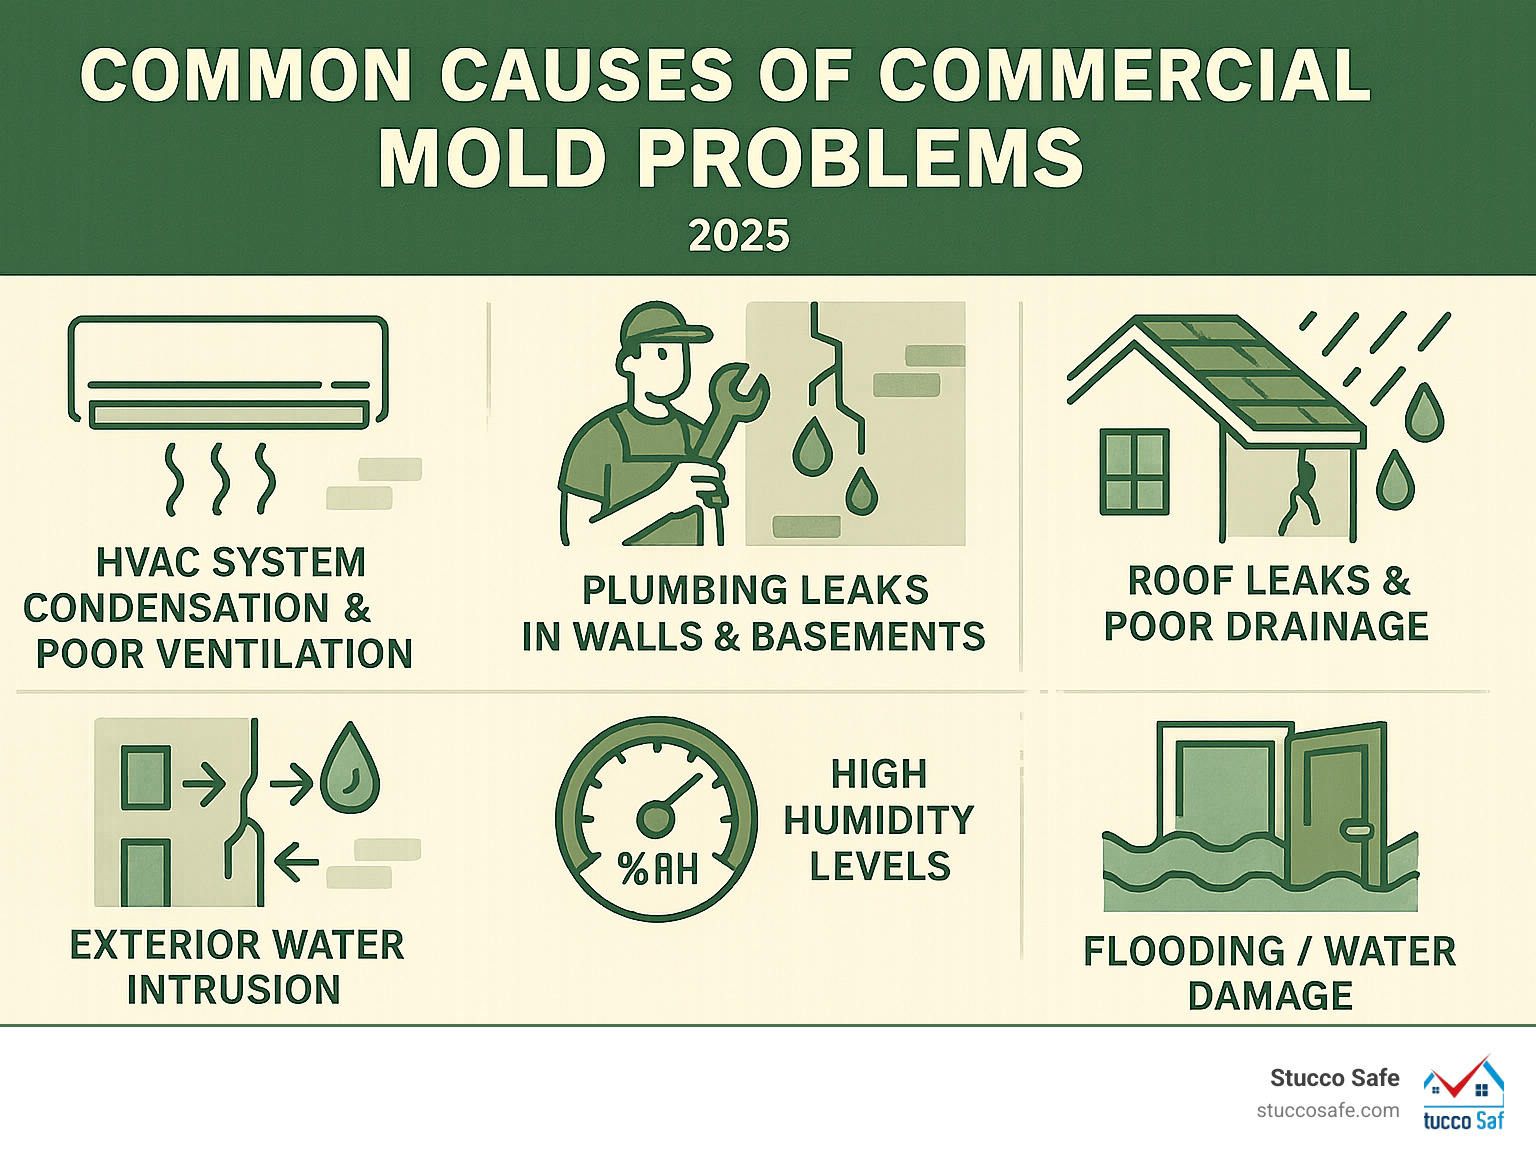
Water damage from old leaks often creates perfect breeding grounds in wall cavities and crawl spaces where you’d never think to look. Your HVAC system might be circulating spores from a damp coil throughout the entire building. These hidden sources can keep pumping mold spores into the air for months without anyone realizing what’s happening.
When air samples reveal intact spore chains, that’s like finding breadcrumbs leading to active mold growth somewhere nearby. It tells us there’s likely a significant source that needs attention, even if we haven’t spotted it yet during a visual inspection.
Post-remediation verification is another crucial use for air testing. After you’ve paid for mold cleanup, how do you know the job was done right? Air samples give you objective proof that spore levels have returned to normal ranges, a process outlined in guidelines from organizations like the American Industrial Hygiene Association (AIHA), protecting you from future liability and giving everyone confidence that the air is safe to breathe again.
Protecting Occupant Health and Well-being
Your tenants and their employees deserve to feel healthy and comfortable in your building. Mold spores are tiny enough to get deep into people’s lungs, where they can trigger allergic reactions and respiratory issues. For people with asthma, exposure can mean serious attacks that send them to the emergency room.
High-risk individuals include young children, elderly tenants, pregnant women, and anyone with weakened immune systems. These folks can experience more severe symptoms from the same level of exposure that might only cause mild irritation in healthy adults.
We’ve seen patterns where people feel fine at home but start experiencing symptoms like coughing, sneezing, eye irritation, and headaches only when they’re in certain buildings. They might deal with throat irritation, skin rashes, or constant fatigue that mysteriously improves on weekends and vacations.
When multiple people in your building report similar symptoms that seem to come and go based on their time in the space, that’s a red flag worth investigating. While we can’t test people directly for mold exposure with complete accuracy, these health patterns often guide us toward finding indoor air quality problems that need immediate attention.
The goal is simple: catch these issues before they become major health concerns or expensive legal problems. Mold air testing gives you the data you need to make informed decisions about your property and the people who depend on you for a safe environment.
A Guide to Professional Mold Air Testing Methods
When it comes to assessing mold in a commercial property, we move beyond simple observations. Professional mold air testing methods employ specialized equipment and scientific protocols to provide accurate and actionable data. These methods involve collecting air samples and sending them to accredited laboratories for detailed analysis.
The primary goal of professional mold air testing is to identify the presence, type, and concentration of airborne mold spores. This helps us understand the scope and severity of a mold problem, assess potential human exposure, and verify the effectiveness of remediation efforts.
Common professional methods include:
- Spore Trap Analysis (Non-Viable Air Testing): This is the most widely used method. Air is drawn through a cassette containing a sticky slide. Mold spores and other microscopic particles impact onto the slide, which is then analyzed directly under a microscope. This method quickly identifies the types of mold present and their quantity (spores per cubic meter) but doesn’t tell us if the spores are alive or dead.
- Culture Tests (Viable Air Testing): Air is drawn through a device that collects spores onto a culture medium. These plates are then incubated, allowing any viable (living) mold spores to grow. This method can distinguish between species with similar characteristics and provides insight into the mold’s growth potential. However, it’s generally more time-consuming and expensive.
- Surface Sampling: While not strictly air testing, surface samples (using swabs, tape lifts, or bulk material collection) are often taken in conjunction with air samples. They are crucial for identifying the specific mold types growing on visible surfaces and can help pinpoint the source of airborne spores.
How Professional Mold Air Testing is Performed
The precision of professional mold air testing lies in its meticulous execution. It’s not just about waving a device in the air; it’s a controlled process designed to yield reliable results.
Here’s a glimpse into our process:
- Air Pump Calibration: We use high-volume air pumps that are carefully calibrated daily to ensure consistent and accurate airflow rates (e.g., 15 liters per minute for Air-O-Cell cassettes). This ensures that a known volume of air is sampled, allowing for quantitative analysis (spores per cubic meter).
- Sample Collection Cassettes: Disposable impaction samplers or spore trap cassettes are attached to the air pump. As the pump runs, air is pulled through the cassette, and airborne particles, including mold spores, are collected on a special medium inside.
- Closed-Building Conditions: For indoor air sampling, we typically establish “closed-building conditions.” This means keeping windows and exterior doors shut (except for normal entry/exit) for a specified period (often 24 hours prior and during testing). This stabilizes the indoor air environment, preventing external air from skewing results and allowing for better reproducibility. We also ensure that air exchangers or fans that mix indoor and outdoor air are switched off.
- Sampling Duration: The air pump usually runs for a set duration, often 10 minutes indoors under normal conditions. This duration might be adjusted based on the environment – for instance, a shorter duration if there’s an active dust source to prevent overloading the sample.
- Lab Analysis: Once collected, the samples are sealed and sent to an accredited laboratory. Here, trained microbiologists analyze the samples under a microscope, identifying and quantifying the types of mold spores present. The results are then compiled into a comprehensive report.
To give you a clearer picture of different sampling methods often used in a comprehensive mold assessment, here’s a comparison:
| Method | Description | Primary Use | Advantages | Limitations
<h2>Output</h2>
<textarea id="output" rows="10" cols="50" readonly></textarea>

<script>
    document.getElementById("form").addEventListener("submit", function(event) {
        event.preventDefault(); // Prevent default form submission

        const select = document.getElementById("select");
        const output = document.getElementById("output");

        // Get the selected value
        const selectedValue = select.value;

        // Display the selected value in the textarea
        output.value = "Selected value: " + selectedValue;
    });
</script>
“`
Explanation:
-
HTML Structure:
- An
<h1>for the title. - A
<h2>for the form section. - A
<form>element with anid="form"(useful for JavaScript). - A
<label>for the dropdown. - A
<select>element with anid="select". This is your dropdown.- Each
<option>tag represents an item in the dropdown. - The
valueattribute of eachoptionis what gets submitted or retrieved via JavaScript when that option is selected. - The text between the
<option>tags is what the user sees in the dropdown.
- Each
- An
<input type="submit">button to trigger the form submission. - A
<h2>for the output section. - A
<textarea>with anid="output"where the selected value will be displayed. It’sreadonlybecause the user shouldn’t type in it.
- An
-
JavaScript (
<script>tag):-
document.getElementById("form").addEventListener("submit", function(event) { ... });- This line selects the HTML form element by its
id(“form”). addEventListener("submit", ...)attaches an event listener to the form. This means that whenever the form is submitted (e.g., by clicking the “Submit” button or pressing Enter in an input field), the function provided will be executed.function(event): The function receives aneventobject as an argument.event.preventDefault();: This is crucial! By default, when a form is submitted, the browser tries to send the form data to a server and often reloads the page.preventDefault()stops this default behavior, allowing us to handle the form submission purely with JavaScript without a page reload.
- This line selects the HTML form element by its
-
const select = document.getElementById("select");- This gets a reference to the
<select>(dropdown) element.
- This gets a reference to the
-
const output = document.getElementById("output");- This gets a reference to the
<textarea>element.
- This gets a reference to the
-
const selectedValue = select.value;- This is the core of getting the selected value. The
valueproperty of a<select>element (when it’s not a multiple-select dropdown) automatically holds thevalueattribute of the currently selected<option>.
- This is the core of getting the selected value. The
-
output.value = "Selected value: " + selectedValue;- Finally, this line takes the
selectedValueand sets it as the content of thetextareaelement.
- Finally, this line takes the
-
This setup provides a complete, self-contained example of how to create a dropdown menu and retrieve the user’s selection using JavaScript.


