
Stucco Wall Anchors: Top 3 Safe Solutions
Why Stucco Wall Anchors Are Different From Everything Else
Stucco wall anchors require specialized hardware because stucco isn’t just another wall surface – it’s a hard, brittle cementitious material that can crack, chip, or fail if you use the wrong fasteners. Unlike drywall that gives way easily, stucco’s concrete-like hardness demands anchors specifically designed to distribute loads evenly and resist weather exposure.
Quick Answer for Stucco Wall Anchors:
- Plastic/Nylon Anchors: Under 15 lbs (house numbers, small decorations)
- Sleeve/Masonry Screw Anchors: 15-50 lbs (mailboxes, hose reels)
- Wedge/Toggle Anchors: Over 50 lbs (heavy fixtures, structural attachments)
- Key Requirement: Must be made from corrosion-resistant materials
- Installation: Always pre-drill with masonry bits and seal penetrations
The challenge isn’t just about holding power – it’s about preventing water intrusion that can lead to costly hidden damage behind your stucco. Regular wall anchors simply aren’t designed for stucco’s unique properties or the exterior weather conditions they’ll face.
As Gabe Kesslick, a certified stucco inspector with over 20 years of experience in leak detection and repair, I’ve seen countless homes where improper stucco wall anchors led to expensive moisture damage that could have been prevented with the right approach. Through my work at Stucco Safe, I help homeowners understand how proper fastening techniques protect both their investments and their peace of mind.

Why Stucco Isn’t Your Average Wall
Stucco is fundamentally different from any interior wall surface. It’s a cementitious material—a plaster-like mix of cement, sand, and water that hardens to a concrete-like strength. This makes it a durable, structural coating for your home’s protective shell.
However, this strength creates challenges for hanging items. Unlike forgiving drywall, stucco’s brittleness means it can easily crack or chip. Its hardness also changes how load distribution works. Drywall anchors spread out behind the soft material, but stucco requires anchors that distribute weight across its surface. Getting this wrong can cause cracks, inviting water intrusion and costly hidden damage.
Every penetration in stucco is a potential entry point for moisture. A small crack around an improper anchor can become a pathway for water to reach your home’s structural elements.
More info about Stucco Siding Problems
 vs. a simple drywall interior wall - stucco wall anchors infographic")
The Critical Difference: Stucco vs. Regular Wall Anchors
Many homeowners make expensive mistakes using regular anchors designed for interior walls. These work via an expansion mechanism, spreading out behind drywall. This system is ineffective on stucco.
Stucco’s hardness prevents these anchors from expanding properly. Forcing one into stucco creates stress points that can lead to spider-web cracks. Stucco wall anchors are engineered differently to prevent surface damage. They work with stucco’s properties, gripping mechanically or distributing loads over a wider area to prevent the concentrated pressure that causes cracks.
Weather resistance is another crucial difference. Stucco anchors are made from corrosion-resistant metals or weather-stable plastics to handle decades of exposure without failing or causing rust stains.
Understanding Your Stucco System
Knowing your home’s stucco system is key to choosing the right anchors. The system thickness and construction method are critical factors.
- Traditional 3-coat stucco is about an inch thick, applied over wire lath. This robust system provides plenty of material for most anchor types.
- One-coat systems are thinner and often have foam insulation behind them. Anchors must be long enough to penetrate the stucco and foam to reach solid backing.
- EIFS (Exterior Insulation and Finish Systems), or synthetic stucco, requires extreme care. Penetrations must not compromise the system’s continuous moisture barrier.
The structure behind the stucco is also important. Shear walls have solid backing (plywood or OSB), providing a secure substrate between studs. Open stud walls only have lath and stucco between framing, so heavy items must be anchored to a stud.
Choosing Your Anchor: From Lightweight Decor to Heavy-Duty Fixtures
Selecting the right stucco wall anchors means matching the anchor’s strength to the item’s weight while respecting stucco’s brittle nature. The weight of your item is the starting point, but since stucco is an exterior surface, choosing corrosion-resistant materials is essential to prevent rust stains and ensure longevity.

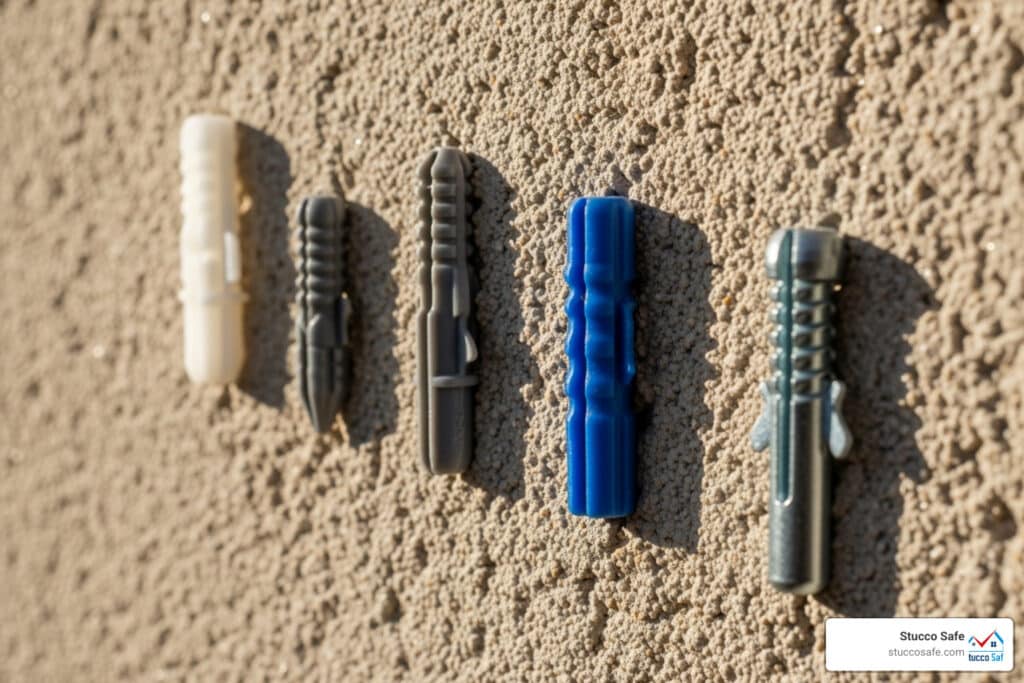
For Lightweight Items (Under 15 lbs)
For light-duty jobs, you need anchors that provide a secure grip without being too aggressive.
- Plastic anchors are affordable and reliable, expanding as a screw is driven into them.
- Ribbed anchors have external ridges that prevent them from spinning during installation.
- Push-in anchors offer a quick, solid connection for the lightest applications.
These anchors are perfect for: house numbers, small signs, string lights, thermometers, and small decorative shelves.
For Medium-Weight Objects (15-50 lbs)
Medium-weight items require stronger, engineered fastening solutions.
- Sleeve anchors are metal anchors with an expanding sleeve that grips the sides of the drilled hole as you tighten the bolt, creating a firm connection.
- Masonry screw anchors (like Tapcon-style screws) are made from hardened steel and cut their own threads into the stucco for a very secure hold. They are ideal screws for stucco walls.
- Expansion anchors use friction and mechanical expansion to create a strong grip within the stucco.
Use these for: mailboxes, hose reels, larger decorative wall hangings, window boxes, exterior shelving units, outdoor lighting fixtures, and small trellises.
Choosing the Best Stucco Wall Anchors for Heavy Loads (Over 50 lbs)
For heavy-duty applications, the margin for error is zero. These jobs demand the strongest stucco wall anchors and often require anchoring into the structural framing behind the stucco.
- Wedge anchors are the gold standard. As you tighten the nut, an expansion clip wedges the anchor firmly into the hole, providing exceptional holding power.
- Toggle bolts are effective for open stud walls, as their wings spread out behind the stucco to distribute the load over a wide area.
- Heavy-duty expansion anchors use mechanical interlocking for an incredibly strong connection.
For any item over 50 pounds, always locate wall studs or other structural framing. Attaching directly to your home’s framework provides the ultimate security. This is also where professional assessment becomes valuable. At Stucco Safe, we’ve seen many expensive repairs that began with an attempt to hang something too heavy without proper planning.
hanging items on stucco walls
More info about drilling into stucco
The Right Way to Install Stucco Wall Anchors
Properly installing stucco wall anchors is a precision job. An incorrect approach can lead to cracks, water damage, or falling fixtures. The key to success is respecting the material, prioritizing safety first, and sealing all penetrations to maintain your home’s weather resistance.

Accurate drilling and watertight seals protect the structural components behind your stucco. The most critical and often-skipped step is waterproofing every penetration. Each hole is a potential entry point for water, and we’ve seen simple installations lead to rotted sheathing because this step was forgotten. Also, avoid the “muscle it in” approach; overtightening screws will crack the brittle stucco.
Essential Tools for Installing Stucco Wall Anchors
Using the right tools makes the job smooth and professional.
- Hammer drill: Essential for penetrating stucco’s concrete-like hardness. A regular drill is not powerful enough.
- Masonry drill bits: Carbide-tipped bits are non-negotiable for drilling into hard materials without dulling.
- Screwdriver or screw gun: Provides control to drive screws without overtightening and cracking the stucco.
- Level and measuring tape: Ensure your fixtures are installed straight.
- Safety goggles and gloves: Protect your eyes from dust and your hands during work.
- Exterior-grade caulk: Your insurance against water damage. This is essential, not optional.
More info on the best drill bits
Step-by-Step Installation Guide
Follow this process for a secure, weather-tight installation.
- Mark your location: Use a measuring tape and level to mark exactly where each anchor will go. Double-check your measurements.
- Drill the pilot hole: With a masonry bit on your hammer drill, drill slowly with steady pressure to the depth specified for your anchor. Let the tool do the work to avoid cracking the stucco.
- Clean the hole: Use a shop vacuum or compressed air to remove all dust and debris. A clean hole ensures the anchor can engage properly for maximum hold.
- Insert the anchor: Apply a small bead of exterior-grade caulk inside the hole as a first defense against water. Gently tap the anchor in until it’s flush with the surface.
- Drive the screw: Drive the screw until it feels snug, then stop. Overtightening can strip the anchor or crack the stucco. The fixture should be firm against the wall.
- Apply sealant: This is your final, crucial step. Apply a generous bead of exterior-grade caulk around the base of the fixture where it meets the stucco to create a waterproof seal. For wooden fixtures, leave the bottom unsealed to allow drainage.
Avoiding Costly Mistakes: Maintenance and Risk Prevention
Improper installation or neglect of stucco wall anchors can lead to significant problems. A simple project can turn into a costly nightmare if done incorrectly.

Water intrusion is the most damaging risk. Every unsealed hole is a potential path for water to get behind the stucco, where it can rot wood, grow mold, and cause hidden structural damage.
Other serious concerns include:
- Stucco delamination: Excessive stress from anchors can cause stucco to separate from the wall.
- Rust stains: Using the wrong fasteners leads to ugly brown streaks and indicates fastener failure.
- Cracking and chipping: This often results from aggressive drilling or overtightening screws.
Long-Term Anchor Maintenance
With regular attention, your stucco wall anchors can last for decades. A few minutes of care can prevent major problems.
- Regular inspection: As part of your seasonal maintenance, gently wiggle each mounted item to check for stability.
- Checking for looseness: If an item feels wobbly, carefully tighten the screw until it is snug, not overly tight.
- Signs of corrosion: Telltale rust streaks are an early warning. Replace corroding fasteners with a proper exterior-grade option immediately.
- Re-caulking seals: This is your most important maintenance task. Weather and UV exposure break down caulk over time. If you see cracks or gaps in the sealant, scrape out the old caulk and apply a fresh bead of exterior-grade caulk to prevent water intrusion.
More info about Stucco Wall Maintenance
What Happens When Installation Goes Wrong?
Improper installation leads to more than just falling fixtures; the reality is far more serious and expensive. Identifying damage begins with looking for hairline cracks radiating from anchor points, dark stains on exterior walls, or damp spots and mold on interior walls.
The real nightmare is hidden moisture damage. Water quietly rots sheathing and framing, grows mold, and compromises your home’s structure, often remaining invisible until the damage is extensive and costly to repair. Homes built between 1993 and 2006 are particularly vulnerable, with failure rates as high as 90% due to inadequate moisture management in building codes of that era.
The importance of professional assessment cannot be overstated. If you see any signs of cracking, staining, or moisture around your stucco wall anchors, get a professional opinion. At Stucco Safe, we use forensic testing methods, like drilling small holes and using moisture probes, to find problems invisible to the naked eye. Our inspections range from $495 to $1,595 depending on home size, a fraction of the cost of late-stage remediation. Early detection can save you from five-figure repair bills.
More info about Stucco Cracks
More info about Moisture Problems with Stucco
Frequently Asked Questions about Stucco Anchors
Here are answers to common questions about stucco wall anchors to help you make the right decisions for your home.
Can I use regular screws or nails in stucco?
No. Regular screws and nails are designed for softer materials like wood or drywall. Due to stucco’s hardness, attempting to use standard fasteners without pre-drilling almost guarantees you will crack the surface, which can lead to water intrusion and costly damage.
Even if you get a regular fastener in, it will lack adequate holding power because the threads aren’t designed to grip the dense material. Specialized fasteners are absolutely required. Use masonry screws (like Tapcons) or dedicated stucco wall anchors that are engineered with harder steel and aggressive threads for a secure, long-lasting hold.
How do I remove a stucco anchor?
Removing a stucco wall anchor requires patience and will always leave a hole that needs patching. The anchor removal process involves unscrewing the fixture and carefully extracting the anchor, using pliers for plastic anchors or possibly drilling out metal ones. Work slowly to avoid enlarging the hole.
Proper patching is critical. Clean out debris and fill the hole with stucco patching compound. The challenge is matching the texture of your existing stucco, which may require experimenting with tools like sponges or brushes. After the patch dries, prime and paint the area to blend it in.
Do I need to drill into a stud behind the stucco?
This depends on the weight of the item. Understanding when to find a stud is crucial for preventing costly mistakes.
- For lighter items (under 50 lbs), properly installed stucco wall anchors that grip the stucco itself are usually sufficient.
- For heavy items (over 50 lbs), finding and drilling into wall studs is essential for safety and stability. Heavy fixtures hung without stud support can fail. While stud finders for drywall may work, you might need a more powerful model for stucco.
If your home has a shear wall with plywood or OSB sheathing, you have secure attachment points between studs, but studs always offer the maximum shear strength. When in doubt, always anchor to a stud.
Secure Your Fixtures with Confidence
Successfully hanging items on your stucco home becomes straightforward once you understand what makes this exterior surface unique. The secret to project success lies in respecting stucco’s hard, brittle nature while using the proper technique and right materials designed specifically for this challenging surface.
Think of it this way: you wouldn’t use a butter knife to cut a steak, and you shouldn’t use drywall anchors on stucco. When you match the right stucco wall anchors to your specific application – whether it’s lightweight house numbers or a heavy outdoor fixture – you’re setting yourself up for years of worry-free performance.
Damage prevention should always be your top priority. Every penetration you make in stucco creates a potential pathway for water, and we’ve seen how a seemingly innocent mounting job can lead to thousands of dollars in hidden damage. That’s why proper sealing isn’t optional – it’s absolutely critical for maintaining your home’s long-term integrity.
The good news? Armed with the knowledge from this guide, you can confidently tackle most stucco mounting projects yourself. You now know the difference between plastic anchors for your thermometer and wedge anchors for that heavy pergola bracket. You understand why pre-drilling matters and how crucial that final bead of exterior-grade caulk really is.
If you ever find yourself questioning whether your stucco system is healthy enough for new installations, or if you notice any signs of cracking or moisture around existing anchors, don’t hesitate to get a professional assessment. At Stucco Safe, our certified inspectors use forensic testing methods to uncover hidden moisture problems that aren’t visible on the surface. We serve homeowners throughout Southeastern Pennsylvania, New Jersey, and Delaware, with Stucco inspections ranging from $495 to $1595 or more for very large homes.
Investing in proper installation techniques and professional guidance when needed protects your home from potentially far more expensive repairs down the road. Your stucco exterior can remain both beautiful and structurally sound for decades when you treat it with the respect and care it deserves.
Explore our comprehensive guide to the Best Anchors for Stucco