
What anchors to use for stucco: Best 2025 Guide
Why Choosing the Right Stucco Anchors Matters
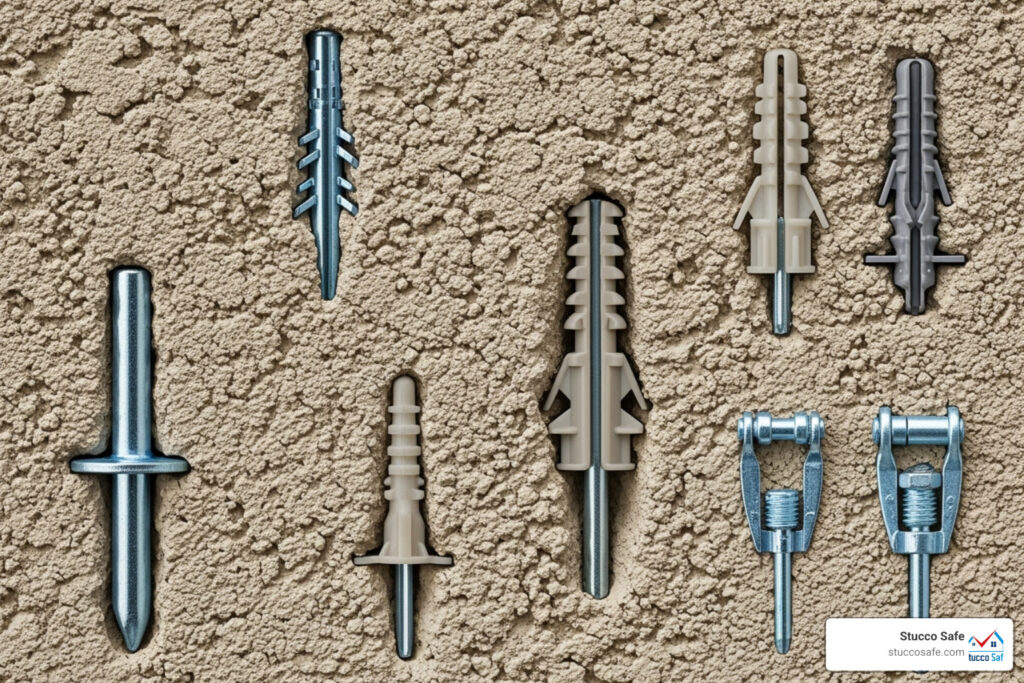
What anchors to use for stucco depends on your item’s weight and the stucco type.
- Light-duty (under 15 lbs): Plastic expansion anchors or ribbed conical anchors
- Medium-duty (15-50 lbs): Sleeve anchors or larger masonry screws
- Heavy-duty (over 50 lbs): Wedge anchors or lag shields with lag screws
As one stucco contractor noted: “Stucco is a surprisingly hard surface and fastening anything to it can be a huge hassle if you are not properly prepared.” Many homeowners find too late that regular drywall anchors simply fail on stucco walls.
Stucco’s cement-based composition makes it brittle and prone to cracking if you use the wrong fasteners. Unlike drywall, stucco needs specialized anchors that grip without causing damage. The wrong anchor can lead to loose fixtures, cracks, or moisture intrusion that damages your home’s structure.
For exterior installations, the stakes are higher. Weather exposure means your anchors must resist corrosion and maintain a watertight seal. A poor choice can lead to water damage costing thousands to repair.
I’m Gabe Kesslick, an EDI Level 2 Certified Stucco Inspector with over 20 years of experience. I’ve seen the costly damage from using the wrong anchors. This guide will help you understand what anchors to use for stucco to avoid these pitfalls.

Understanding Your Stucco Wall Before You Drill
Think of your stucco wall as a cement layer cake. Understanding what you’re drilling into is the difference between success and a costly repair.
Traditional stucco is a mix of cement, sand, and water applied in coats over a metal lath. This lath is attached to wall sheathing, which covers the structural wood studs of your home.

Not all stucco is the same. Traditional stucco is hard and brittle. EIFS (Exterior Insulation and Finish Systems), or synthetic stucco, includes a foam insulation board underneath that can’t hold much weight. Knowing which type you have is key to determining what anchors to use for stucco.
For heavier items, you must find the wooden or metal studs behind the stucco with a stud finder. For significant loads, anchoring directly to the structural framing is essential for support.
If you’re unsure about your wall’s condition, especially with older stucco, consider a professional assessment. Many DIY projects fail because homeowners don’t know what they’re working with. More on professional assessments can provide peace of mind.
Why Regular Screws and Anchors Fail in Stucco
Using regular screws in stucco is a recipe for disaster. Stucco’s brittleness is the main problem. A standard screw will crack the cement-based surface, often creating a spider-web pattern as it’s driven in.
Regular screws also lack grip in stucco’s crumbly surface. Unlike wood, where threads bite in, stucco crumbles away from standard threads, causing fixtures to loosen and eventually fall.
This cracking risk is more than cosmetic. It can lead to spalling, where chunks of your wall flake off. A tiny crack can grow into a much larger problem.
The biggest issue for exterior walls is the moisture intrusion risk. Cracks become a pathway for water to get behind the stucco, leading to rot, mold, and expensive structural damage. Investing a few extra dollars in the right anchor is a smart choice.
Exterior vs. Interior Stucco Considerations
Location matters when choosing what anchors to use for stucco, as exterior and interior walls have very different needs.
Exterior stucco faces harsh weather, so corrosion resistance is essential. Standard steel fasteners will rust, stain your wall, and fail. Use stainless steel fasteners (304 or 316 grade) for the best protection against the elements.
The most critical step for exterior work is sealing holes properly. Every hole is a potential leak. After installing your anchor and fixture, you must create a watertight barrier with high-quality, weatherproof caulking.
Interior stucco has an easier life. Without weather exposure, corrosion isn’t a major concern (except in high-humidity areas like bathrooms). However, you still need anchors designed for stucco’s brittle nature to prevent cracking.
Think of exterior anchoring as a two-part job: securing the item and protecting your wall from water. Interior work focuses on getting a solid connection without damaging the wall surface.
What Anchors to Use for Stucco Based on Load Weight
Successful stucco anchoring means matching your anchor to your load. When selecting what anchors to use for stucco, consider the weight capacity, which includes shear strength (resistance to sliding forces) and tensile strength (resistance to pull-out forces).
The anchor material is also key. Plastic and nylon are great for light loads, as they expand to grip the stucco. Steel offers superior strength and durability, especially for outdoor use.

For Light-Duty Applications (Under 15 lbs)
For lighter items, you need gentle yet effective solutions.
- Plastic expansion anchors expand as a screw is driven in, creating friction that grips the inside of the drilled hole. They are simple and effective for items that don’t put much stress on the wall.
- Ribbed conical anchors have external fins that bite into the stucco, providing extra rotational resistance to prevent spinning during installation.
- Masonry screw anchors have aggressive threads that cut directly into a pilot hole for a secure hold. They work well in solid stucco or if they hit wood backing.
These anchors are ideal for: house numbers, small decorations, lightweight fixtures, picture frames, small signs, compact mailboxes, and thermometers. Using the right anchor prevents sagging or falling items.
For Medium-Duty Applications (15-50 lbs)
For more substantial projects, you need anchors that can handle more weight and stress.
- Sleeve anchors consist of a threaded bolt inside an expandable sleeve. Tightening the bolt expands the sleeve, pressing it firmly against the hole’s interior for a reliable mechanical interlock.
- Larger masonry screws have an increased diameter and length for a more robust connection. They offer more holding power while still being easy to install.
- Toggle bolts are ideal for hollow areas behind stucco. A spring-loaded toggle opens behind the wall, spreading the load over a larger area as you tighten the bolt.
These are excellent for: outdoor light fixtures, small to medium wall-mounted planters, decorative shutters, hose reels, fencing components, larger mailboxes, and small shelving units. For more tips, see A guide to hanging items on stucco.
For Heavy-Duty Applications (Over 50 lbs)
When mounting substantial items, you need the strongest anchoring solutions.
- Wedge anchors are extremely strong. A clip at the end expands as you tighten the nut, creating a powerful mechanical grip inside the hole. They are designed for applications where failure is not an option.
- Lag shields with lag screws work by expanding a shield inside the hole as a large lag screw is driven in. This combination distributes heavy loads effectively.
- Anchoring into studs is the best method for the heaviest items. Use a stud finder to locate the wood or metal framing and drive long screws or lag bolts directly into them. This provides superior strength by using your home’s structure for support.
Heavy-duty applications include: large outdoor trellises, heavy art installations, large satellite dishes, commercial signage, heavy-duty shelving, and structural supports for awnings or decks. When dealing with substantial loads, it’s always wise to overengineer rather than hope for the best.
The Proper Procedure for Installing Anchors in Stucco
Properly installing anchors in stucco ensures a secure mount that lasts and prevents damage. An incorrect installation can lead to cracks, loose fixtures, and water damage. This process, refined over 20 years, protects your home while creating a secure attachment.

Safety comes first. Always wear safety glasses to protect your eyes from stucco dust and chips. Gloves will protect your hands. Before you start, gather your tools: a hammer drill, carbide-tipped masonry drill bits, measuring tape, a level, and a caulking gun with weatherproof sealant for exterior work. A hammer drill’s combined rotation and hammering action is essential for drilling clean holes in stucco without causing cracks. For detailed drilling guidance, check out More on drilling techniques.
Step 1: Mark and Pre-Drill the Pilot Hole
Measuring and marking your anchor points carefully is the first step. Use a sharp pencil for clear marks, and use a level to ensure your fixture will be straight. It’s easier to adjust a pencil mark than to re-drill a hole.
Choosing the right drill bit is critical. The anchor packaging specifies the required bit size. The wrong size will result in a loose fit or risk cracking the stucco. Carbide-tipped masonry bits are best for stucco. For more specific guidance, see our article on Using the correct masonry drill bit.
Set your hammer drill and drill slowly, letting the bit do the work. Avoiding excessive pressure prevents cracks. Drill to the depth specified by the anchor manufacturer, marking your bit with tape for consistency.
Step 2: Clean the Hole and Insert the Anchor
Removing dust and debris from the hole is a crucial pro step, as stucco dust can compromise the anchor’s grip. Use compressed air or a small brush to clean the hole thoroughly. A clean hole is essential for a secure grip.
Insert the anchor into the clean hole. It should slide in easily, then require gentle tapping with a hammer to sit flush with the wall. If there’s resistance, stop and check the hole for debris or size issues. Never force an anchor; it’s better to re-drill than to crack your stucco.
Step 3: Secure the Fixture and Seal the Area
Now, drive the screw. Position your fixture and thread the screw into the anchor with steady pressure. You’ll feel it grip as it tightens. The key is avoiding overtightening. Stop when the fixture is snug. Overtightening can strip the anchor, crack the stucco, or break the screw. Use a low torque setting on a power drill and finish by hand.
For exterior installations, applying weatherproof sealant is a crucial final step. Use a quality exterior caulk to apply a continuous bead around the fixture’s perimeter, leaving no gaps for water. This seal prevents water from getting behind the stucco, which can cause rot, mold, and costly structural damage.
Tool the caulk for a smooth, watertight seal. This attention to detail in preventing water damage is the mark of a professional-quality installation.
Frequently Asked Questions about Stucco Anchors
Here are answers to the most common concerns that come up when people are figuring out what anchors to use for stucco.
How can I avoid damaging the stucco surface when installing anchors?
Preventing stucco damage requires proper technique due to its brittle nature.
- Always drill a pilot hole. This is the most important step to prevent cracks, giving the anchor a clean path.
- Use a sharp masonry bit. A dull bit can chip or crack the surface. Use sharp, carbide-tipped masonry bits for clean cuts.
- Never hammer nails directly into stucco. This common shortcut leads to spider web cracks, as stucco can’t handle the impact.
- Avoid overtightening screws. Stop when the fixture is firm. Overtightening can strip the anchor or crack the stucco.
- Seal the hole with quality caulk. For exterior work, this protects your wall from expensive water damage.
Can I remove a stucco anchor after installation?
Yes, but it leaves a hole that needs proper repair to protect the wall.
First, unscrew the fastener. Then, pull or drill out the anchor body. Plastic anchors may pull out with pliers, but stubborn metal anchors might need to be drilled out.
Crucially, you must patch the hole with stucco patch compound to prevent water damage and maintain appearance. Smooth the patch to match the texture, let it cure, then prime and paint for exterior walls to blend it in and add weather protection.
What tools are necessary for installing anchors in stucco?
Having the right tools makes the job much easier.
- A hammer drill: Its hammer action is needed to drill into hard stucco without causing cracks.
- A set of masonry drill bits: Use the exact size specified by the anchor manufacturer for a secure grip.
- Safety glasses: Drilling creates dust and chips that can cause eye injury.
- A level: This ensures your fixture is straight.
- A screwdriver or power drill: Use one with adjustable torque to avoid overtightening.
- The anchor and fastener: Choose the right one for your project’s weight requirements.
- Weatherproof caulk and a caulking gun: For exterior jobs, quality caulk is essential to prevent costly moisture damage.
Conclusion
Choosing what anchors to use for stucco correctly protects your home’s integrity and ensures a secure installation. It’s a small investment that prevents future headaches.
The key is matching your anchor to the load. A light item may only need a plastic anchor, while a heavy trellis requires a wedge anchor or lag shield. Proper installation technique is the difference between success and a costly mistake. Pre-drilling, using the right bit, cleaning the hole, and not overtightening are essential steps to prevent cracks and failure.
Most importantly, damage prevention should guide every decision. Stucco is brittle and unforgiving of shortcuts. Using the right tools and sealing exterior holes protects your home from moisture intrusion and expensive repairs.
The importance of knowing your wall’s condition cannot be overstated. Soft spots, moisture stains, or unusual cracking might signal deeper problems that a professional inspection could uncover.
At Stucco Safe, we understand that your home’s exterior is its first line of defense. Our certified inspectors use forensic testing methods to detect moisture and structural issues throughout Southeastern Pennsylvania, New Jersey, and Delaware. Stucco Safe inspections provide the complete picture of your wall’s health, with costs varying from $495 to $1595 or more for very large homes – a smart investment compared to the potential expense of repairing extensive water damage.
When you take the time to choose the right anchors and follow proper installation techniques, you’re preserving the beauty and structural integrity of your stucco home for years to come. For additional guidance on selecting the perfect fasteners for your specific project, Learn more about the best anchors for stucco.