
How to install anchors in stucco: Pro Guide 2025
Why Proper Anchor Installation Protects Your Stucco Investment
Learning how to install anchors in stucco properly can save you from costly repairs and unsightly cracks. Here’s the essential process:
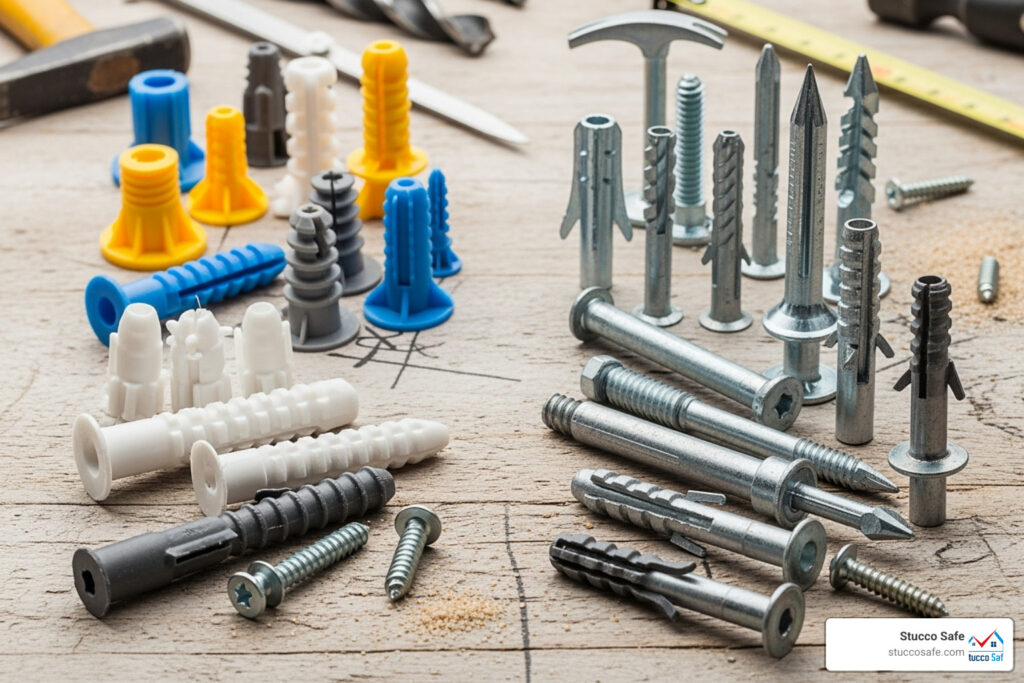
- Choose the right anchor: Plastic for light items (under 10 lbs), metal for heavy items (over 25 lbs).
- Mark your location and apply painter’s tape to prevent cracking.
- Drill slowly with a masonry bit matching your anchor size.
- Insert the anchor flush with the wall.
- Drive the screw without overtightening.
- Seal with caulk to prevent water intrusion.
Stucco’s hard, cement-based surface protects your home from weather, but its brittleness creates challenges when hanging items. Unlike drywall or wood, stucco isn’t solid enough for many fasteners on its own and requires specific anchors to distribute weight. Without proper technique, you risk creating cracks that allow moisture penetration, leading to serious structural damage.
Professional contractors know that the right anchor, properly installed, makes all the difference between a secure mounting and a costly repair.
I’m Gabe Kesslick, and I’ve been detecting and repairing moisture issues in stucco systems since 2001. Through thousands of inspections, I’ve seen how improper installations can compromise stucco integrity, which is why understanding how to install anchors in stucco correctly is crucial for protecting your home’s value.

Before You Drill: Understanding Stucco and Choosing Your Anchor
Stucco is a cement-based material made of cement, sand, and water applied in layers over a wire lath mesh. This composition makes it durable against weather but brittle when drilling. Its hardness can dull drill bits, and one wrong move can cause cracks. Unlike wood or drywall, stucco requires a specific approach.
The wire lath mesh can also complicate drilling, sometimes causing the hole to become larger than intended. This is why understanding how to install anchors in stucco starts with choosing the right anchor. An anchor distributes weight across a larger surface area, preventing the stress that leads to cracks.
Plastic vs. Metal: When to Use Each Anchor Type
The choice between plastic and metal anchors depends on your project’s weight.
Plastic anchors are ideal for lightweight projects under 10-15 pounds, such as house numbers, small decorative pieces, or string lights. These nylon or plastic anchors expand as you drive a screw into them, creating a secure fit. They are compatible with standard screws and are gentle on stucco.
Metal anchors are necessary for heavier items. Sleeve anchors work well for medium-weight items like light fixtures or small shelves, expanding as you tighten the bolt. For heavy-duty jobs like large mailboxes or substantial fixtures, wedge anchors are the best choice, creating a strong mechanical interlock.
Always choose stainless steel or corrosion-resistant coatings for metal anchors to prevent rust stains, which is crucial in the weather conditions of Southeastern Pennsylvania, New Jersey, and Delaware.
Matching the Anchor to the Item’s Weight
Matching the anchor to the item’s weight is crucial for safety and preventing stucco damage. Using an anchor that’s too small risks failure, while one that’s too large can create unnecessary stress.
- Plastic ribbed anchors: For light-duty items up to 15 pounds, like house numbers and small signs.
- Sleeve anchors: For medium-weight items from 15-50 pounds, such as medium light fixtures or handrails.
- Wedge anchors: For heavy loads from 50 to 200+ pounds, including large signs or mailboxes.
- Toggle bolts: For items from 25-100 pounds where there is a hollow space behind the stucco. They require a larger pilot hole but distribute weight effectively.
For a detailed comparison, see our guide on Best Anchors for Stucco. Holding power can vary based on your stucco’s condition. The goal is load distribution to prevent cracks. When in doubt, choose a slightly larger anchor.
Gathering Your Toolkit for Success
Before you learn how to install anchors in stucco, gather your tools to make the job smoother and prevent damage. Having everything ready is key.

Here’s your essential toolkit:
- Safety goggles: Non-negotiable for protecting your eyes from dust and debris.
- Power drill: A strong corded or cordless model is necessary for stucco’s hard surface.
- Masonry drill bit: Use a carbide-tipped bit that matches your anchor size. Regular bits will dull quickly. For more details, see our guide on the Best Drill Bit for Stucco.
- Hammer, level, measuring tape, and pencil: For tapping in anchors, ensuring items are straight, and marking locations.
- Stucco anchors and screws: Choose anchors based on weight and use compatible stainless steel screws for corrosion resistance.
- Silicone caulk and caulking gun: Essential for sealing the installation to prevent moisture intrusion.
- Painter’s tape: A pro tip to prevent chipping around the drill hole.
- Stud finder: Helpful for locating framing for heavy items, though it may not always work through thick stucco.
With these tools, you’re prepared for a successful installation.
The Definitive Guide on How to Install Anchors in Stucco
With your tools and safety gear ready, it’s time to learn how to install anchors in stucco. Patience and precision are key. Following these steps methodically ensures a secure installation.

Step 1: Mark and Prepare the Surface
Proper preparation is what separates amateur attempts from professional results. Measure your location carefully with a tape measure and use a level to ensure items will hang straight. Mark each spot with a pencil, double-checking spacing for multiple anchors. Finally, apply a strip of painter’s tape over each mark. This simple trick helps prevent the stucco from chipping or cracking around the hole as you drill.
Step 2: The Proper Procedure for Drilling Pilot Holes
Drilling into stucco can be nerve-wracking, but the right technique makes it simple. Your masonry drill bit must match the anchor size exactly; check the anchor’s packaging for specifications. The golden rule is to drill slowly and apply consistent, moderate pressure. Speed is your enemy. Let the bit do the work.
Avoid using the hammer drill setting at first, as it can be too aggressive and cause cracks. Use the regular rotary setting to penetrate the outer stucco layer. Periodically pull the bit out to clear debris from the hole, which ensures efficient cutting. For more tips, see our guide on How to Drill into Stucco.
Step 3: How to install anchors in stucco for a Secure Fit
With the pilot hole drilled, it’s time to install the anchor.

Insert your anchor into the hole. It should fit snugly with slight resistance. If you have to force it, your hole may be too small. Tap the anchor gently with a hammer until it is flush with the stucco surface. The anchor should feel secure with no wiggling. If it’s loose, you may need a larger anchor.
For more on specialized options, see our guide on Stucco Screw Anchors.
Step 4: Driving the Screw and Final Touches
This final step secures your item and protects your stucco. Insert the screw through your item and into the anchor. Using a screwdriver or a drill on a low setting, turn clockwise steadily. You’ll feel the anchor expand and grip the stucco. Do not overtighten. Once the item is secure, stop. Overtightening can crack the stucco or strip the anchor.
Finally, apply a bead of exterior-grade silicone caulk around the screw head and where the item meets the wall. This crucial weatherproofing step prevents moisture intrusion and gives your project a professional finish.
Pro-Level Tips to Avoid Cracks and Damage
We’ve covered the basics, but here are a few more nuggets of wisdom from our years of experience that will help you achieve a truly professional, damage-free finish. These best practices are all about finesse and foresight.

Best Practices for a Flawless Finish
- Drill Slowly: This is the most important tip. A slow, controlled speed minimizes vibration and heat, preventing cracks.
- Use Sharp Bits: A sharp, high-quality masonry bit cuts cleanly and prevents damage.
- Avoid Overtightening: Stop turning once the item is secure to avoid cracking the stucco.
- Use Stainless Steel Hardware: For outdoor use, stainless steel screws and wide washers prevent rust and distribute the load evenly. This is key for hanging items on stucco walls securely.
- Keep it Clean: Debris in the hole can weaken the anchor’s grip.
Drill-Free Alternatives for Lightweight Items
For very lightweight items, consider drill-free alternatives to preserve your stucco.
- Adhesive Hooks and Strips: Outdoor-rated adhesive hooks are great for temporary items like holiday wreaths or small signs. Success depends on proper preparation:
- Clean the Surface: Thoroughly clean the stucco with a stiff brush and a degreasing soap, then rinse. Wipe with rubbing alcohol to remove any residue. The surface must be clean and dry.
- Check Weight Limits: Always adhere to the product’s weight rating to prevent failure.
- Apply in Good Weather: Adhesives bond best in warm, dry conditions.
- Suction Cups: These are not recommended for stucco. The textured surface prevents a good seal, causing them to fail quickly.
Heavy-Duty Installations and Long-Term Maintenance
When you’re dealing with something substantial like a large light fixture or trellis, the game changes. This is where we focus on structural integrity and connections that will last.
How Professionals Approach Heavy-Duty Applications
Professionals approach heavy items by connecting to the home’s framing, not just the stucco.
- Locate Studs: The best method is to find studs using a stud finder and secure items directly to the framing with long, stainless steel screws. This provides the strongest connection.
- Use Toggle Bolts: If no stud is available and there’s a hollow cavity behind the stucco, toggle bolts are a great option. They expand behind the wall to distribute weight over a large area.
- Consider Epoxy Anchors: For the most demanding jobs or when drilling into solid masonry behind the stucco, epoxy anchors are the professional standard. A high-strength resin is injected into the hole, creating a bond that is often stronger than the material itself.
As a rule, avoid plastic anchors for any item over 15-20 pounds. For heavier loads, metal anchors or direct structural connections are required to prevent failure.
Maintaining Your Stucco Anchors
Proper maintenance ensures your anchors remain secure and protect your stucco system.
- Inspect Regularly: Check your anchors every six months, especially after harsh weather. Gently tug on mounted items to check for loosening.
- Look for Rust: Address any rust or corrosion immediately, as it weakens fasteners and stains stucco. Using stainless steel hardware from the start prevents this.
- Check for Water Intrusion: The silicone seal is critical. If the caulk is cracked or pulling away, re-seal it to prevent moisture from getting behind the stucco. This is a common issue we find during inspections in Southeastern Pennsylvania, New Jersey, and Delaware.
- Address Loose Anchors: If an anchor is loose, try tightening the screw. If it remains unstable, a more significant repair may be needed, such as removing the anchor and patching the hole. Our guide on Patching a Hole in Stucco can help.
Frequently Asked Questions about Installing Stucco Anchors
After helping homeowners with stucco installations for over two decades, I’ve noticed the same questions come up time and again. Let me share the answers that will save you both time and potential headaches.
Can I screw directly into stucco without an anchor?
Absolutely not. Screwing directly into stucco is a common mistake. Stucco is brittle and lacks the holding power to grip screw threads. This will lead to a loose screw and a high risk of cracking the stucco because the weight isn’t distributed. Anchors are essential because they are engineered to spread the load across a larger surface area, creating a secure mounting point.
How do I drill into stucco without cracking it?
To drill without cracking, follow these key steps:
- Use a sharp masonry bit: A sharp bit cuts cleanly, while a dull one will chip the stucco.
- Apply painter’s tape: Place tape over the drill spot to prevent chipping around the hole’s edge.
- Drill slowly and steadily: High speed creates cracks. Use slow, consistent pressure and let the bit do the work.
- Avoid the hammer drill function: The hammer setting is too aggressive for the brittle stucco surface. Use the regular drill setting.
What do I do if the hole becomes too big?
Enlarged holes can happen, often from hitting the wire lath behind the stucco. Here are your options:
- Use a larger anchor: If the hole is only slightly too big, the next size up may provide a secure fit.
- Use epoxy filler: For significantly oversized holes, fill the hole with a masonry epoxy filler. Once it cures, you can drill a new, correctly-sized pilot hole into the epoxy.
- Patch and re-drill: For a badly damaged hole, it may be best to patch it completely and drill a new hole nearby. For help with this, see our guide on How to Repair Exterior Stucco Cracks.
Conclusion: Secure Your Fixtures with Confidence
You now know how to install anchors in stucco safely and effectively. By choosing the right anchor, drilling slowly with a sharp masonry bit, avoiding overtightening, and sealing with caulk, you can protect your home’s integrity while securely mounting your fixtures.
While this guide covers most projects, call a professional for extremely heavy items or if you see signs of moisture damage or structural issues. At Stucco Safe, our certified inspectors use forensic testing to assess stucco health and find hidden moisture problems. We serve homeowners throughout Southeastern Pennsylvania, New Jersey, and Delaware, with inspections starting at $495.
Protecting your stucco is protecting your investment. With these skills, you can confidently tackle your next project. Ready to get started? Learn more about the best anchors for your stucco project and begin with confidence.