Stucco Inspection Report Sample: Ultimate Guide 2025
Why Understanding a Stucco Inspection Report Sample Matters
A stucco inspection report sample provides a detailed blueprint of what to expect when assessing your home’s exterior cladding system. If you’re searching for examples of these reports, here’s what they typically include:
Key Components of a Stucco Inspection Report:
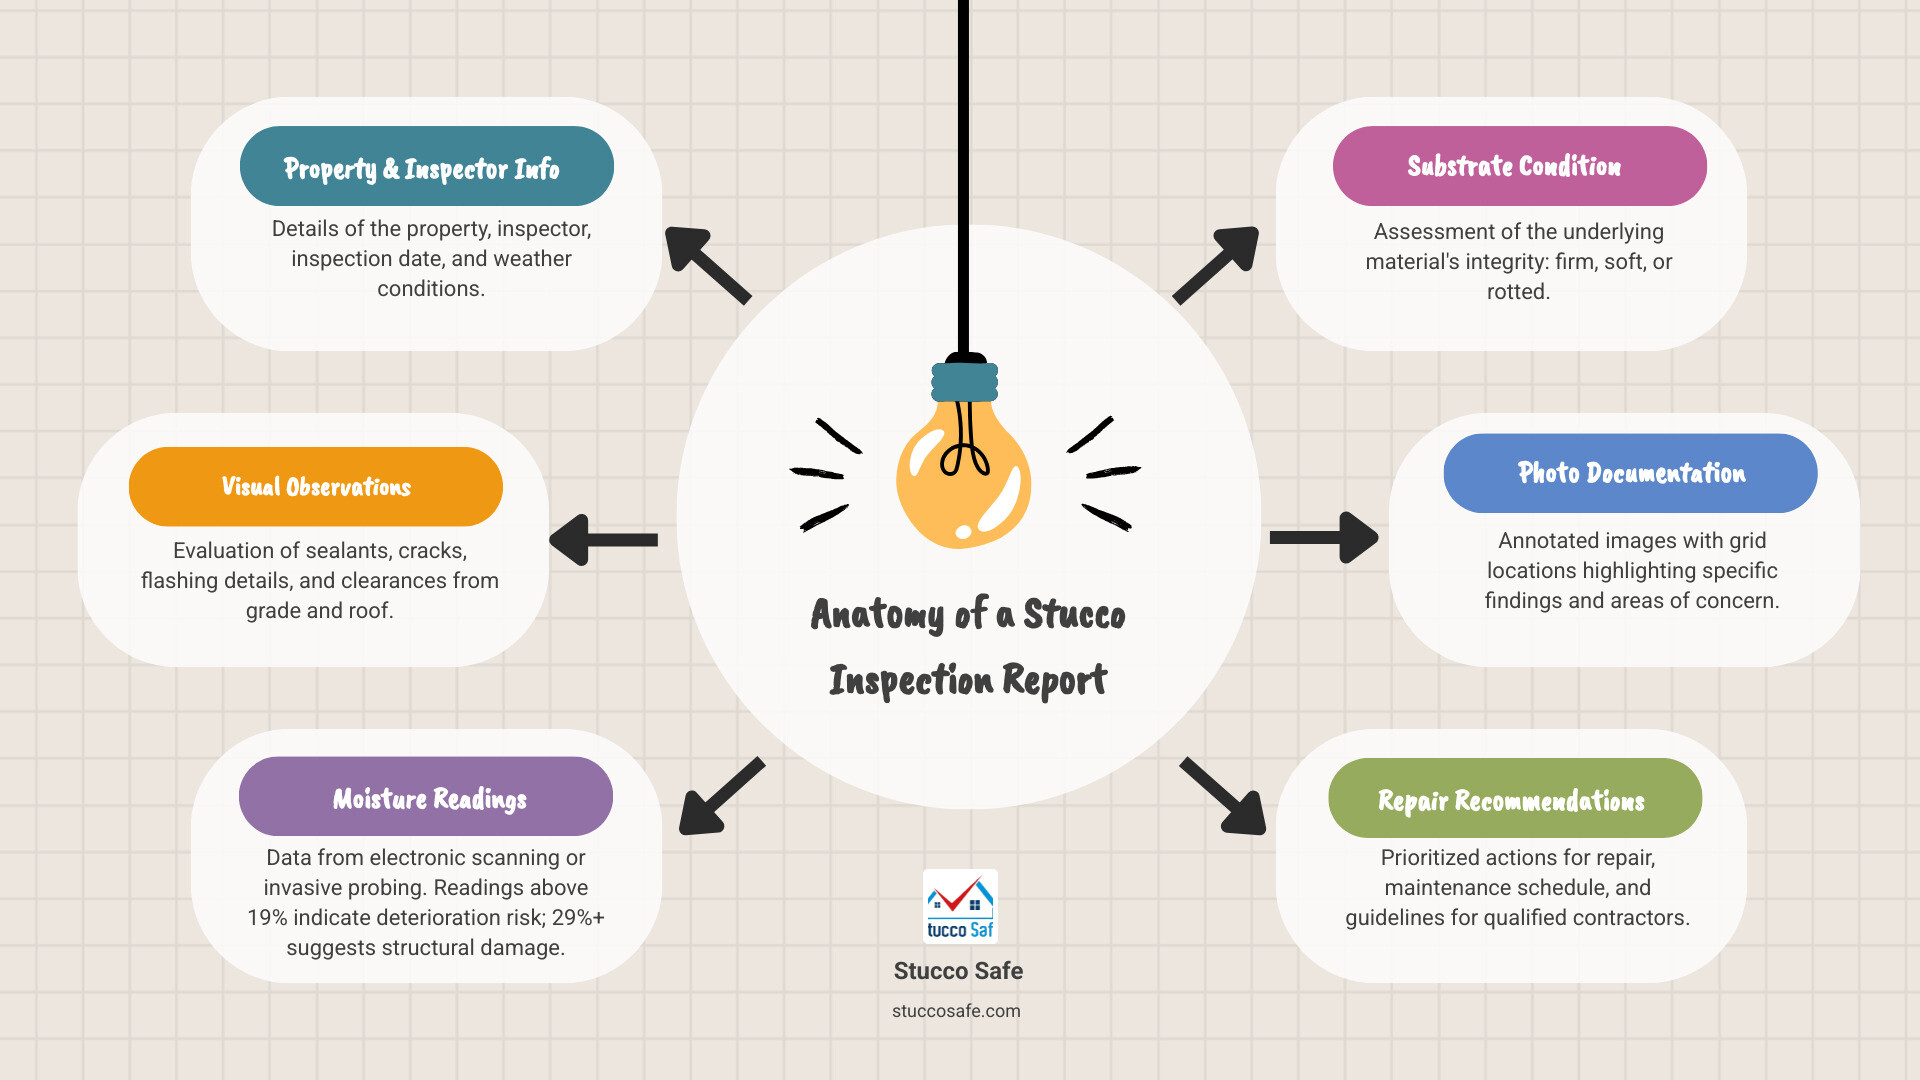
- Property and inspector information with inspection date and conditions
- Executive summary highlighting critical findings
- Visual observations of sealants, cracks, flashing, and clearances
- Moisture readings from electronic scanning or invasive probing
- Substrate condition assessments (firm, soft, or deteriorated)
- Photo documentation with grid locations and annotations
- Repair recommendations prioritized by severity
- Maintenance guidelines for ongoing care
The report serves as both a diagnostic tool and a roadmap for repairs, detailing everything from minor sealant failures to significant moisture intrusion that could cost thousands to remediate.
Understanding what’s in a stucco inspection report isn’t just about reading technical jargon—it’s about protecting your investment. When moisture readings exceed 19%, wood deterioration can begin. When they climb above 29%, structural damage is often already present. A comprehensive report doesn’t just identify these numbers; it explains what they mean for your home’s substrate, your repair budget, and your property’s long-term value.
I’m Gabe Kesslick, an EDI Level 2 Certified Stucco Inspector who has conducted thousands of stucco inspections since founding Stucco Safe in 2015, and I’ve reviewed countless stucco inspection report samples to help homeowners understand what lies beneath their exterior walls. My experience with forensic building envelope investigations has taught me that a detailed, well-documented report is your most valuable tool in preventing catastrophic and costly stucco failures.
What to Expect in a Stucco Inspection Report
When you receive a stucco inspection report, you’re getting far more than just a checklist of problems. It’s a comprehensive document that tells the story of your home’s exterior—what’s working, what’s failing, and what needs attention before small issues become expensive disasters.
The primary purpose of any stucco inspection report sample is straightforward: identify visible installation flaws, pinpoint areas where water is sneaking in, and uncover potential hidden damage to the structure beneath your stucco. For home buyers and current owners alike, reviewing sample reports before your own inspection helps you understand just how deep this analysis goes and what you’re really paying for when you invest in a professional assessment.
Think of a comprehensive report as your roadmap. It doesn’t just list problems—it explains them, prioritizes them, and gives you a clear path forward for repairs and ongoing maintenance. Let’s walk through what you’ll actually find inside.
Key Sections of a Report
Every professional stucco inspection report follows a logical structure designed to give you both the big picture and the fine details. Here’s what we include when we deliver a report to our clients:
Property Details anchor the report with essential context. You’ll see the full property address, the home’s estimated age (which matters because stucco systems deteriorate over time), approximate square footage, and number of stories. A two-story home built in 2004 presents different challenges than a single-story built in 1995.
Inspector Information establishes credibility. Our reports always include our contact details and the inspector’s qualifications—in our case, an EDI Level 2 Certified Stucco Inspector. This matters because not all inspectors have the specialized training needed for forensic stucco analysis.
The Executive Summary is where busy homeowners start. This concise overview highlights the most critical findings and potential risks without forcing you to wade through technical details first. If there’s major moisture intrusion or structural concerns, you’ll know it immediately.
Scope of Inspection defines exactly what we examined. For visual inspections, this typically covers the stucco surface, exterior sealants, flashings, windows, doors, roof-to-stucco transitions, and penetrations. For invasive inspections, we detail our moisture scanning and probing methods so you understand how we gathered our data.
Every professional report includes Limitations of Liability because honesty matters. We’re clear that our inspection is a limited assessment—a snapshot in time, not a crystal ball. We can’t detect every hidden defect, especially when construction materials, hidden metals, or wiring within walls might influence our readings. It’s important you understand what we can and can’t guarantee.
Weather Conditions might seem like filler, but they’re actually crucial. We record the temperature, humidity, and last known rainfall because these factors directly affect moisture readings and visual observations. A reading taken three days after heavy rain tells a different story than one taken during a dry spell.
Visual Observations
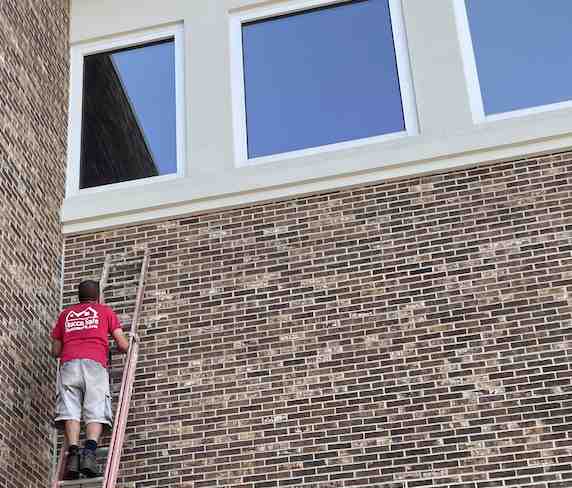
Before we break out the high-tech equipment, we start with what experienced eyes can see. This visual assessment often reveals more than you’d expect, and it’s where patterns of neglect or poor installation become obvious.
Sealant condition is one of the first things we scrutinize. The caulking around windows, doors, utility penetrations, and other transitions acts as your home’s first line of defense against water. When sealants are separated, missing, or deteriorated, moisture has an open invitation inside. Since quality sealants typically need replacement every 2-3 years, we’re looking for any that have clearly exceeded their lifespan and turned brittle or cracked.
Cracks and surface damage tell us a lot about what’s happening beneath the surface. Hairline cracks—roughly 1/16 of an inch wide—are common in stucco systems and don’t always signal disaster, but they still need monitoring and repair. Thicker cracks or spider-web patterns? Those often indicate installation errors or more serious structural movement. We also document any impact damage or surface abrasions that have compromised the stucco’s protective barrier.
Staining and discoloration aren’t just cosmetic problems. Mildew, run-off stains, and rust marks often signal prolonged moisture exposure. That reddish staining you might see? It could be from sprinkler overspray hitting metallic components, or iron oxides in the water itself. Either way, it’s evidence that water is spending too much time where it shouldn’t be.
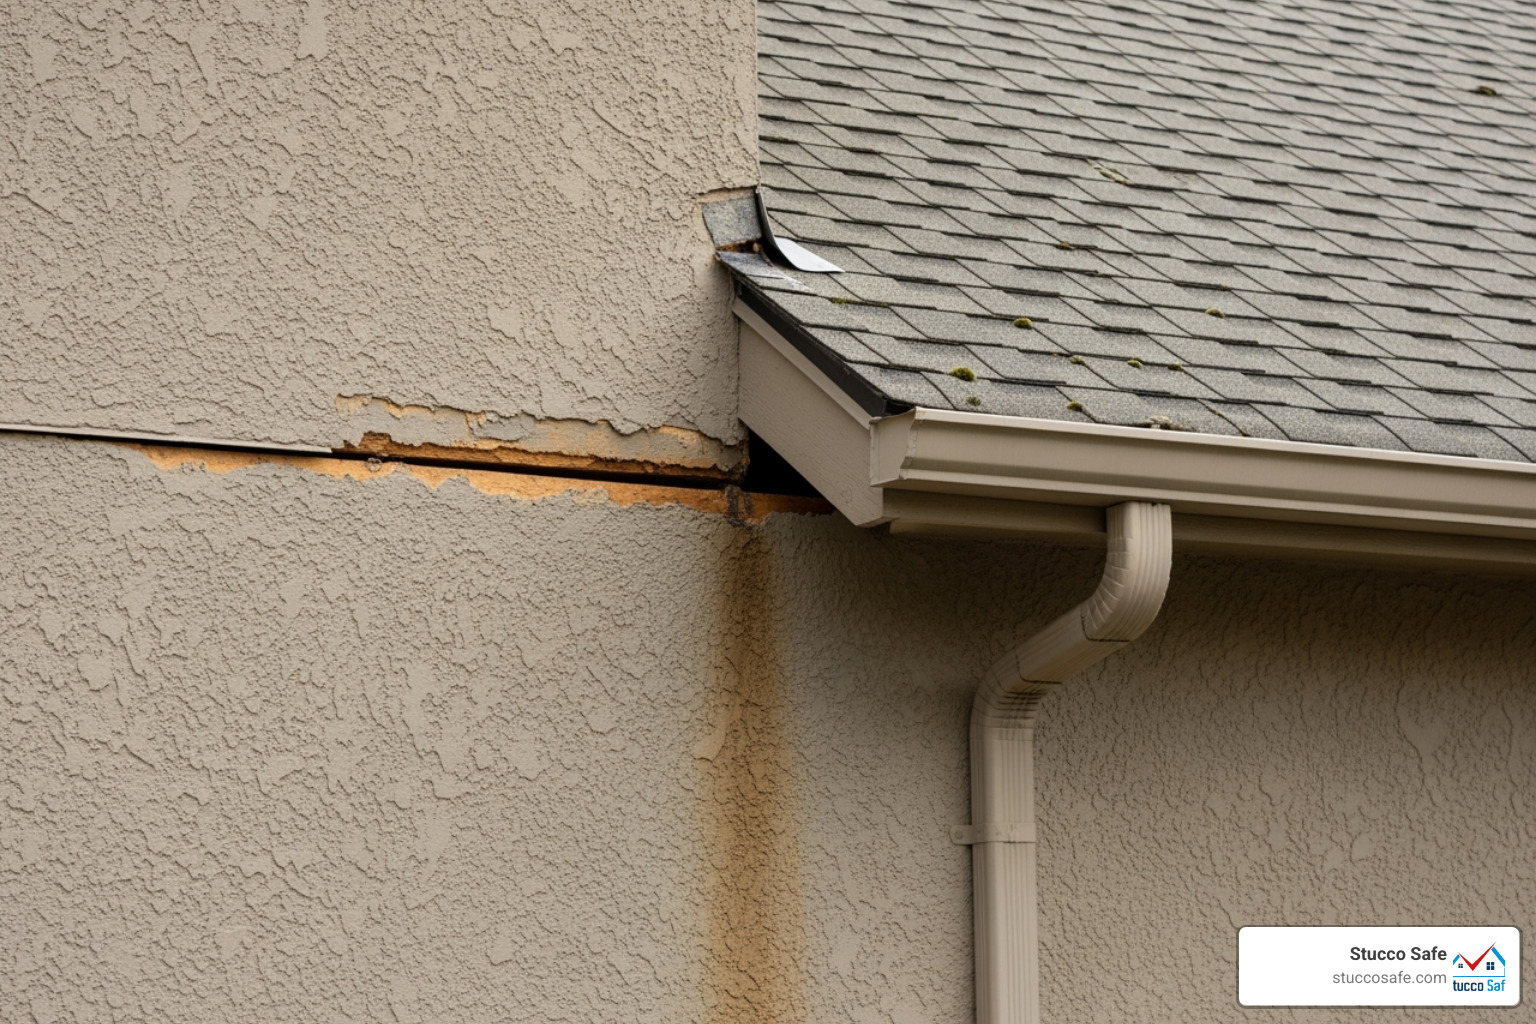
Flashing details deserve special attention because proper flashing is what keeps water moving away from vulnerable areas. We inspect head flashings above windows and doors, diverter flashings at roof-to-wall intersections, and cap flashing on balcony walls. Missing kickout flashing at roof eaves is such a common problem that we’ve seen it cause thousands of dollars in water damage to otherwise sound homes.
Clearances from grade and roofs might sound technical, but the concept is simple: stucco needs breathing room. We verify that your stucco system sits at least 4 inches above soil, 2 inches above hard surfaces like concrete or pavers, and 2 inches above roof coverings. When stucco sits too close to these surfaces, moisture wicks up into the system, and you’re inviting both water damage and pest problems.
Invasive Test Results
Visual observations are valuable, but they only reveal surface-level issues. To truly understand your stucco’s health, we need to look beneath the exterior—and that’s where forensic testing becomes essential.
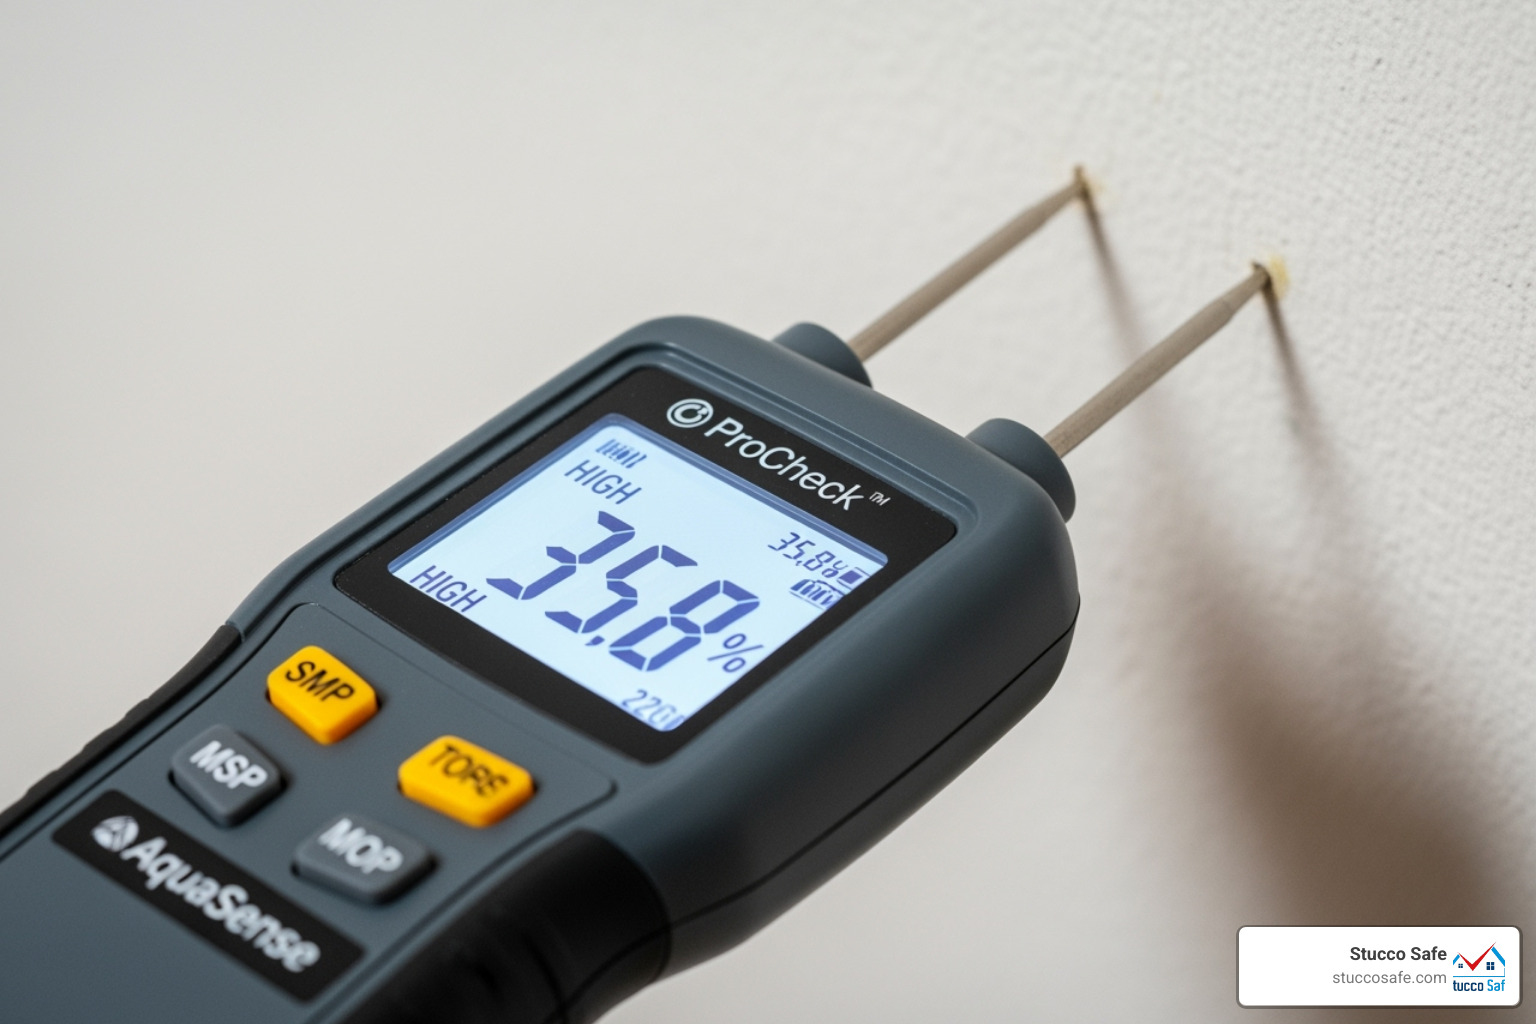
Moisture meter readings form the foundation of invasive testing. We use specialized equipment like the Delmhorst BD-2100 or Extech M055 moisture probe meters to detect moisture hiding behind your stucco. These meters give us readings across test ranges—typically low (6-13%), medium (13-19%), and high (19%+). These numbers represent relative moisture values, not exact water content percentages. Occasionally, hidden metal or wiring can create false readings, but experienced inspectors like us have learned to recognize and account for these anomalies.
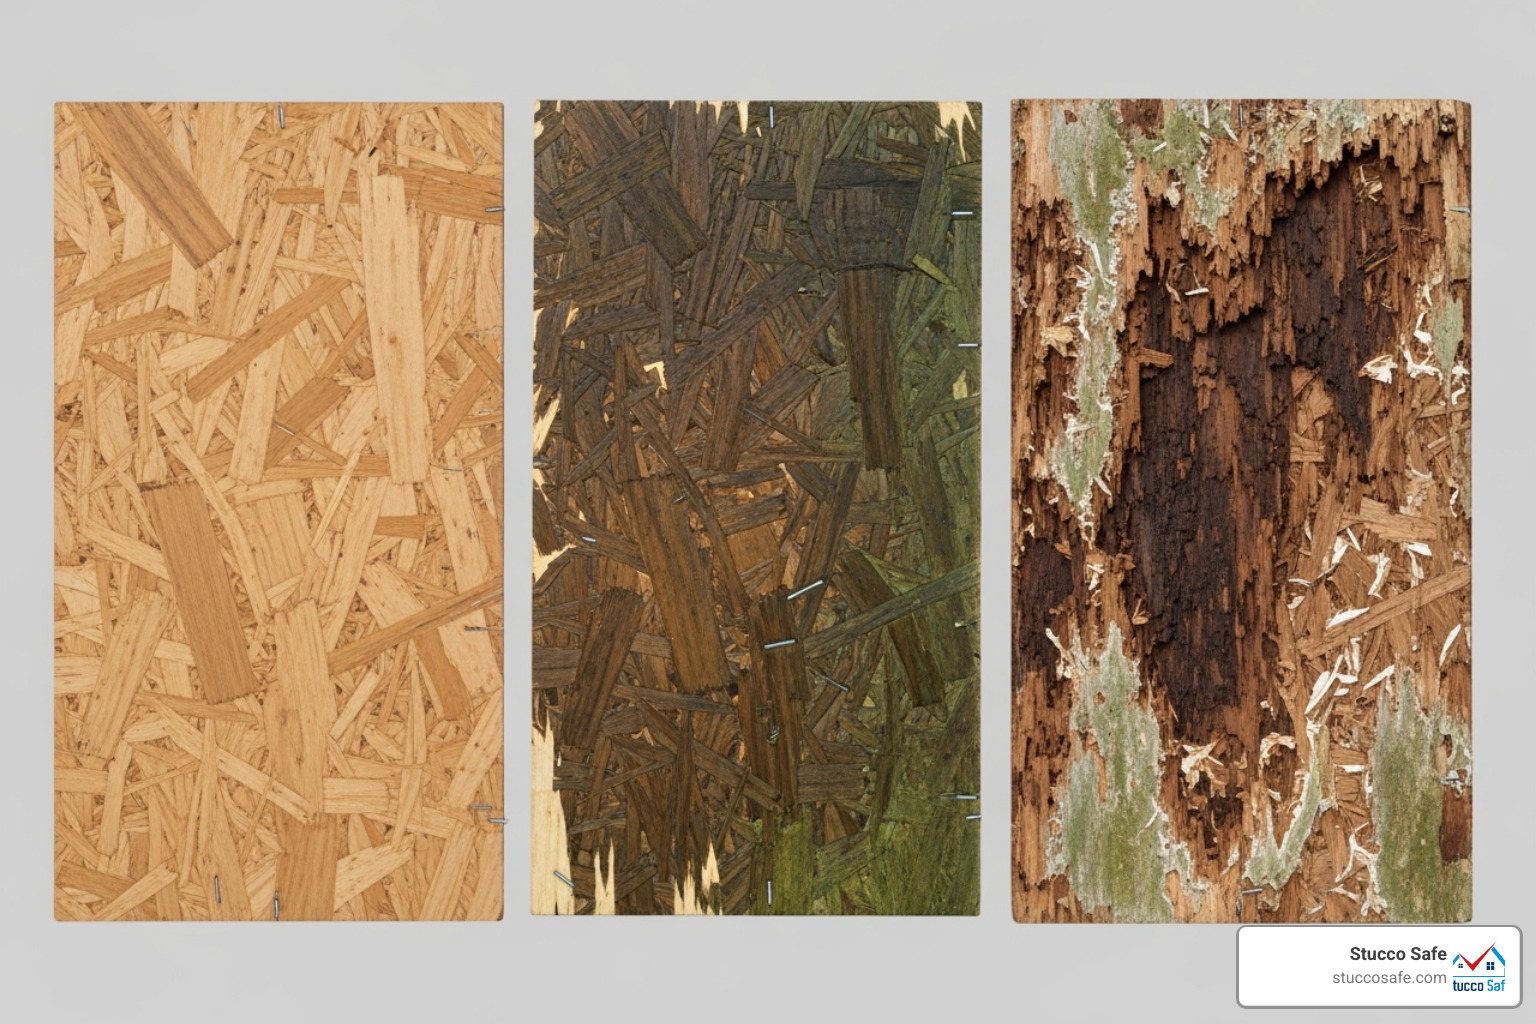
Substrate condition tells us whether moisture has already caused damage. The substrate—usually OSB plywood or oriented strand board—sits directly behind your stucco. When we probe areas with liftd moisture readings, we’re feeling for firmness. A firm substrate means no apparent damage yet. Semi-firm or semi-soft indicates early deterioration is underway. Rotted or nonexistent substrate? That’s a serious red flag requiring immediate attention and likely significant repairs.
Probe locations mapping is where our meticulous documentation pays off. For every invasive test point, we record the exact location using a grid system, take a photograph, and note the corresponding moisture percentage. This detailed mapping doesn’t just identify problem areas—it creates a permanent record you can reference during repairs or share with contractors.
Specialized equipment extends beyond basic moisture meters. We sometimes use thermal infrared imaging to detect temperature variations that suggest hidden moisture. While infrared cameras are excellent screening tools, they can’t definitively confirm moisture presence—that still requires invasive probing. Our certified inspectors are trained to use all these tools effectively and interpret the results accurately.
Recommendations and Next Steps
The most valuable part of any stucco inspection report sample is the recommendations section. This is where technical findings transform into a practical action plan you can actually use.
Repair priorities organize the chaos. We categorize every recommendation by urgency and severity because not all problems demand immediate action. High moisture readings—29% or above—combined with structural damage always top the priority list, often requiring partial system removal to assess and repair the underlying damage. Liftd moisture levels in the 21-29% range with semi-firm substrate might be manageable with targeted remediation rather than full replacement.
Maintenance schedules help you stay ahead of problems. Our reports include specific timelines for ongoing care: replace sealants every 2-3 years before they fail, and apply high-quality elastomeric coatings or paint every 5-10 years to prevent staining, seal minor cracks, and improve waterproofing. Regular maintenance costs far less than emergency repairs.
Recommended contractor qualifications matter more than most homeowners realize. We emphasize hiring qualified stucco waterproofing contractors with at least ten years of experience, general liability insurance of $1,000,000 or more, and written transferable warranties covering at least two years. Ideally, repairs should be monitored by a Certified Stucco Inspector to ensure the work actually fixes the underlying problems.
Further investigation needs sometimes arise when our inspection reveals issues requiring more intrusive analysis. This might include core sampling to visually inspect structural wood damage, or consulting with a structural engineer for complex foundation or framing concerns. We’ll always be clear about when you need additional expertise beyond our scope.
Visual vs. Invasive: A Stucco Inspection Report Sample Comparison
Not all stucco inspections are created equal. The difference between a visual and an invasive inspection is significant, and the resulting reports reflect this gap in detail. A visual inspection can identify surface-level problems, but an invasive inspection provides the forensic data needed to understand what’s happening behind the stucco.
| Feature | Visual Inspection Report | Invasive Inspection Report |
|---|---|---|
| — | — (Srivastava, S. M. (n.d.). Sample Insurance Inspection Report 1. Scribd. Retrieved October 26, 2023, from https://www.scribd.com/document/883772276/Sample-Insurance-Inspection-Report-1)* |
Interpreting Report Findings: From Moisture Readings to Repairs
Receiving a multi-page report can be overwhelming. Understanding the key findings, especially moisture readings and common deficiencies, is crucial for making informed decisions. This section breaks down what the technical jargon really means for your property.
Decoding Moisture Meter Readings
Understanding moisture readings is like learning your home’s secret language. Our moisture meters provide relative values, not absolute water content. Here’s how we interpret them for your stucco inspection report sample:
- Low Moisture (6-15%): Good news! This range typically indicates a dry and healthy stucco system.
- Liftd Moisture (16-28%): This is where we start to pay close attention. Readings in this range suggest a potential for moisture accumulation. If the substrate is firm, it might be manageable with proper remediation. However, sustained readings of 19% or more can cause wood and other organic materials to deteriorate.
- High Moisture (29%+): This is a significant concern. Readings in this category are usually associated with structural damage. When we see numbers this high, it often means the system needs to be removed locally to assess and repair the underlying substrate and framing.
- Wood Deterioration Threshold (19%+): This is a critical benchmark. If wood moisture content stays at or above 19% for a sustained period, the risk of wood rot and decay significantly increases.
- Substrate Condition (Firm vs. Soft): We don’t just look at the numbers; we feel the substrate. A firm substrate with liftd moisture might indicate a recent leak or an area that retains moisture but hasn’t yet caused significant damage. A semi-soft or nonexistent substrate, especially with high moisture, is a clear sign of ongoing deterioration and potential structural compromise.
Common Issues Found in a Stucco Inspection Report Sample
Many problems identified in a stucco inspection report sample stem from common installation flaws or neglected maintenance. Here are some of the most frequent culprits we uncover:
- Sealant Failure (windows, doors): This is one of the most common issues. Sealants around windows, doors, and other penetrations degrade over time, cracking, separating, or losing adhesion. Since sealants are suggested to be replaced every 2-3 years, many homes are overdue for this critical maintenance.
- Missing Kickout Flashing: At points where a roofline terminates against a vertical stucco wall, kickout flashing is essential. Without it, rainwater runs directly down the wall, often behind the stucco, leading to severe moisture intrusion.
- Improper Clearances (grade, hard surfaces): Stucco systems require specific clearances to prevent moisture wicking. A minimum clearance of 4″ above grade (soil), 2″ above hard surfaces (like patios or sidewalks), and 2″ above roof coverings is essential. When stucco touches these surfaces, it acts like a sponge, drawing moisture into the wall system.
- Hairline and Structural Cracks: Hairline cracks (generally 1/16 of an inch) are common in stucco and should be monitored and sealed. However, larger, thicker cracks or those around windows and doors can indicate more serious issues, including water damage or structural movement.
- Penetration Sealing Issues: Any penetration through the stucco—such as dryer vents, hose bibs, electrical outlets, or light fixtures—creates a potential entry point for water if not properly flashed and sealed. We often find missing or inadequate sealants at these vulnerable locations.
- Staining and Efflorescence: Discoloration like mildew, algae, or reddish rust stains on stucco surfaces often signifies excessive moisture exposure. Efflorescence, a white powdery substance, indicates water is moving through the stucco and leaching out salts.
From Report to Resolution: Typical Repair Recommendations
Once we’ve identified the issues in your stucco inspection report sample, the next step is to outline the path to resolution. Our recommendations are practical, detailed, and aimed at long-term protection.
- Sealant Replacement (2-3 year lifespan): We’ll recommend that a qualified stucco waterproofing contractor touch up or replace all failing sealants around doors, windows, and penetrations. Using high-quality, low-modulus sealants (like NP1 or Dow Corning 795) is crucial for durability and flexibility.
- Elastomeric Coatings (5-10 year lifespan): For overall waterproofing and to help manage hairline cracks, we often suggest applying a ‘top-of-the-line’ elastomeric coating every 5-10 years. These coatings provide an extra layer of protection against wind-driven rain.
- Crack Repair and Patching: Hairline cracks should be sealed and painted. Thicker cracks may need to be ground out, re-textured, and then sealed to restore the stucco’s integrity and appearance.
- Flashing Installation/Retrofit: This is a big one. We’ll recommend installing or retrofitting missing kickout flashing, ensuring proper head and pan flashing around windows and doors, and adding cap flashing to horizontal architectural elements like balcony walls or accent bands.
- Substrate and Structural Wood Repair: If our invasive testing reveals soft, semi-soft, or nonexistent substrate, we’ll recommend opening those areas. The goal is to expose the underlying structure, repair any confirmed substrate or frame damage, and reinstall the stucco system according to current industry standards. This might involve core sampling or even a partial tear-off to ensure all damage is addressed.
- Importance of Qualified Contractors: We cannot stress this enough: all repairs should be performed by qualified stucco remediation contractors. We recommend seeking contractors with a minimum of ten years of experience in stucco repair, general liability insurance of at least $1,000,000, and a written transferable warranty on work and materials for at least two years. We also recommend that repairs be monitored by a Certified Stucco Inspector to ensure quality and adherence to best practices.
Frequently Asked Questions about Stucco Inspection Reports
What are the limitations of a stucco inspection report?
While thorough, a stucco inspection report sample does have inherent limitations. It represents a point-in-time assessment, meaning it reflects the condition of the property at the moment of inspection. It is not a guarantee against future issues, as new problems can arise from weather events, shifting foundations, or neglected maintenance.
Our inspections are also limited by accessibility. Areas that are unsafe to access, too high, or obstructed by vegetation, furniture, or permanent fixtures cannot be fully evaluated. Furthermore, while moisture meters are invaluable indicators, they are not always infallible. False readings can occasionally occur due to hidden construction elements, metals, or electrical wiring within the walls. However, our experienced inspectors are trained to differentiate these anomalies from actual moisture. Our stucco inspection is specifically focused on moisture and mold prevention within the stucco system, and it is not a substitute for a general home inspection or a structural engineering report.
How does a stucco report help maintain my property’s value?
A comprehensive stucco inspection report sample is a powerful tool for maintaining and even enhancing your property’s value. Here’s how:
- Proactive Problem Solving: It helps you identify and address issues like sealant failures, moisture intrusion, or improper flashing before they escalate into costly structural damage, wood rot, or widespread mold. Proactive repair is almost always less expensive than reactive remediation.
- Informed Decision-Making: For home buyers, a clean or well-addressed report provides peace of mind and can be a strong negotiation point. For sellers, addressing issues upfront can prevent delays or price reductions during a transaction.
- Documentation for Resale: A detailed report, especially one that includes photographic evidence and records of completed repairs, serves as invaluable documentation. It demonstrates to potential buyers that the home has been diligently maintained and that any stucco-related concerns have been professionally handled. This transparency can significantly increase buyer confidence and property appeal.
- Long-Term Protection: Following the maintenance guidelines in your report, such as annual inspections and timely sealant replacement, ensures the longevity of your stucco system, protecting your investment for years to come.
What are the next steps after receiving a stucco report?
Receiving your stucco inspection report sample is just the beginning of protecting your home. Here’s what we recommend you do next:
- Review with Your Inspector: We encourage you to discuss the findings with your inspector. We’re here to explain any technical jargon, clarify observations, and ensure you fully understand the implications of the report. Stucco Safe offers a free consultation after delivering your report.
- Obtain Repair Estimates: If repairs are recommended, seek quotes from multiple qualified and certified stucco remediation contractors. We can often provide a list of reputable professionals in Southeastern Pennsylvania, New Jersey, and Delaware who are experienced in addressing the specific issues found in our reports. Be sure to provide them with your full report.
- Schedule Repairs: Once you’ve chosen a contractor, schedule the necessary repairs promptly. Addressing issues quickly can prevent further damage and more extensive, costly remediation down the line. The average cost of stucco repair can range from $500 to $3,000, but major issues can run into the hundreds of thousands of dollars.
- Follow-Up Inspection: After repairs are completed, we highly recommend a follow-up inspection (ideally within three months) to verify that the work was done correctly and effectively. This ensures that the issues have been fully resolved and moisture levels remain acceptable. We also suggest annual inspections for ongoing maintenance, which can serve as valuable documentation for homeowners.
Conclusion: Using Your Report to Protect Your Investment
A detailed stucco inspection report sample is more than just a list of problems; it’s a blueprint for protecting your home’s structural integrity and value. Understanding what a comprehensive report contains, especially one based on invasive testing and forensic analysis, empowers you to address deficiencies effectively and maintain your stucco system for years to come.
For a forensic-level analysis in Southeastern Pennsylvania, New Jersey, or Delaware, a certified inspection from Stucco Safe provides the clarity needed to make confident decisions about your property. Our stucco inspections vary in cost from $495 to $1595 or more for very large homes, a small investment compared to the potential costs of undetected damage. We use forensic testing methods to identify latent building defects, ensuring we uncover issues that are often invisible on the surface. Don’t let your home cry for help; let us provide you with the detailed understanding you need.
Learn more with our Ultimate Guide to Stucco Inspection

