
The DIY Guide to Patching Your Stucco Like a Pro
Why Knowing How to Fix Stucco on a House Can Save You Thousands
Knowing how to fix stucco on a house is one of the most valuable skills a homeowner can have — because small problems become expensive ones fast.
Here’s a quick overview of the basic repair process:
- Identify the damage — cracks, bubbles, holes, or dark stains
- Remove loose stucco — use a hammer, chisel, and wire brush
- Repair the substrate — replace damaged mesh or builder’s paper if needed
- Apply stucco in layers — scratch coat, brown coat, then finish coat
- Match the texture — use a sponge float to blend with surrounding stucco
- Cure before painting — wait at least 28 days before applying exterior paint
Minor repairs can cost as little as $150 in materials and take about an hour of active work, spread over two days of curing time.
Stucco is tough. When properly installed, it can last 100 years. But it’s also porous — and water is almost always the culprit when things go wrong. A small crack or bubble on the surface can hide serious moisture damage in the wall beneath, affecting the wood sheathing and framing long before you see visible signs on the exterior.
That’s what makes stucco deceptive. The surface looks fine. The damage is already happening behind it.
Whether you’ve spotted a hairline crack near a window, noticed bubbling after heavy rain, or found chalky white streaks running down your wall, this guide walks you through exactly what to do — and when a DIY fix is enough versus when you need professional help.
I’m Gabe Kesslick, founder of Stucco Safe and an EDI Level 2 Certified Stucco Inspector with over two decades of experience in leak detection and repair — including hundreds of cases where homeowners needed to understand how to fix stucco on a house before hidden moisture caused structural damage. My goal here is to give you the clearest, most practical guide possible so you can approach your repair with confidence.

How to fix stucco on a house vocab explained:
Identifying Damage: When to Learn How to Fix Stucco on a House
Before you grab a trowel, we need to play detective. Stucco damage is rarely just “on the surface.” In regions like Southeastern PA and Southern New Jersey, our homes face intense freeze-thaw cycles that turn tiny cracks into major entry points for water.

Recognizing Early Warning Signs
If you want to master how to fix stucco on a house, you have to recognize the symptoms of moisture intrusion:
- Efflorescence: These are white, hazy, or chalky streaks. They occur when moisture moves through the stucco, dissolving internal salts and depositing them on the surface as the water evaporates.
- Bubbling and Blistering: If your stucco looks like it’s developing “hives,” air or water is trapped behind the finish coat.
- Dark Blotches: These “wet spots” that don’t go away after the sun comes out are a major red flag for trapped moisture.
- The Rubber Mallet Test: Gently tap your walls with a rubber mallet. A sharp, solid “thwack” is good. A hollow, drum-like sound indicates delamination—the stucco has separated from the lath.
Assessing DIY Feasibility vs. Professional Need
We love a good DIY project, but we also know that a poorly-done repair can be a disaster because of stucco’s permanence.
| Damage Type | DIY or Pro? | Action |
|---|---|---|
| Hairline cracks (thinner than a credit card) | DIY | Seal with stucco patch or sanded caulk. |
| Small holes (impact damage) | DIY | Patch using the three-coat method. |
| Cracks wider than a credit card | Pro | Indicates structural settling or major moisture. |
| Widespread bubbling/staining | Pro | Requires forensic testing to check for rot. |
If you are dealing with minor cosmetic issues, you can certainly handle it. For larger projects, you might Find a Painter to help with the finish, but if you suspect structural issues, a professional inspection is the only way to be sure. At Stucco Safe, we’ve seen homes built between 1993 and 2006 with failure rates as high as 90% due to poor building codes. In these cases, a simple patch is like putting a band-aid on a broken leg.
For more details on crack assessment, check our guide on how to repair exterior stucco cracks.
Essential Tools and Materials for Stucco Repair
To fix stucco like a pro in Villanova or Cherry Hill, you need the right kit. You wouldn’t perform surgery with a butter knife, and you shouldn’t patch your home with a garden spade.
Choosing the Right Stucco Mix
Most modern repairs use a “one-coat” or “three-coat” system. For a durable repair, we recommend a mix of:
- Portland Cement & Hydrated Lime: The “glue” of the system.
- Mason Sand: Provides the bulk and texture.
- Acrylic Bonding Agent: Our “secret weapon” for making new stucco stick to the old stuff.
Pro Tip: Mix your stucco to the consistency of thick peanut butter or buttercream frosting. It should hang onto your trowel without sliding off. Stucco mix remains usable for only 30 to 90 minutes after water is added, so work in small batches!
Safety and Preparation Gear
- 6-in-1 tool: Perfect for scraping away loose debris.
- Hawk and Trowel: The hawk holds the “mud,” and the trowel applies it.
- Floats: Use a red sponge float to smooth the base coat and a green sponge float to swirl the finish texture.
- Safety Gear: Stucco is alkaline and can cause chemical burns. Always wear waterproof gloves and safety goggles.
The Step-by-Step Process for Patching Stucco
Ready to get your hands dirty? Here is the meat and potatoes of how to fix stucco on a house.
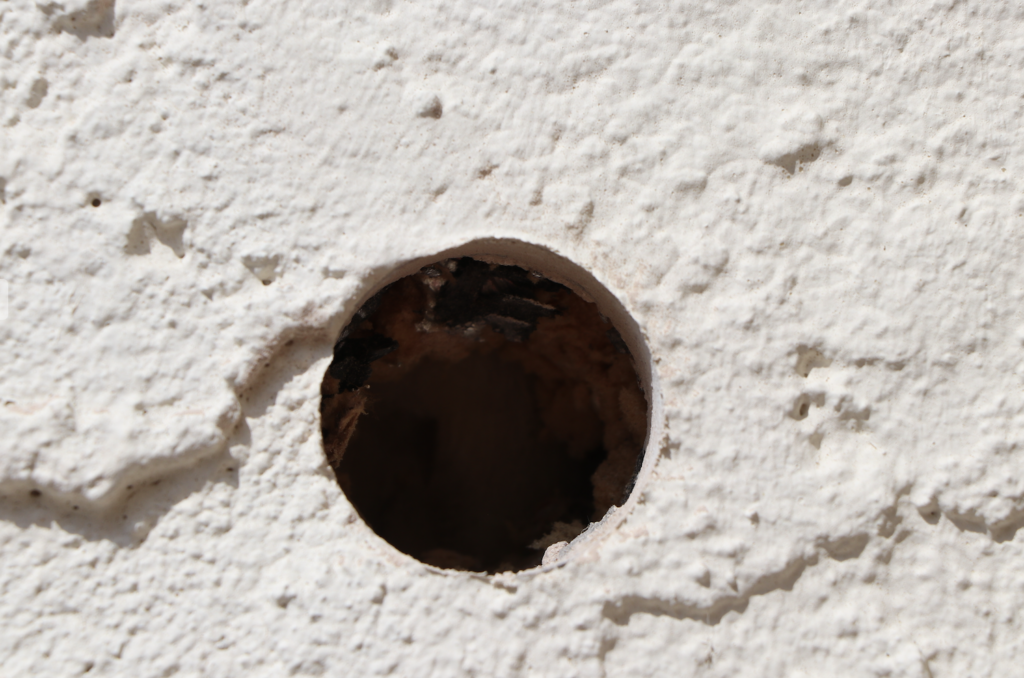
Preparing the Substrate and How to Fix Stucco on a House Hole
You can’t just slap new mud over old paint. It won’t stick.
- Clear the Area: Use a hammer and cold chisel to break off all loose or crumbling stucco. Chip away at the edges until you reach “sound” stucco that is firmly adhered to the wall.
- Clean the Edges: Use a wire brush to scrub the edges. You want a clean, stable surface for bonding.
- Inspect the Lath: If the metal mesh (lath) behind the stucco is rusted through, cut it out and nail in a new piece of galvanized mesh using roofing nails. If you see wood lath, cover it with two layers of grade-D builder’s paper first.
- The Mist Method: This is crucial. Before applying your mix, mist the area with a hose. You want the surface damp, but not dripping. This prevents the old wall from “sucking” the moisture out of your new patch, which causes cracking.
For a deeper dive into holes, see how to fix a hole in stucco.
Applying the Coats and How to Fix Stucco on a House Crack
Traditional stucco is applied in layers. Don’t try to fill a deep hole in one go!
- The Scratch Coat: Apply a 1/4-inch layer. Once it loses its “wet” sheen, use a scrap of mesh or a specialized tool to “scratch” horizontal grooves into it. This provides a “key” for the next layer. Let this cure for 24-48 hours.
- The Brown Coat: Mist the scratch coat and apply a 3/8-inch layer. Trowel it smooth and flush it to about 1/8 inch below the existing surface.
- Curing: Keep the patch moist by lightly misting it once or twice a day.
For visual learners, we highly recommend watching Kirk’s videos for technique to see the “sling and smooth” motion in action.
Mastering the Finish: Texture Matching and Painting
This is where the “art” comes in. Getting the stucco to stick is science; making it disappear is art.
Recreating Common Stucco Textures
- Dash Finish: Tossing wet stucco onto the wall with a brush or sprayer for a bumpy look.
- Sand Finish: Using a green sponge float in circular motions to bring the sand aggregate to the surface. This is common in places like King of Prussia and West Chester.
- Lace/Skip Trowel: Applying a texture and then “knocking it down” with a clean trowel.
Expert Advice: Practice your texture on a piece of cardboard or plywood before touching the house. Matching the grit (like a 20/30 texture) is essential for a seamless look. Check out Kirk Giordano videos on YouTube for masterclasses on matching nearly any finish.
Curing and Final Painting
Do not paint immediately! Fresh stucco is highly alkaline and will “burn” through standard paint.
- The 28-Day Rule: You must wait at least 28 days for the pH levels to neutralize.
- Choose the Right Paint: Use a high-quality elastomeric paint or a 100% acrylic exterior paint. These are “breathable,” allowing water vapor to escape while keeping liquid rain out.
- Application: Use a roller with at least a 1-inch nap to ensure the paint gets into all the nooks and crannies of the texture.
Common Mistakes and Preventive Maintenance
Even the best DIYers make mistakes. Here is how to avoid the most common pitfalls when learning how to fix stucco on a house.
Avoiding Patch Failure
- Temperature Matters: Only work when temperatures are between 40 and 90 degrees Fahrenheit. If it’s too hot or windy, the stucco dries too fast and cracks. If it’s too cold, it won’t cure.
- Direct Sunlight: Try to work in the shade. If you must work in the sun, cover your patch with plastic sheeting to slow down the drying process.
- Ignoring the Source: If a leaky window caused the damage, patching the stucco without fixing the window is a waste of time. The patch will fail again.
For more maintenance tips, read our tips for repairing small cracks.
Long-Term Stucco Care
- Clean Your Gutters: Overflowing gutters dump massive amounts of water directly onto your stucco walls.
- Check Weep Screeds: Ensure the bottom edge of your stucco (the weep screed) isn’t buried in mulch or dirt. Stucco needs to “drain” at the bottom.
- Regular Inspections: We recommend a professional inspection every two years, especially if you live in a high-moisture area like Toms River or Wilmington.
Frequently Asked Questions about Stucco Repair
How long should stucco repairs cure before painting?
You should wait a minimum of 28 to 30 days. This allows the chemical curing process to complete and the pH levels to drop. Painting too early leads to peeling and discoloration.
Can I apply new stucco over old, painted stucco?
Generally, no. Stucco needs a porous surface to bond to. If your house is painted, you must either remove the paint, use a specialized bonding agent, or install new metal lath over the old surface to give the new stucco something to “grip.”
What is the typical cost of DIY stucco repair vs. professional services?
A DIY repair for a small area typically costs around $150 in materials. Professional minor repairs usually range from $150 to $500. However, if you need a full professional stucco inspection to find hidden leaks, those vary from $495 to $1595 or more for very large homes. While $150 sounds better, it can cost $70,000 more to remove all stucco than to fix a localized issue early.
Conclusion
Mastering how to fix stucco on a house is a great way to maintain your home’s curb appeal and protect your investment. By following the three-coat method, respecting curing times, and using the right tools, you can achieve professional-grade results.
However, stucco is a complex system. Often, the cracks you see are just the tip of the iceberg. If you see persistent staining, smell mildew, or notice cracks wider than a credit card, it’s time to call in the experts.
At Stucco Safe, we specialize in forensic testing and moisture detection. Our certified inspectors use state-of-the-art equipment to see what’s happening behind your walls, ensuring your home stays structural sound for years to come. We proudly serve Southeastern PA, New Jersey, and Delaware, including West Chester, Villanova, Cherry Hill, and Princeton.
Don’t guess when it comes to your home’s “protective skin.” Schedule a professional inspection for your stucco house today and get the peace of mind you deserve.