
Anchor Screw into Stucco: Securely in 2025
Why Proper Stucco Anchoring Prevents Costly Damage
To anchor screw into stucco, you need specialized techniques and materials to avoid cracking, moisture intrusion, and structural damage. Stucco’s hard, brittle surface demands specific anchors and careful installation.
Quick Answer: Essential Steps to Anchor Screw into Stucco
- Use masonry screws or stucco anchors – Never use standard wood screws.
- Drill pilot holes with a masonry bit slightly smaller than the anchor.
- Apply painter’s tape over the drilling area to prevent chipping.
- Insert anchor and tap flush with the stucco surface.
- Drive screw slowly to avoid overtightening and cracking.
- Seal with silicone caulk to prevent water intrusion.
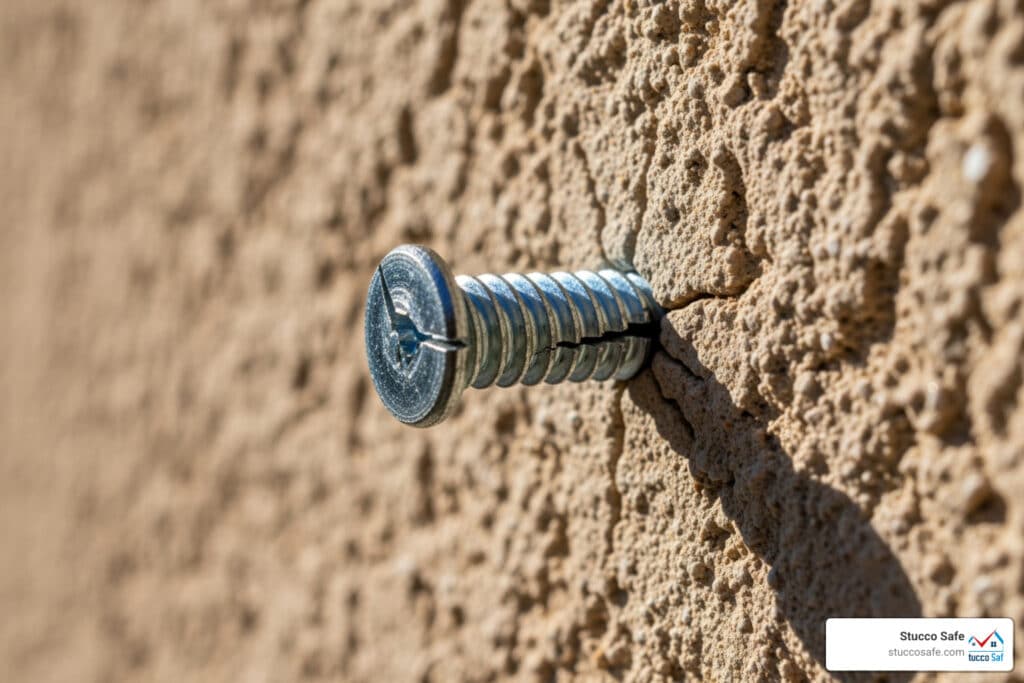
Stucco is hard like concrete and requires screws made for tough surfaces. Improper drilling can cause cracks, and poor sealing can lead to moisture problems costing thousands in remediation.
The most common mistakes homeowners make:
- Using regular wood screws instead of masonry screws
- Skipping the pilot hole step
- Drilling too fast or with too much pressure
- Forgetting to seal exterior holes against moisture
Weight capacity depends on anchor type:
- Light-duty plastic anchors: up to 20 pounds
- Medium-duty expansion anchors: 20-50 pounds
- Heavy-duty toggle bolts: over 50 pounds
As Gabe Kesslick, an EDI Level 2 Certified Stucco Inspector with over 20 years of experience, I’ve seen many cases where improper anchor screw into stucco installation led to moisture intrusion and costly damage. Understanding the right techniques protects your investment and your home’s structural integrity.

Understanding the Basics: Stucco, Screws, and Anchors
Stucco is a cement-based mixture that creates a surface that’s both hard like concrete and quite brittle. This combination makes it tricky to anchor screw into stucco. Standard wood screws are ineffective; they either fail to penetrate the surface or create a crumbly mess with no holding power.
For a secure hold, you need the right hardware. Masonry screws, made of hardened steel with self-tapping threads, are designed to cut through tough materials like stucco. For outdoor use, choose screws with a corrosion-resistant coating to prevent rust stains.
For even more holding power, stucco anchors are the ideal solution. When a screw is driven into an anchor, the anchor expands, creating a strong friction grip inside the pre-drilled hole. This expansion mechanism is key because it distributes the weight of the hung item across a larger area. This prevents stress from concentrating on one point, which could crack the brittle stucco and lead to pull-out failure.
| Anchor Type | Best For | Weight Capacity | Pros | Cons |
|---|---|---|---|---|
| Plastic Anchors | Light decorations, indoor use | Up to 20 pounds | Cheap and easy to install | Limited strength, not great outdoors |
| Sleeve Anchors | Medium to heavy items | 20-50 pounds | Versatile and strong | Need precise drilling, hard to remove |
| Tapcon Screws | Direct fastening projects | 20-50 pounds | No separate anchor needed | Blue color shows, requires careful drilling |
| Toggle Bolts | Heavy items in hollow areas | Over 50 pounds | Excellent for big loads | Need larger holes, tricky installation |
| Wedge Anchors | Very heavy structural items | Over 50 pounds | Incredibly strong | Permanent installation, deep drilling required |
The Difference Between Masonry, Stucco, and Standard Screws
- Standard wood screws are made of soft metal with coarse threads designed for wood fiber. They cannot grip dense, brittle stucco.
- Masonry screws (like Tapcon) are made from hardened steel with aggressive self-tapping threads to cut into materials like concrete and stucco. They often have a blue corrosion-resistant coating for outdoor durability.
- Stucco-specific screws are often colored to blend with stucco finishes and are designed to work with plastic or nylon anchors for a secure grip.
Using the correct fastener is essential when you anchor screw into stucco for a secure, lasting result.
How Stucco Anchors Provide a Secure Grip
When you drive a screw into a stucco anchor, it expands outward, creating a friction grip distributed across the interior surface of the hole. This mechanical lock distributes weight evenly, preventing the concentrated stress that can crack brittle stucco. By spreading the load, anchors prevent pull-out and protect your wall from damage. Quality anchors made from nylon or high-grade plastic conform to the drilled hole, maximizing contact for superior holding power.
For detailed guidance on choosing the perfect anchor for your specific project, check out our comprehensive guide on the best anchors for stucco.
Gearing Up: Tools and Preparation for Stucco Anchoring
Having the right tools on hand before you anchor screw into stucco is crucial for a smooth project. A standard power drill is sufficient; avoid using the hammer setting on stucco, as it can cause damage.

Here is your essential tool list:
- Masonry drill bits: These are non-negotiable. Regular bits will quickly dull or break. For more on bit selection, see our guide on the best drill bit for stucco.
- Screwdriver or driver bits: Match these to your screw heads (Phillips, hex, etc.).
- Hammer: For gently tapping anchors flush with the surface.
- Safety gear: Safety goggles and gloves are a must.
- Marking tools: A level, measuring tape, and pencil ensure accurate placement.
- Painter’s tape: This is a key tool for preventing the stucco from chipping during drilling.
- Waterproof silicone caulk: Essential for sealing exterior holes against moisture.
Preparing the Stucco Surface
Proper surface preparation ensures a clean, professional result and prevents damage.
- Clean the surface: Use a stiff brush to remove any loose dust, dirt, or debris. Ensure the area is completely dry before drilling.
- Mark your location: Use a measuring tape, pencil, and level to mark the exact spot for your anchor. Double-check that your placement is level before drilling.
- Apply painter’s tape: Place a piece of painter’s tape over your marked drilling spot. This simple step provides support to the stucco surface and significantly reduces the chance of chipping or cracking around the hole.
This preparation adds only a few minutes but leads to cleaner holes, better anchor placement, and a lower risk of damaging your stucco.
The Step-by-Step Guide to Anchor Screw into Stucco
With your surface prepped, you can now properly anchor screw into stucco. This process requires precision and a focus on weatherproofing to protect your home.

Drilling a Pilot Hole to Anchor Screw into Stucco
Drilling correctly is critical to avoid cracking the brittle stucco.
- Select the right bit: Use a masonry drill bit with a diameter that matches your anchor size (e.g., a 3/16″ bit for a 3/16″ anchor).
- Drill slowly and steadily: Set your drill to a moderate speed and apply consistent pressure. Let the bit do the work. Rushing can cause damage.
- Skip the hammer setting: Do not use a hammer drill setting on the stucco layer. It’s too aggressive and can cause cracking. Steady rotational drilling is best.
- Control your depth: Drill just deep enough for the anchor to sit flush with the stucco surface. You can mark the depth on your drill bit with a piece of tape as a guide. For more details, see our guide on how to drill into stucco.
How to Properly Anchor Screw into Stucco
With the pilot hole drilled, the anchoring process is straightforward.
- Insert the anchor: Gently push the anchor into the pilot hole. It should fit snugly. If needed, use a hammer to tap it flush with the stucco surface.
- Drive the screw: Using a drill on a low torque setting or a screwdriver, drive the screw into the anchor. Go slowly to feel the screw engage.
- Avoid overtightening: This is a common mistake that can crack the stucco or strip the anchor. Drive the screw until it is snug and the item is secure against the wall, then stop. Trust the anchor to do its job.
Sealing the Hole to Prevent Moisture Damage
For any exterior applications, this final step is mandatory to prevent costly water damage.
- Apply waterproof silicone caulk: Place a neat bead of caulk around the base of the screw or hardware where it meets the stucco. For extra protection, you can apply a small amount of caulk into the hole before inserting the anchor.
- Prevent water intrusion: This simple seal prevents water from seeping behind the stucco, which can cause rot, mold, and structural damage. Sealing protects both your new installation and your entire wall system.
Alternatives and When to Call for Backup
While it’s useful to know how to anchor screw into stucco, it’s also important to recognize when a different approach is needed. Some projects are too risky for DIY and require professional help.

Adhesive Hooks for Lightweight Items
For very light decorations like string lights or small wreaths, adhesive hooks can be a drill-free alternative. Success depends on a few factors:
- Surface Preparation: The stucco must be perfectly clean. Scrub away dirt and wipe the area with rubbing alcohol before application.
- Weight Limits: Always adhere to the manufacturer’s specified weight limitations. These hooks are for lightweight items only.
- Weather: Extreme temperatures and direct sunlight can weaken the adhesive over time. Apply them in mild, dry weather for the best results.
Adhesive hooks are a temporary solution for light-duty applications. For more ideas, see this guide on hanging items on stucco walls.
When to Consider a Professional
Sometimes, the smartest and safest choice is to call a professional. Certain projects carry risks that can lead to costly mistakes. Call for help when dealing with:
- Hanging very heavy objects: Items like large TVs or heavy trellises are subject to complex forces like wind load and vibration. Professionals use specialized fastening systems (e.g., chemical anchors) to support these loads safely.
- Older, brittle stucco: Older stucco can be unpredictable and may crack or crumble easily when drilled.
- Visible signs of distress: If you see cracks, bulging, or water stains, do not drill. These are symptoms of underlying problems, and drilling can make them worse.
- Suspected moisture issues: This is the most dangerous scenario. Drilling into a wall with hidden moisture can accelerate damage, leading to extensive and expensive repairs.
This is where a professional assessment is invaluable. At Stucco Safe, our certified inspectors use forensic testing to identify hidden moisture and structural problems invisible from the surface. An inspection, which can cost from $495 to $1595, is a small investment compared to remediation costs that can run into the tens of thousands. We serve homeowners throughout Southeastern Pennsylvania, New Jersey, and Delaware, helping them avoid turning a small project into a major disaster.
Before you drill, protect your investment with a professional evaluation: More info about stucco inspection.
Frequently Asked Questions about Anchoring into Stucco
Here are answers to the most common questions homeowners have when they anchor screw into stucco.
How much weight can a stucco anchor hold?
The weight capacity is not a single number; it depends on several factors:
- Anchor Type: A basic plastic anchor may only hold up to 20 pounds, while medium-duty expansion anchors handle 20-50 pounds, and heavy-duty toggle or wedge anchors can support over 50 pounds. Always check the manufacturer’s specifications on the packaging.
- Substrate Material: An anchor secured into a wood stud behind the stucco will hold significantly more weight than one relying only on the stucco in a hollow cavity.
- Installation Quality: A properly installed anchor will meet its rated capacity. An anchor that is overtightened or installed in the wrong size pilot hole will fail at a much lower weight.
Can I drill into stucco without an anchor?
In most cases, no. Stucco is brittle and often has a hollow space behind it. A screw driven directly into stucco will either crumble the material or have nothing to grip, resulting in a failed mount. The only exception is if you can locate and drill directly into a solid wood stud behind the stucco. Even then, you risk cracking the surface. For a reliable hold, always use a proper masonry anchor.
How do I remove a stucco anchor without damaging the wall?
Removing an anchor will always leave a hole, but you can minimize damage.
- Remove the screw from the anchor first.
- Extract the anchor gently. Use needle-nose pliers to work it out. Some anchors may break off inside the wall, which is acceptable. Tapcon screws are the easiest to remove, as you just unscrew them.
- Patch the hole. Use an exterior stucco patching compound or high-quality caulk to fill the hole. Larger holes may require a more involved repair.
For guidance on patching, see our guide on how to repair small cracks in stucco.
Conclusion
Learning to anchor screw into stucco correctly is a valuable skill for any homeowner. By following the proper steps, you can ensure your projects are secure and protect your home’s exterior from damage.
The key takeaways are simple: use the right materials (masonry screws and anchors), prepare the surface carefully (don’t forget the painter’s tape), drill slowly with a masonry bit, and seal all exterior holes with silicone caulk to prevent moisture intrusion.
Proper technique is about more than just a successful project; it’s about preserving your home’s value and avoiding costly repairs. A secure anchor protects your wall system for years to come.
However, before you drill, it is critical to know the condition of your wall. A perfectly installed anchor is useless if the wall is already compromised by hidden moisture or structural issues. Drilling into a damaged wall can lead to a catastrophe.
This is why Stucco Safe offers professional inspections. Our certified inspectors use forensic testing to identify hidden damage before it becomes an expensive disaster. An inspection costing $495 to $1595 is a wise investment compared to a remediation bill that could exceed $50,000.
Ready to tackle your stucco project with confidence? Start with the right materials by checking out our guide: More info about the best anchors for stucco.