
Best Anchors for Stucco Exterior: 3 Ultimate Choices
Why Choosing the Right Anchors Protects Your Home’s Value
Best anchors for stucco exterior depend on what you’re hanging. Here’s a quick guide:
| Load Type | Best Anchor | Weight Capacity | Common Uses |
|---|---|---|---|
| Light (Under 10 lbs) | Plastic sleeve anchors or nylon expansion anchors | 5-25 lbs | House numbers, small decorations, thermometers |
| Medium (10-50 lbs) | Metal sleeve anchors or concrete screws | 25-75 lbs | Handrails, hose reels, medium fixtures |
| Heavy (Over 50 lbs) | Wedge anchors or toggle bolts anchored into studs | 50-200+ lbs | Large shelving, structural supports, trellises |
| Critical for all: | Stainless steel or galvanized for outdoor use | N/A | Prevents corrosion and rust stains |
Stucco is hard yet brittle, completely different from drywall. Standard screws will crack the surface, fail to grip, and create moisture entry points that can lead to thousands in hidden water damage.
The real danger is hidden moisture. An improperly sealed hole allows water to soak the wood sheathing and framing behind the stucco. By the time you see stains, the internal damage can be severe. Homes built from 1993-2006 are especially vulnerable due to past building code issues.
Choosing the right anchor protects your home’s structural integrity and value. Every hole in stucco requires the correct anchor, a proper pilot hole, and a waterproof seal with silicone caulk.
As an EDI Level 2 Certified Stucco Inspector since 2001, I’ve seen countless cases where a few unsealed screw holes led to widespread moisture damage. This guide will show you how to use the best anchors for stucco exterior to make secure, damage-free attachments.

Why Stucco Demands Specialized Anchors
Understanding stucco’s unique composition is key to anchoring. It’s a multi-layered, cement-based material applied over a wire lath and substrate (wood or masonry), forming a rigid shell for your home.
Its hardness and brittleness make it durable but unforgiving to drill. Anchoring involves a complex system of finish, scratch, and brown coats, plus a moisture barrier. Standard fasteners fail in this layered structure. For more details, see our guide on the More info about the best anchors for stucco.
The Problem with Standard Screws
Using standard wood or drywall screws in stucco is a common mistake that leads to disaster. Stucco is too brittle to form threads, causing screws to loosen or crack the finish. The risks include:
- Insufficient Grip: Stucco is too hard and brittle to be threaded by a standard screw, resulting in a weak hold.
- Stress Concentration: The focused pressure of a screw can easily cause cracking and chipping.
- Water Entry Points: Any crack or loose fastener becomes an open invitation for moisture.
- Rust Stains: Non-corrosion-resistant screws will rust and leave permanent stains on your stucco.
- Fastener Failure: Without a proper grip, the screw will eventually fail, causing the hung item to fall.
Using the wrong screw can compromise your wall and lead to costly repairs. For more on screw selection, see our guide: More information on screw selection.
How Stucco Anchors Provide a Secure Hold
The solution is specialized stucco anchors, which work on an expansion principle rather than threading.
These anchors distribute the load to prevent cracks by using an expansion principle for a secure hold:
- Expansion Mechanism: Anchors expand inside a pre-drilled hole, creating a strong friction grip that locks them in place.
- Increased Surface Area: This expansion distributes force over a wider area, reducing the risk of cracking.
- Preventing Pull-Out: The expanding mechanism creates much higher pull-out resistance than a simple screw.
- Distributing Weight Evenly: Spreading the weight prevents strain on the brittle stucco surface.
Stucco anchors are engineered to grip the wall from within, providing a robust attachment. To learn about different anchor types, visit: Learn about different anchor types.
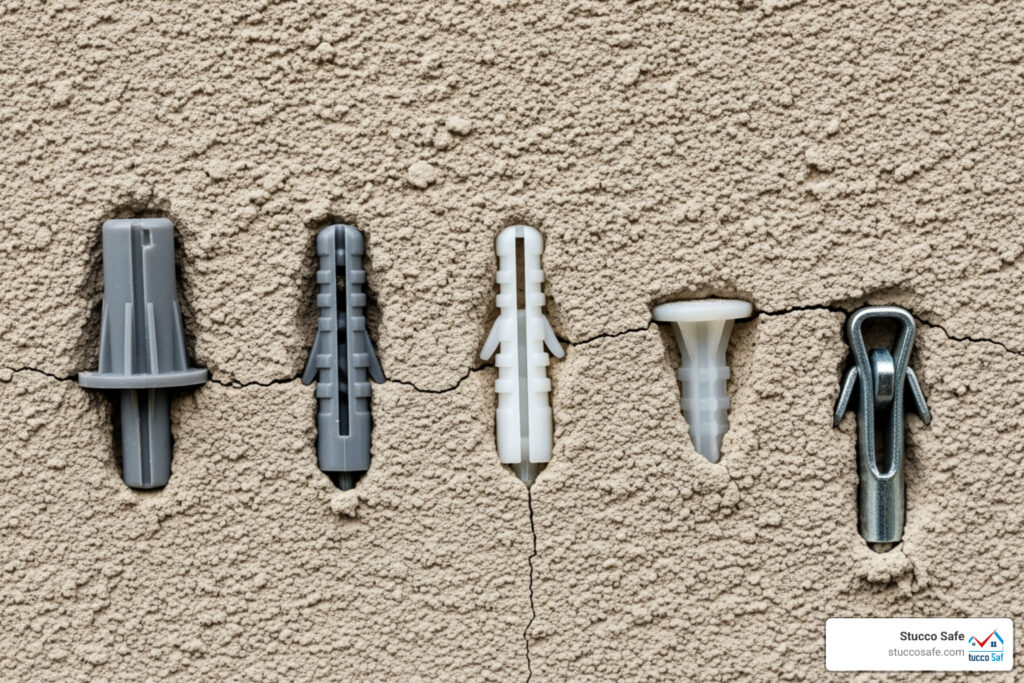
A Guide to the Different Types of Stucco Anchors
Choosing the best anchors for stucco exterior requires knowing the options. Each type suits specific loads and substrates.
| Anchor Type | Load Capacity (lbs) | Common Applications | Ideal Substrate | Key Feature |
|---|---|---|---|---|
| Plastic Sleeve Anchors | 5-25 (Light) | House numbers, small decorations, light signs | Any (stucco only or over wood/masonry) | Simple expansion, easy installation |
| Nylon Expansion Anchors | 5-25 (Light) | Thermometers, light fixtures, small planters | Any (stucco only or over wood/masonry) | Flexible, good vibration resistance |
| Metal Sleeve Anchors | 25-75 (Medium) | Handrails, hose reels, medium light fixtures | Solid masonry (concrete, block, brick) | Stronger expansion, durable |
| Concrete Screws (Tapcon) | 20-80 (Medium) | General purpose, versatile, small shelving | Solid masonry (concrete, block, brick) | Self-tapping into masonry, no anchor needed |
| Wedge Anchors | 50-200+ (Heavy) | Heavy fixtures, structural applications, large trellises | Solid masonry (concrete, block) | Highest holding power in solid material |
| Toggle Bolts | 25-100 (Heavy) | Hollow wall applications, large wall art, mailboxes | Hollow spaces (foam backing, empty cavity) | Spreads load behind the wall |
| Helical Anchors | Specialty (Repair) | Securing delaminated stucco | Stucco to backup material | Repairs loose stucco sections |
For Lightweight Items (Under 10 lbs)
For small items with minimal strain, use light-duty anchors.
- Plastic Sleeve Anchors: A common choice for lightweight items (under 10 lbs, up to 25 lbs). A plastic sleeve expands as a screw is inserted. Ideal for house numbers and small decor.
- Nylon Expansion Anchors: Similar to plastic sleeves, these offer more flexibility and vibration resistance. They are great for light fixtures or small planters under 10 lbs.
For more on light-duty anchors, see our guide: More on light-duty anchors.
For Medium-Weight Loads (10-50 lbs)
For items requiring a more substantial hold, medium-weight anchors are the workhorses.
- Metal Sleeve Anchors: These provide stronger expansion than plastic versions. Recommended for medium loads (10-50 lbs, up to 75 lbs), they are perfect for handrails and hose reels. They perform best in solid masonry substrates.
- Concrete Screws (e.g., Tapcon): These are excellent for medium loads (20-80 lbs), as they tap their own threads into concrete, block, or brick. They offer a strong, reliable hold in masonry substrates behind stucco.
For details on concrete screw anchors, check out: Details on concrete screw anchors.
For Heavy-Duty Applications (Over 50 lbs)
For substantial items like heavy shelving or structural supports, you need heavy-duty anchors designed for maximum holding power.
- Wedge Anchors: These are the champions for solid masonry, offering incredible strength for heavy items (50-200+ lbs). As a nut is tightened, an expansion clip creates a powerful mechanical interlock inside the drilled hole.
- Toggle Bolts: Essential for hollow spaces behind stucco (e.g., foam insulation). A toggle expands behind the wall, distributing the load over a large area. They are excellent for heavy items (25-100 lbs) where no stud is available.
For loads over 100 lbs, use multiple anchor points to distribute the weight. For a deeper dive into how toggle bolts work, visit: How do toggle bolts work.
How to Choose the Best Anchors for Your Stucco Exterior Project
Choosing the best anchors for stucco exterior for your project isn’t one-size-fits-all. It requires considering three critical factors.

Factor 1: Matching the Anchor to the Load Weight
This is the most crucial factor. Always overestimate the load weight, as environmental factors like wind and rain can add stress.
- Light Loads (<10 lbs): For small decor or signs, plastic or nylon expansion anchors are sufficient.
- Medium Loads (10-50 lbs): For handrails or hose reels, use metal sleeve anchors or concrete screws.
- Heavy Loads (>50 lbs): For large trellises or heavy shelving, choose wedge anchors or toggle bolts. For items over 100 lbs, use multiple anchor points.
Always check the anchor’s rated weight capacity and aim for a safety margin. For a comprehensive guide to stucco anchors, you can refer to: A comprehensive guide to stucco anchors.
Factor 2: Identifying the Substrate Behind Your Stucco
The material behind your stucco, the substrate, is as important as the stucco itself. This structural element dictates your anchor choice.
- Solid Masonry (Concrete/Block): If your stucco is over concrete or block, use metal sleeve anchors, concrete screws, or wedge anchors.
- Wood Sheathing: For stucco over wood sheathing, you may be able to use longer screws that pass through the stucco and bite into the wood. Ensure the penetration is sealed.
- Hollow Spaces (e.g., Foam Insulation): For modern systems with foam insulation behind the stucco, toggle bolts are ideal as they expand in the cavity behind the wall.
Use a deep-scanning stud finder or drill a small test hole to identify the substrate. For more about hollow wall anchors, check out: Learn about hollow wall anchors.
Factor 3: Choosing the best anchors for stucco exterior for Outdoor vs. Indoor Use
This factor is critical for longevity and aesthetics. Exterior anchors face constant exposure to rain, humidity, and temperature changes.
- Corrosion Resistance: This is non-negotiable for any exterior application to prevent rust stains.
- Stainless Steel: We highly recommend stainless steel anchors for all outdoor use due to their superior corrosion resistance.
- Galvanized Coating: If stainless steel isn’t an option, a heavy galvanized coating offers good protection, though it is not as long-lasting.
Choosing the right material prevents rust and extends the life of your installation. For more on outdoor fasteners, explore: More on outdoor fasteners.
The Proper Installation Process: A Step-by-Step Guide
Even the best anchors for stucco exterior will fail if installed incorrectly. Proper technique is crucial for a secure hold and preventing moisture intrusion, the silent killer of stucco systems.

Essential Tools and Safety Gear
Gather these tools before you begin to ensure a smooth process:
- Hammer Drill: Essential for drilling into stucco and masonry.
- Masonry Drill Bits: Use carbide-tipped bits that match your anchor’s diameter.
- Silicone Caulk and Caulk Gun: Use high-quality, exterior-grade, waterproof silicone.
- Safety Goggles and Gloves: Protect your eyes and hands.
- Painter’s Tape: Helps prevent chipping around the drill hole.
- Level and Measuring Tape: For accurate placement.
- Screwdriver or Drill: To drive the screw.
For a comprehensive guide on masonry drill bits, visit: Guide to masonry drill bits.
Step-by-Step Installation for the best anchors for stucco exterior
Follow these steps carefully for a secure, watertight installation:
- Mark the Location: Use a level and measuring tape to mark the spot. Double-check your measurements.
- Apply Painter’s Tape: Place tape over the mark to prevent the drill bit from wandering and minimize chipping.
- Drill the Pilot Hole: Use a hammer drill with the correct masonry bit. Drill slowly and steadily to a depth slightly longer than your anchor.
- Clean Debris: Clear all dust from the hole with a brush or compressed air for a proper grip.
- Seal with Silicone Caulk: This is a critical step. Apply waterproof silicone caulk into the hole to create a watertight seal.
- Insert the Anchor: Gently tap the anchor into the hole until it is flush with the surface.
- Fasten the Screw: Drive the screw into the anchor slowly and steadily.
- Avoid Over-Tightening: Stop when the screw feels snug. Over-tightening can strip the anchor or crack the stucco.
For detailed installation instructions, refer to: Detailed installation instructions.
Risks of Improper Installation
In our inspections across Southeastern Pennsylvania, New Jersey, and Delaware, we’ve seen that the biggest risk of improper installation is moisture intrusion.
- Moisture Intrusion: An unsealed hole funnels water behind the stucco. This is especially risky for homes built between 1993 and 2006 due to outdated building codes.
- Hidden Rot: Water behind stucco soaks into wood sheathing and framing, causing rot that can compromise your home’s structure.
- Mold Growth: Constant moisture creates a breeding ground for mold behind your walls.
- Structural Damage: Over time, rot can lead to significant structural damage requiring repairs that cost tens of thousands of dollars.
- Stress Cracks: Overtightening or using the wrong anchor can cause cracks in the stucco, creating more pathways for water.
Taking the time to install anchors correctly is the cheapest insurance you can buy for your home. Learn how to drill into stucco correctly to avoid these risks: Learn how to drill into stucco correctly.
Maintenance, Removal, and When to Call a Professional
Even with the best anchors for stucco exterior and proper installation, you may need to move or remove items. Knowing how to do this, and when to call a professional, is key.
Pros and Cons of Using Stucco Anchors
Here are the pros and cons of using stucco anchors:
Pros:
- Secure Hold: Provide a strong, reliable attachment.
- Versatility: There is an anchor for nearly any load or substrate.
- Supports Weight: Allow you to hang heavy items safely.
- Preserves Stucco Integrity: Distribute load to minimize cracking.
Cons:
- Requires Special Tools: A hammer drill and masonry bits are needed.
- Potential for Damage: Improper installation can cause significant damage.
- Permanent Hole: Removing an anchor leaves a hole that needs patching.
- Learning Curve: Requires a specific technique for proper installation.
How to Fix a Hole After Removing an Anchor
If you need to remove an anchor, here’s how to patch the hole:
- Remove the Screw and Anchor: Back out the screw, then gently pull the anchor out with pliers. If it breaks, you can patch over it.
- Clean the Hole: Brush out any loose debris.
- Patch the Hole: Use an exterior-grade stucco patching compound to fill the hole completely.
- Texture and Paint: Mimic the stucco texture as the patch sets, then prime and paint to match once cured.
When to Call a Professional for Installation
While many projects are DIY-friendly, sometimes it’s best to call a professional. A small upfront investment can prevent massive future expenses.
- Very Heavy Items (>50 lbs): For safety and proper load distribution, a pro is recommended for substantial items.
- Older or Brittle Stucco: A professional can minimize damage to delicate or aged stucco.
- Visible Stucco Damage (Cracks, Stains): If you see existing damage, stop. This indicates an underlying issue that needs inspection.
- Suspected Moisture Issues: Do not drill if you suspect hidden moisture. Schedule a professional stucco inspection first.
- Complex Installations: For intricate projects or when you’re unsure of the substrate, a pro provides peace of mind.
A professional stucco inspection can cost $495 to $1595, a small price compared to the tens of thousands needed to fix severe moisture damage. For more ideas on hanging items on stucco walls, check out: Find out more about hanging items on stucco walls.
Frequently Asked Questions about Stucco Anchors
Here are answers to some of the most common questions about stucco anchors.
How much weight can a stucco wall hold with anchors?
The weight capacity depends on the anchor type, substrate strength, and installation quality.
- Plastic sleeve anchors: 5-25 lbs (light loads).
- Metal sleeve anchors/concrete screws: 25-75 lbs (medium loads).
- Wedge anchors: 50-200+ lbs (heavy loads in solid masonry).
- Toggle bolts: 25-100 lbs (heavy loads in hollow walls).
For items over 100 lbs, use multiple anchor points. Always check the manufacturer’s specifications.
Can you screw directly into stucco without an anchor?
No. This is a common and damaging mistake. Stucco is too brittle to be threaded by a screw, which will:
- Crumble the stucco: Creating a weak, unstable hole.
- Offer no grip: The screw will quickly loosen.
- Cause cracking: Creating an entry point for moisture.
Always use a purpose-made stucco anchor or masonry screw. Learn more about anchoring screws: Learn more about anchoring screws.
What are the biggest risks with improper stucco anchor installation?
The biggest risk is moisture intrusion. In our work across Southeastern PA, New Jersey, and Delaware, we’ve seen catastrophic damage start from small, unsealed holes.
- Unsealed holes are water funnels: A hole that isn’t sealed with silicone caulk becomes a direct pathway for water into your wall system.
- Hidden rot: Water soaks into wood sheathing and framing, leading to hidden rot that weakens your home’s structure.
- Mold growth: Moisture creates an ideal environment for mold, which poses health risks.
- Costly structural repairs: By the time damage is visible, repairs can cost tens of thousands of dollars.
Beyond moisture, improper installation can also lead to stress cracks and anchor failure.
Conclusion: Protect Your Investment with the Right Approach
Stucco anchoring is manageable with the right knowledge. Its unique nature demands specialized anchors and careful installation, not standard screws.
Key takeaways:
- Match the anchor to the load and substrate: Know the weight of your item and what’s behind your stucco.
- Use the right tools: A hammer drill with masonry bits is essential.
- Seal every penetration: This is your home’s cheapest insurance against moisture damage.
As certified inspectors, we often trace significant moisture damage back to small, unsealed fastener holes. This minor oversight can lead to hidden rot, mold, and structural issues that erode your home’s value. Proper sealing is the cheapest insurance for your home’s exterior. For a complete overview and to ensure you’re making the safest choice for your home, explore our ultimate guide on the best anchors for stucco.