
How do you drill into stucco: Flawless No Cracks 2025
Why Learning How to Drill Into Stucco Matters for Your Home
How do you drill into stucco safely without causing cracks or moisture damage? Here’s the quick answer:
- Use a hammer drill with carbide-tipped masonry bits
- Start with a pilot hole using a smaller bit
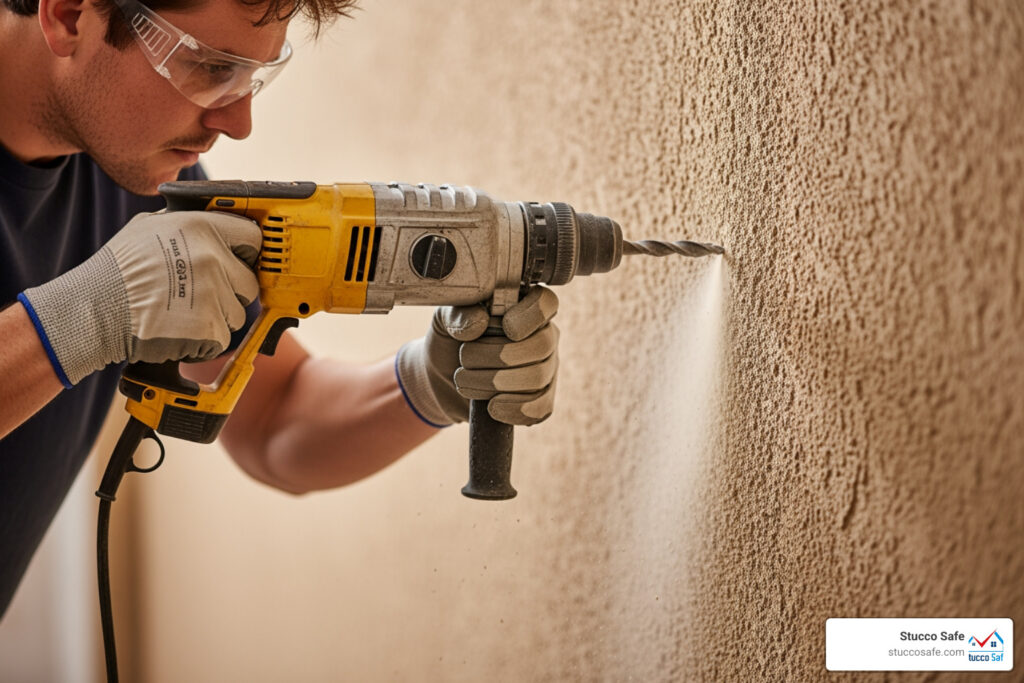
- Drill slowly and steadily at a perpendicular angle
- Apply painter’s tape over the drilling spot to prevent chipping
- Always use anchors – never screw directly into stucco
- Seal every hole with exterior-grade waterproof caulk
Many homeowners hesitate to drill into their stucco walls, fearing cracks or moisture damage. But drilling into stucco is a manageable project with the right tools and technique. The real danger isn’t the drilling itself; it’s in leaving unsealed holes that allow water to seep behind your stucco and damage the wood structure underneath.
Any unsealed hole becomes a pathway for water intrusion, leading to wood rot, mold, and expensive repairs. Behind the hard stucco surface sits your home’s moisture barrier, sheathing, and framing—all vulnerable to water damage.
I’m Gabe Kesslick, an EDI Level 2 Certified Stucco Inspector. Since 2001, I’ve investigated moisture issues behind stucco and seen the damage from improperly drilled holes. This guide will show you how do you drill into stucco correctly to mount items safely while protecting your home.

Gearing Up: Tools and Prep for Drilling Stucco
Proper preparation is the key to a successful project, protecting your home’s structural integrity and ensuring your safety. Using the wrong tools is a recipe for a cracked, leaky mess.
Choosing the Right Drill and Bits
Your regular drill and wood bits won’t work on stucco. For holes up to 3/8 inch, a standard drill might suffice, but a hammer drill is your best friend. It combines rotation with a rapid hammering action, making it easier to penetrate hard stucco without cracking. For larger holes or extensive projects, a more powerful rotary hammer is ideal. You can learn more about the difference between hammer drills and rotary hammers.
You must use masonry drill bits, which are engineered for concrete and stucco. Look for carbide-tipped bits for most projects or diamond-tipped bits for tougher material. Regular bits will dull instantly and damage your wall.

Here’s your essential toolkit:
- Hammer Drill (recommended)
- Masonry Drill Bit Set (carbide or diamond-tipped)
- Safety Glasses & Dust Mask
- Caulking Gun & Exterior-Grade Caulk (critical for sealing)
- Level & Measuring Tape
- Stud Finder
- Painter’s Tape
- Small Brush or Compressed Air
- Hammer
- Pencil or Marker
Selecting Suitable Fasteners and Anchors
Stucco is brittle and has no holding power on its own. You cannot simply drive a screw into it. Anchors are essential to distribute the load and prevent cracks.
- For light items (house numbers), use plastic sleeve anchors.
- For heavy items (hose racks), use metal screw anchors or toggle bolts for superior holding power.
Always use corrosion-resistant screws like galvanized or stainless steel to prevent rust stains, a common issue in the humid climates of Southeastern Pennsylvania, New Jersey, and Delaware. Masonry screws are designed for hard surfaces and provide a strong grip when used with the correct anchor. For a deeper dive, see our stucco wall anchors complete guide.
Preparing the Surface and Locating Support
First, mark your exact drilling location with a measuring tape and level. Then, apply painter’s tape over the mark. This simple step prevents the stucco from chipping and keeps your drill bit from “walking” across the surface.
Before drilling, check for hidden electrical wires and pipes. A stud finder can help locate structural supports and may detect utilities. You can also perform a tapping test: traditional stucco sounds dense, while synthetic stucco (EIFS) sounds hollow. If you’re mounting something heavy, anchoring into a stud is best. If you suspect utilities are in the area, choose a different location or consult a professional to avoid a costly emergency.
How Do You Drill Into Stucco? A Step-by-Step Guide
With your tools gathered and the surface prepped, it’s time to drill. The key is patience—let the hammer drill do the work to prevent cracks. Drilling is only half the job. Creating a proper waterproof seal is what truly protects your home from moisture damage.

Step 1: Drill a Pilot Hole
Never start with your final hole size. Begin with a small masonry bit (around 3/16-inch) to create a pilot hole. Position your drill perpendicular to the wall and start drilling slowly with gentle, steady pressure. Once the bit catches, you can increase the speed. This pilot hole guides the larger bit and significantly reduces the risk of cracking the stucco.
Step 2: Drill the Main Hole
Switch to the masonry bit that matches your anchor’s diameter. A correct match is crucial for a secure grip. Align the bit with your pilot hole, keep the drill perpendicular, and start slowly. Apply consistent, gentle pressure and let the hammer drill work. Periodically pull the bit out to clear dust and prevent overheating. Once you reach the required depth for your anchor, switch the drill to reverse and slowly back the bit out.
Step 3: Clean and Insert the Anchor
A clean hole is essential for a secure grip. Use a small brush or compressed air to remove all dust and debris from the hole. Any debris left behind will compromise the anchor’s holding power. Once clean, gently push the anchor into the hole until it’s flush with the stucco surface. If it’s a snug fit, tap it gently with a hammer to seat it fully. For a visual guide, a helpful video tutorial on drilling stucco can walk you through this process.
Step 4: Seal the Hole and Drive the Screw
This is the most critical step. An unsealed hole is an open invitation for moisture, leading to wood rot and mold, especially in the humid climate of Southeastern Pennsylvania, New Jersey, and Delaware. Never leave an exterior hole in stucco unsealed.
- Fill the Hole: Inject a generous amount of exterior-grade waterproof caulk into the drilled hole, filling it around the anchor. This is your primary moisture barrier.
- Drive the Screw: Insert your corrosion-resistant screw into the anchor and tighten it until firm. Do not overtighten, as this can crack the stucco or strip the anchor.
- Final Seal: Apply a bead of caulk around the base of your mounted fixture or the screw head. This secondary seal ensures no water can get in.
Unsealed penetrations are a leading cause of moisture intrusion we find during stucco inspections. Seal it right the first time to prevent costly problems later.
Troubleshooting and Advanced Scenarios
Even with good preparation, you might encounter challenges. Here’s how to handle common issues and know when to call a professional.

How do you drill into stucco without causing damage?
Preventing cracks is about technique. The keys to a damage-free job are:
- Use a sharp masonry bit. A dull bit hammers and chips the stucco, causing fractures.
- Apply painter’s tape over the drill spot to support the surface.
- Start with a pilot hole to create a guide path and reduce stress.
- Drill at a slow speed initially, applying steady, even pressure. Let the hammer drill do the work; never force it.
How do you drill into stucco vs. EIFS (Synthetic Stucco)?
Not all stucco is the same. It’s crucial to know if you have traditional stucco or EIFS (Exterior Insulation and Finish Systems), also known as synthetic stucco.
- Traditional Stucco: A hard, dense, cement-based system applied over metal lath. It feels like concrete and sounds solid when tapped. It requires a hammer drill and robust masonry bits.
- EIFS (Synthetic Stucco): A softer system with a foam insulation board, fiberglass mesh, and an acrylic finish. It often looks smoother and sounds hollow when tapped. You can often use a standard drill on a slow setting. Be gentle to avoid damaging the foam.
Anchoring strategies also differ. Traditional stucco uses standard masonry anchors, while EIFS may require specialized foam anchors or long toggle bolts that reach the sheathing behind the foam. Improper drilling can void EIFS warranties, so if you’re unsure, consult a professional.
What to Do If You Hit Metal Lath or an Obstruction
If your drill hits something metallic, don’t panic. It’s likely metal lath, the wire mesh reinforcement in traditional stucco. A sharp carbide-tipped bit can usually push through it with steady, consistent pressure.
However, if the drill stops dead, stop drilling immediately. You could have hit rebar, a steel stud, or worse, an electrical conduit or water pipe. The safest move is to reposition your hole a few inches away. As discussed in this forum discussion on hitting metal in stucco, it’s better to be safe than sorry.
When to Call a Professional
While many projects are DIY-friendly, some situations require an expert:
- Mounting very heavy items like awnings or satellite dishes that need structural anchoring.
- If your stucco already has large cracks, bulging, or signs of deterioration.
- If you see signs of suspected moisture damage, like staining or interior dampness.
- When working with EIFS systems, where improper work can void warranties.
- If you simply feel uncertain or uncomfortable with the project.
At Stucco Safe, our certified inspectors use forensic testing to find hidden moisture and structural issues across Southeastern Pennsylvania, New Jersey, and Delaware. An inspection, costing between $495 and $1595+, is a wise investment to protect your home’s integrity.
Frequently Asked Questions About Drilling Into Stucco
You’ve got questions, and we’ve got answers! These are the most common concerns we hear from homeowners tackling their first stucco drilling project.
Is it okay to screw directly into stucco?
Here’s the short answer: no, never screw directly into stucco without an anchor. We can’t emphasize this enough!
Think of stucco like a really hard cookie – it might feel solid, but it’s actually quite brittle and has very low holding power. You might be able to twist a screw into it initially, and it might even feel snug for a day or two. But here’s what happens: the moment you hang something on that screw, or when temperature changes cause expansion and contraction, or when a strong wind buffets your mounted item, those screw threads will strip right through the brittle stucco. You’ll end up with a loose, wobbly fixture and a damaged hole that’s now bigger than it should be.
Always use a properly sized anchor to distribute the load across a wider area. The anchor is what actually holds your item securely – it expands behind or within the stucco to create a stable, lasting grip. The screw is just the delivery mechanism. Skip the anchor, and you’re asking for trouble down the road.
What are the best types of fasteners for stucco?
The winning combination for how do you drill into stucco and mount items securely involves pairing the right anchor with the right screw. Here’s what we recommend:
Start with masonry screws – these are specifically engineered for hard surfaces like concrete, brick, and stucco. They often feature self-tapping threads that bite effectively when paired with an appropriate anchor. For the screws themselves, corrosion resistance is non-negotiable. In our humid Southeastern Pennsylvania, New Jersey, and Delaware climate, moisture is a constant concern. Choose galvanized screws or stainless steel screws to prevent rust stains from bleeding through your beautiful stucco finish. Nothing ruins curb appeal quite like orange rust streaks running down your white exterior!
As for anchors, match them to your load. Plastic sleeve anchors work beautifully for lighter items like address numbers or small decorative pieces. For heavier installations – think mailboxes, light fixtures, or hose racks – step up to metal screw anchors or toggle bolts. Toggle bolts are particularly effective because they expand behind the stucco surface, distributing weight across a much larger area.
The golden rule: always match your screw size to your chosen anchor, and make certain the anchor is rated for the weight you’re planning to hang. When in doubt, go one size heavier – it’s better to be over-prepared than under-supported.
How do I repair a hole in stucco if I make a mistake?
Oops! We’ve all been there – drilled in the wrong spot, changed our minds about placement, or had an anchor fail. The good news? Stucco repairs are surprisingly forgiving for small mistakes.
For small holes – think abandoned pilot holes or old anchor holes up to about 3/8 inch – the fix is beautifully simple. Clean out any loose debris or dust from the hole. Then grab your exterior-grade waterproof caulk and inject it directly into the hole, filling it completely. Use a putty knife or even a gloved finger to smooth the caulk flush with the surrounding stucco surface. The key here is ensuring a watertight seal. If you’ve chosen a paintable caulk, you can touch it up with exterior paint to match your stucco color, making the repair nearly invisible.
For larger holes or when you need to match texture, reach for a pre-mixed stucco patch compound from your local hardware store. First, thoroughly clean the hole and remove any loose material. Apply the patch compound with a putty knife, working it firmly into the hole. Here’s the fun part: if your stucco has texture, you get to play artist! While the patch is still wet, use a damp sponge, brush, or even your gloved finger to dab, stipple, or swirl the surface to match the surrounding finish. It might take a bit of experimentation, but most homeowners can achieve a pretty convincing match. Let the patch dry completely according to the package directions – usually 24 hours – then seal the edges with caulk if needed and paint to match.
The most critical aspect of any repair isn’t just making it look good – it’s ensuring the repair is completely weather-tight. Any unsealed gap, no matter how small, becomes an open door for moisture to slip behind your stucco and start causing damage to your home’s structure. Take that extra minute to seal properly, and you’ll protect your investment for years to come.
Conclusion
Drilling into stucco doesn’t have to be intimidating. With the right tools, a patient approach, and the knowledge from this guide, you can confidently mount fixtures on your home’s exterior.
The most important takeaway is that sealing is absolutely critical. Every hole you drill must be sealed with exterior-grade waterproof caulk to prevent moisture from causing wood rot, mold, and serious structural damage. Remember these fundamentals: use a hammer drill with a masonry bit, start with a pilot hole, and seal every penetration without fail.
If you encounter large cracks, suspect existing moisture issues, or simply feel the project is beyond your comfort level, professional expertise is invaluable. At Stucco Safe, our certified inspectors detect hidden moisture and structural problems throughout Southeastern Pennsylvania, New Jersey, and Delaware. An inspection is a smart investment in your home’s long-term health.
For a complete overview of your options, explore our stucco wall anchors complete guide. You now have the knowledge to protect your home.