
Historic Stucco: 3 Steps to Save Your Home
The Enduring Charm of Historic Stucco
From Ancient Plaster to Modern Facade: The Story of Stucco
Ever wondered about the fascinating journey of historic stucco? This resilient material isn’t just a facade; it’s a survivor that has sheltered civilizations for more than two millennia. Its earliest known use dates to the sixth century BC in the Middle East and soon spread across India, China, Greece, and Rome. Even the word “stucco” has roots in ancient Germanic languages—proof of its long-standing popularity.
At its simplest, stucco is a mortar-like blend of fine sand and a binder that hardens. The basic recipe, however, has evolved dramatically:
- Early mixes were lime-based, giving buildings a breathable, flexible “skin.”
- By the 1820s, natural cements added strength and durability.
- After 1871, Portland cement became dominant in the U.S., often blended with a little lime for workability.
- Modern formulas can include fibers, waxes, or polymers to improve curing and crack resistance.
Regardless of the mix, traditional stucco is applied in three layers: a scratch coat for adhesion and moisture management, a brown coat for strength, and a finish coat for color and texture. Total thickness generally ranges from 3/4 to 1-1/4 inches.
Historical Styles and Finishes
Stucco’s adaptability made it a favorite in nearly every American architectural revival from the 1800s on. You’ll spot it on Greek Revival, Spanish Colonial, Tudor, Art Deco, Prairie Style, and humble Bungalows alike. Historic finishes are just as varied—smooth troweled surfaces, ashlar scoring to mimic stone, roughcast, pebble-dash, and the artistic sgraffito technique all tell stories about their era.
To see these details up close, explore our Ask the Experts: Historic Stucco guide.
Why Preserving Historic Stucco is Crucial
Original stucco is a character-defining feature that protects both the architecture and the cultural narrative of a building. Removing or replacing it with incompatible materials erases history and often costs more than timely, proper repairs. Done correctly, maintenance extends the life of the facade, safeguards property value, and honors our shared heritage. For context on potential risks, review More info about the risks of buying a stucco house.
Uncovering the Enemy: Common Causes of Stucco Failure
Even the most beautiful historic stucco isn’t immune to the ravages of time and the elements. After decades of inspecting troubled stucco systems, we’ve seen how seemingly minor issues can snowball into major problems when left unchecked.
The truth is, most stucco failures don’t happen overnight. They develop gradually, often invisibly, until one day you notice a crack, a bulge, or peeling paint. By then, the real damage may already be extensive.
Water infiltration stands as the number one enemy of any stucco system, but it’s not working alone. Foundation settling or upward heaving can stress the stucco beyond its limits, creating cracks that invite more trouble. We’ve also seen countless cases where well-meaning incompatible repairs using modern Portland cement on older lime-based stucco actually make things worse, creating rigid patches that crack under normal building movement.
Trapped moisture is particularly insidious because it works silently behind the scenes, rotting wood lath and compromising the bond between stucco layers. Ground moisture migration from poor drainage or raised grade levels can saturate the lower portions of your stucco, while simple lack of maintenance – like ignoring clogged gutters or failed caulking – can lead to years of water exposure.
Perhaps most frustrating is when improper drainage around your home turns every rainstorm into a threat to your stucco. We’ve seen homes where beautiful historic facades were damaged simply because downspouts directed water straight onto the stucco surface.
The key insight here is that visible stucco damage is almost always a symptom, not the root cause. Patching cracks without addressing why they formed is like putting a band-aid on a broken pipe – it might look better temporarily, but the underlying problem will resurface. For a comprehensive look at these moisture-related challenges, check out More info on stucco moisture problems.
The Role of Water: Stucco’s Greatest Threat
If historic stucco had a nemesis, water would be it. While stucco is designed to shed water, persistent or excessive moisture exposure can transform this protective coating into a liability.
Water has many ways to breach your stucco’s defenses. Leaky gutters and failed flashing are among the worst offenders, creating concentrated streams that overwhelm the stucco’s ability to dry out between weather events. Clogged downspouts can cause water to overflow and cascade down your walls, while capillary action draws moisture upward from saturated soil or building materials.
In our service areas of Southeastern Pennsylvania, New Jersey, and Delaware, freeze-thaw cycles add another layer of complexity. Water that penetrates the stucco during warmer months can freeze during winter, expanding and creating internal pressure that gradually breaks down the material. This seasonal stress can cause spalling, where chunks of stucco literally pop off the surface.
What makes water damage particularly treacherous is its stealth nature. The most serious deterioration often happens where you can’t see it – behind the stucco, affecting the wood lath, sheathing, and even structural framing. By the time you notice bulging or hollow-sounding areas, significant damage may have already occurred.
The good news is that water intrusion is detectable with the right tools and expertise. Our moisture detection methods can identify problems before they become catastrophic failures. To understand more about how water interacts with stucco systems, explore More info on moisture intrusion in stucco and learn the answer to Does Stucco Absorb Water?.
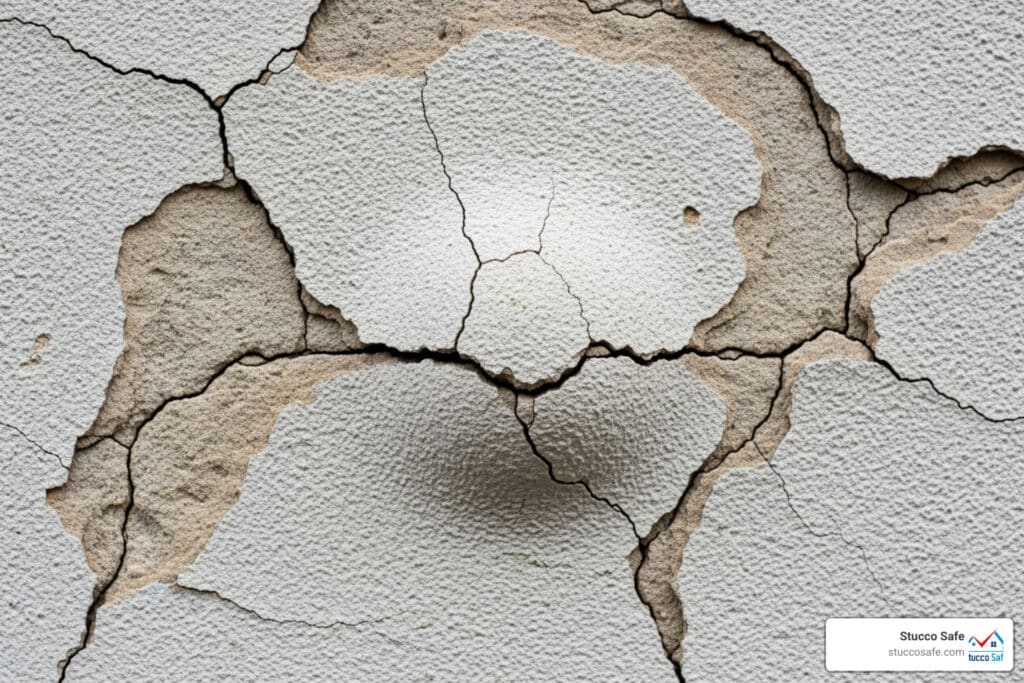
Cracks, Bulges, and Stains: Reading the Signs of Damage

Your historic stucco is constantly communicating with you – you just need to know how to listen. Over the years, we’ve learned that stucco rarely fails without warning. The signs are there; they just need to be properly interpreted.
Cracks are probably the most obvious distress signal. Hairline cracks might seem harmless, but they’re gateways for water infiltration. Structural cracks – the wider, more dramatic ones – usually indicate serious underlying issues like foundation movement or severe deterioration. The location, direction, and width of cracks all tell different parts of the story.
Delamination and bulging represent more advanced stages of failure. When you tap the stucco and hear a hollow sound, that’s delamination – the stucco has lost its bond to the substrate. If you can actually see the stucco pushing outward from the wall, that’s bulging, and it means significant moisture or pressure has built up behind the surface. In extreme cases where delamination affects 40-50 percent of the surface, complete replacement becomes necessary.
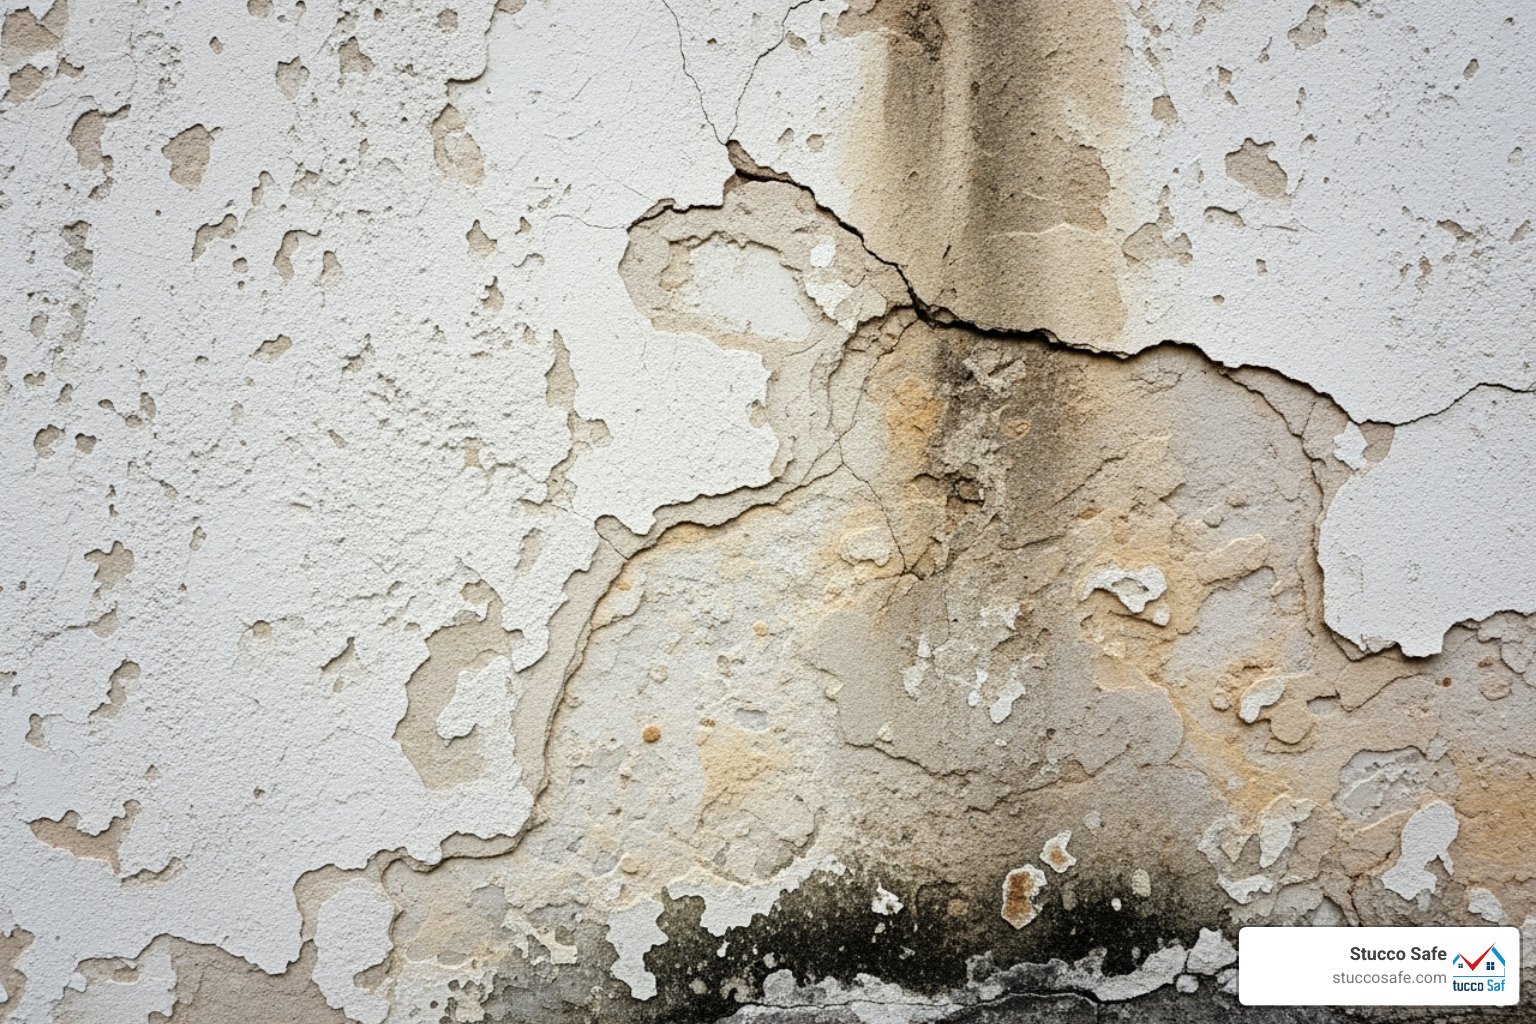
Efflorescence – those white, chalky deposits on the surface – might look like simple staining, but it’s actually salt crystals left behind as water evaporates. It’s a clear indicator that moisture is moving through your stucco system. Similarly, mold and mildew growth in green, black, or brown patches signals persistent moisture problems.
Paint failure is often misunderstood as simply needing a fresh coat, but peeling, blistering, or flaking paint usually indicates underlying moisture issues. This is especially common when non-breathable latex paints trap moisture within the stucco, preventing proper drying.
Here’s what many homeowners don’t realize: these visible signs often represent just a fraction of the actual damage. The most serious deterioration typically occurs behind the stucco, affecting structural components. This is particularly true for homes built between 1993 and 2006, which have an estimated failure rate as high as 90% due to building code issues during that period.
Understanding these warning signs can help you catch problems early, potentially saving thousands in repair costs. If you’re wondering about the significance of cracks in your stucco, we can help determine Are Stucco Cracks Normal?.
The Preservationist’s Toolkit: Assessing and Repairing Historic Stucco
Repairing historic stucco isn’t something you tackle with a YouTube tutorial and a weekend afternoon. It’s both an art and a science that demands genuine professional expertise and a deep respect for preservation principles. We’ve seen too many well-intentioned DIY repairs that ended up causing more harm than good.
The heart of successful historic stucco repair lies in understanding when to patch versus replace. Whenever possible, we prefer patching to preserve as much of the original historic fabric as we can. This is especially true for textured surfaces where matching the original finish requires considerable skill. However, when deterioration is extreme – we’re talking about 40-50% loss of bond – or when previous incompatible repairs have severely compromised the stucco’s integrity, complete replacement becomes necessary.
Material compatibility is absolutely non-negotiable in our work. Modern Portland cement might seem like a strong solution, but its rigid nature often clashes with older, softer lime-based historic stucco. When incompatible materials are mixed, they expand and contract at different rates, leading to even more deterioration. It’s like trying to dance with a partner who’s moving to a completely different rhythm.
For deeper insights into these challenges, the PDF on the Preservation and Repair of Historic Stucco provides excellent guidance, and you can explore More info on hard coat stucco problems on our site.
Step 1: Proper Damage Assessment
Before we even think about mixing materials or picking up a trowel, we need to understand exactly what we’re dealing with. A thorough assessment isn’t just about looking at surface cracks – it’s about uncovering the hidden story your stucco is trying to tell.
Our comprehensive approach starts with a careful visual inspection, examining every inch of the stucco surface for cracks, bulging, staining, and other telltale signs of trouble. But the real detective work happens during our acoustical survey, where we use specialized tools to tap the stucco surface. Those hollow sounds? They’re revealing areas of delamination where the stucco has lost its crucial bond to the substrate.
Identifying the root cause is where our forensic approach really shines. We don’t just patch symptoms – we dig deeper to understand why the damage occurred. Maybe it’s faulty flashing directing water where it shouldn’t go, or perhaps foundation movement is creating stress on the stucco system.
Moisture detection is our specialty at Stucco Safe. We use state-of-the-art moisture meters, like our Extech models, which can read moisture content from 1% to 100% with remarkable accuracy. Sometimes this involves drilling small, unobtrusive holes (about 3/16th of an inch) to probe the substrate and framing behind the stucco. It might seem invasive, but these tiny holes help us pinpoint areas of hidden moisture that could spell disaster if left unaddressed.
Determining stucco composition is like solving a historical puzzle. We need to know whether your historic stucco is lime-based or Portland cement-based to select compatible repair materials. Simple tests, like applying a dilute hydrochloric acid solution (which dissolves lime but not Portland cement), can help with identification. For more complex cases, we might conduct advanced lab analysis.
This detailed assessment creates the foundation for a precise repair plan that addresses underlying issues first. Learn more about what a stucco inspection is and our techniques for stucco leak detection.
Step 2: Key Principles for Repairing Historic Stucco
Once we’ve completed our assessment and addressed the root causes, the real craftsmanship begins. The repair work must be guided by principles that ensure both authenticity and longevity.
Understanding the differences between traditional and modern stucco is crucial:
| Feature | Traditional Lime Stucco | Modern Portland Cement Stucco |
|---|---|---|
| Binder | Primarily hydrated or slaked lime | Primarily Portland cement, often with some lime |
| Flexibility | Softer, more flexible, “breathable” | More rigid, less breathable |
| Drying Time | Slower (7-21 days between coats for fat lime) | Faster (2-3 days between coats for hydraulic lime) |
| Compatibility | Not compatible with rigid Portland cement | Compatible with other Portland cement mixes |
| Appearance | Often smooth, hand-troweled, subtle variations | Can be smoother or very textured, uniform appearance |
| Historical Use | Dominant until late 19th century | Dominant from early 20th century onwards |
Addressing underlying issues comes first – always. Before we touch the stucco, we ensure any problems with roofing, gutters, downspouts, flashing, or drainage are completely resolved. Otherwise, even the most skillful repair will inevitably fail.
Substrate preparation requires removing all deteriorated, severely cracked, and loose stucco down to the lath or masonry substrate. The repair area gets thoroughly cleaned of debris, plant growth, dirt, and loose paint. For masonry substrates, we rake mortar joints to a depth of approximately 5/8 inches to ensure proper mechanical bond.
Layered application follows traditional methods. The scratch coat, typically 1/4″ to 3/8″ thick, goes on first and gets scratched to provide a mechanical key for the next layer. The brown coat builds up thickness over the scratch coat, with both layers totaling no more than about 5/8″. Finally, the finish coat – about 1/4″ thick – provides the desired color and texture.
Proper curing can’t be rushed. Lime-based stucco needs 7-21 days between coats, while hydraulic lime mixes can be ready in 2-3 days. Newly stuccoed areas should be kept damp (around 90% humidity) for 48 to 72 hours to prevent rapid drying and cracking.
Weather conditions matter enormously. We never work in temperatures below 40 degrees Fahrenheit or when frost is possible. Extreme heat or direct sun can cause stucco to dry too quickly, leading to problems down the road.
Step 3: Matching Composition, Color, and Texture
The ultimate goal of historic stucco repair is invisibility – making the new blend so seamlessly with the old that you can’t tell where the repair begins and the original ends. This is where true artistry meets technical expertise.
Material analysis involves thoroughly examining the original historic stucco to determine its precise ingredients and proportions. We identify the type of binder and aggregate characteristics, ensuring our repair mix is somewhat weaker than the masonry substrate to prevent damage.
Sand matching is more critical than most people realize. Sand provides much of the natural color to stucco, so matching the type, color, and particle size exactly is essential for a seamless repair.
Natural pigments were historically derived from brick dust, local dirt, sand, burnt clay, or mineral oxides. Whitewash and color-washes were also common. While modern synthetic pigments exist, matching the nuanced hues of natural pigments requires both skill and patience.
Test patches are absolutely essential – we can’t stress this enough. We always create test samples of the proposed repair mix, applying them to non-conspicuous areas or separate boards. Weathering samples ideally should weather for at least one year, or through a change of seasons, to observe their durability, compatibility, and color changes over time.
Duplicating original texture requires specialized tools and application techniques, whether it’s a smooth troweled finish, roughcast, pebble-dash, or any other historic texture. Trowel techniques significantly impact the final appearance, and replicating the original craftsmanship takes a well-practiced hand.
As noted in our research, Exterior stucco repair for historic buildings is an essential skill that demands precision and respect for the original material. It’s this combination of technical knowledge and artistic sensitivity that makes historic stucco repair both challenging and rewarding.
Long-Term Care: Maintaining Your Stucco for Future Generations
Restoration is only half the battle—consistent care is what lets historic stucco shine decade after decade. A few simple habits will prevent most major failures and keep repair costs down. Get additional tips in our guide to stucco exterior maintenance.
Best Practices for Maintaining Historic Stucco
- Annual walk-throughs – Look for new cracks, stains, or bulges. The sooner you spot change, the easier the fix.
- Mind the rainwater – Clean gutters, extend downspouts, and grade soil so water flows away from walls. Poor drainage is stucco’s number-one enemy.
- Control vegetation – Keep plants a few inches off the facade; foliage traps moisture and roots can pry stucco loose.
- Clean gently – Use a soft brush, non-ionic detergent, and a low-pressure rinse. Skip pressure washing, sandblasting, and acid cleaners entirely.
- Inspect caulking – Sound sealant around windows, doors, and penetrations prevents hidden leaks.
To Paint or Not to Paint?
Many early stucco facades were never meant to be painted; their color came from sand, lime, or a light lime-wash. If you must coat the surface, choose a vapor-permeable finish—traditional lime wash, silicate mineral paint, or another breathable masonry formula. Standard latex and “waterproof” sealants trap moisture, leading to peeling, delamination, and even structural rot. Before picking up a brush, consider why the surface needs paint and confirm you’re not sealing in future problems. Read more about underlying issues in why stucco has problems.
By combining routine inspections with gentle, informed care, homeowners can preserve the beauty and integrity of their historic stucco for the next generation and beyond.
Conclusion: Protecting Your Home’s Historic Legacy
As we’ve journeyed through the fascinating world of historic stucco, one thing becomes clear: preserving and repairing this beautiful material is a truly worthwhile endeavor. It’s how we protect the unique character, architectural integrity, and lasting value of your cherished property. We’ve seen its rich history, understood the common threats it faces, and walked through the careful steps needed for proper assessment and repair.
The heart of it all comes down to a few key principles: always take the time to understand the material’s original composition, especially whether it’s lime-based or Portland cement-based. Then, it’s crucial to prioritize compatible repairs, making sure new materials work harmoniously with the old. And perhaps most importantly, you must address any underlying moisture issues first and foremost. Finally, a commitment to consistent, gentle maintenance will keep your stucco thriving for years to come. It’s not just about making things look good; it’s about safeguarding a piece of history and ensuring your home stays structurally sound for generations.
Given that stucco can often hide its problems so well, and that its repair isn’t as simple as it looks, professional expertise is absolutely critical. That’s where we come in. At Stucco Safe, we specialize in uncovering these hidden issues. We use advanced forensic testing methods and our team of certified inspectors to get to the bottom of things. We’re proud to serve homeowners and property owners across Southeastern Pennsylvania, New Jersey, and Delaware, helping to spot moisture and structural problems that are often completely invisible on the surface.
While the cost of a professional stucco inspection might vary, typically ranging from $495 to $1595 or more for very large homes, think of it as a smart investment. This upfront cost is truly minimal when you consider that a full stucco remediation could easily run into the hundreds of thousands of dollars if problems are left to fester.
Don’t let the timeless charm of your historic stucco hide a serious, deeper problem. We strongly encourage you to Get a professional assessment for your stucco house. It’s the best way to ensure its enduring beauty and structural integrity for all the years to come.