
How to anchor wood to stucco: Secure & Safe 2025
Why Proper Wood Anchoring Protects Your Stucco Investment
How to anchor wood to stucco requires careful attention to your wall system, fasteners, and weatherproofing to prevent costly moisture damage. The essential process is:
- Identify your stucco system – Three-coat (1″ thick) or one-coat systems affect fastener length.
- Choose the right fasteners – Use masonry screws at least 2″ long for open stud walls, 2.5″ minimum for shear walls.
- Drill pilot holes carefully – Use masonry bits and drill slowly to prevent cracking.
- Seal all penetrations – Apply caulk to pilot holes and seal around the top and sides of the wood.
- Leave drainage gaps – Never seal the bottom edge to allow trapped water to escape.
Improper installation can trap moisture behind stucco, leading to wood rot and structural damage costing tens of thousands to repair. Since many stucco installations from the past 30 years lack proper drainage, correct anchoring is even more critical.
Understanding your stucco system is key. Three-coat stucco is more forgiving for moderate loads, while one-coat and EIFS systems require extra care to protect the building envelope.
I’m Gabe Kesslick, an EDI Level 2 Certified Stucco Inspector. Since 2001, I’ve investigated thousands of stucco failures and seen how improper techniques for how to anchor wood to stucco create entry points for water that destroy homes from the inside out.

Before You Begin: Understanding Your Stucco Wall
Before drilling, it’s crucial to understand your stucco wall. Its unique composition requires special consideration when attaching anything, especially wood. Knowing your stucco system, wall structure, and project strength requirements are foundational steps for success.

Know Your Stucco System
The type of stucco on your home determines the attachment method and strength.
- Three-Coat Stucco: This traditional system has three layers over lath and building paper, totaling about 1 inch thick. Its thickness is more forgiving for fasteners. Use fasteners at least 2 inches long for open stud walls and 2.5 inches for shear walls, plus the wood’s width.
- One-Coat Stucco: Also called thin-coat, this system has a 3/8-inch base coat over 1-inch foam insulation. It’s less forgiving due to its thinner structural layer. Use fasteners at least 2.5 inches long for open stud walls and 3 inches for shear walls, plus the wood’s width. Only attach very light items between studs.
- EIFS (Exterior Insulation and Finish System): This synthetic system includes an insulation board, base coat with mesh, and a finish coat. It’s highly susceptible to moisture intrusion if penetrated. Penetrating EIFS requires extreme caution and specialized flashing to prevent water damage, which can lead to significant Stucco House Issues.
Identify Your Wall Structure
The wall’s underlying structure dictates the strongest attachment points.
- Open Stud Walls: Here, stucco is applied over lath directly onto studs. Between studs, fasteners rely on the stucco and lath, suitable only for very lightweight items unless using specialized anchors.
- Shear Walls: These walls have structural backing like plywood or OSB between the studs and lath to resist lateral forces. This provides a robust surface for heavy-duty attachments. Backing is typically 1/2″ to 5/8″ thick in newer buildings.
Locating Studs: For strong attachments, you must locate studs or backing. Use a reliable stud finder or tap the wall to find solid areas. Mark stud locations clearly on the stucco.
Assess Strength Requirements
Consider the weight and force of what you’re attaching to choose the right fasteners and method.
- Lightweight Items: For items like decorative shelves or small signs, strength needs are low. Smaller screws, plastic anchors, or exterior adhesives are suitable.
- Heavy Loads: Structures like pergolas or deck ledgers demand maximum strength. You must anchor into structural elements like wall studs or rim joists. Fasteners must be long enough to penetrate the stucco and sheathing and embed securely into the wood framing to ensure proper weight distribution and prevent failure.
Choosing the Right Fasteners and Tools
With your wall assessed, it’s time to select the right fasteners and tools for a secure attachment that avoids damaging your stucco.
| Fastener Type | Load Capacity | Best Use Case | Installation Difficulty |
|---|---|---|---|
| Screws (Masonry/Stucco) | Light to Medium | Direct attachment to stucco or into underlying wood/lath | Moderate |
| Plastic Anchors | Light | For lighter items where no wood backing is found | Easy |
| Metal Sleeve Anchors | Medium to Heavy | Good for heavier items, expands for better grip | Moderate |
| Toggle Bolts | Heavy | For hollow spaces behind stucco where maximum grip is needed | Moderate |
| Adhesives (Construction) | Light to Medium | Decorative items, trim, where drilling is undesirable | Easy |
The Best Screws and Anchors for Stucco
Regular wood screws won’t work on stucco’s hard, brittle surface. You need specialized fasteners.
- Masonry Screws (e.g., Tapcon): Made from hardened steel, these screws have special threads for hard surfaces and require a pilot hole. Tapcon screws are a good example, with aggressive threads that work well when hitting wood behind stucco.
- Stucco Screws (e.g., Bildex Stucco Anchors): These are designed for stucco. Some, like Bildex anchors, use a same-size masonry bit but may spin if they hit wood without engaging fully due to a less sharp point than Tapcons.
- Corrosion-Resistant Screws: Since stucco is an exterior finish, all fasteners must be corrosion-resistant (stainless steel or coated) to prevent rust stains.
- Plastic Anchors: For light items without wood backing, use plastic anchors designed for masonry. Drill a pilot hole, insert the anchor, and drive in a screw. The anchor expands for a secure grip.
- Metal Sleeve Anchors & Toggle Bolts: For heavy items in hollow cavities, use metal sleeve anchors or toggle bolts. Sleeve anchors expand within the hole, while toggle bolts expand behind the wall to distribute weight. For more details, see our guide on the Best Anchors for Stucco.
Adhesives as an Alternative
For very lightweight or decorative items, adhesives can be a good alternative to drilling.
- Construction Adhesive (e.g., PL subfloor glue, Liquid Nails): Heavy-duty construction adhesives create a strong bond. Polyurethane-based types are excellent for exterior use due to their flexibility and water resistance.
- Surface Preparation: For adhesives to bond, the stucco surface must be clean, dry, and free of debris. Clean with a stiff brush and degreasing soap, then wipe with rubbing alcohol for best results.
- Weight Limitations: Adhesives are not for structural loads. Always check the weight rating. They require warm, dry conditions to cure properly. For more tips on lighter items, The Spruce offers some great tips on hanging items on stucco walls.
Essential Tools for the Job
Having the right tools ensures a clean, secure attachment.
- Power Drill: A powerful drill is essential. A hammer drill is often recommended for its pounding action, which helps drill through tough masonry.
- Masonry Drill Bits: Use masonry bits designed for hard materials. Choose a bit slightly smaller than your screw or anchor for a snug fit. See our guide on the Best Drill Bit for Stucco for more.
- Caulk Gun: For applying sealant.
- Level: To ensure your wood piece is straight.
- Measuring Tape & Pencil: For accurate marking.
- Safety Goggles & Gloves: To protect your eyes and hands.
- Stiff Brush & Cleaning Solution: For surface preparation.
The Step-by-Step Guide on How to Anchor Wood to Stucco
This section walks you through the precise steps to securely anchor wood to stucco, ensuring a strong, weather-tight connection.

Step 1: Prepare the Surface and Mark Your Locations
Proper preparation ensures a clean surface and accurate marking.
- Cleaning Stucco: A clean surface is vital for adhesives and sealants. Scrub the stucco with a stiff brush and degreasing soap, rinse, and let it dry completely. For adhesives, a final wipe with rubbing alcohol improves the bond.
- Measuring and Marking Pilot Holes: Use a measuring tape and pencil to mark fastener locations. Use a level for long pieces to ensure alignment for aesthetics and weight distribution. Double-check all measurements before drilling.
Step 2: How to Drill into Stucco Without Causing Damage
Drilling correctly is critical to avoid cracks and damage.
- Pilot Holes are Non-Negotiable: Always drill a pilot hole first to avoid cracking the stucco or damaging the screw.
- Choose the Right Masonry Drill Bit: Use a masonry bit that is the same size as your anchor or slightly smaller than your screw’s diameter (e.g., a 3/16-inch hole for a Stucco-Tie anchor).
- Drill Slowly and Steadily: Drill slowly with consistent pressure, keeping the drill perpendicular to the wall to prevent cracks. Avoid using a hammer drill unless specified for the anchor, as its vibration can shatter stucco.
- Clear Debris: Periodically pull the drill bit out to clear dust from the hole. This improves cutting efficiency.
- Avoid Pipes and Wires: Before drilling deep, confirm you won’t hit plumbing or electrical lines. Use a stud finder with wire detection or check building plans. For more guidance, see our article on How to Drill into Stucco.
Step 3: Install the Fastener and Secure the Wood
With clean pilot holes, you can install fasteners and attach the wood.
- Inserting Anchors: If using anchors, tap them into the pilot hole until flush with the stucco. A snug fit is essential; if loose, the hole may be too large.
- Driving Screws: Align the wood’s pre-drilled holes with the pilot holes or anchors. Use a drill to drive the screws with steady, clockwise pressure.
- Avoiding Overtightening: Drive screws until snug, but do not overtighten. Overtightening can strip threads and crack or crush the stucco.
Step 4: Create a Weather-Tight Seal
This step is critical for preventing moisture intrusion.
- Caulking Pilot Holes: Before inserting fasteners, squirt exterior-grade sealant (polyurethane or silicone caulk) into each pilot hole to create a waterproof barrier.
- Sealing Around the Wood: After attaching the wood, apply a continuous bead of exterior sealant along the top and side edges where it meets the stucco. Smooth the bead for a clean finish.
- Leaving a Drainage Gap: Do not seal the bottom edge of the wood. This crucial drainage gap allows any trapped moisture to escape, preventing rot and water damage. Sealing all four sides traps water. This step is vital for preventing problems like Bubbling Stucco: A Guide to Prevention and Repair.
Common Problems and When to Call a Professional
Even with the best techniques, problems can arise. Knowing when to troubleshoot and when to call an expert is key to protecting your home.

Troubleshooting Common Issues When You Anchor Wood to Stucco
- Cracked Stucco: Small cracks from drilling can be fixed with a flexible stucco patch. For guidance, see our article on Repair Small Cracks in Stucco. Large or structural cracks indicate a bigger problem.
- Stripped Screw Holes: A stripped hole means the fastener lost its grip, possibly from overtightening or a too-large pilot hole. Try a larger fastener. If the wood is stripped, fill the hole with wood filler, let it cure, and re-drill.
- Wobbly Fixtures: A wobbly fixture means the fasteners aren’t holding. Remove it and upgrade to stronger anchors or longer screws that can reach the framing.
- Fastener Pull-Out: If a fastener pulls out, it was likely inadequate for the load or the wall material is compromised. This requires a stronger re-anchoring strategy or professional help.
Recognizing Signs of Deeper Problems
Be vigilant for these red flags, which may indicate larger issues with your stucco system:
- Water Stains: Dark streaks or discoloration on stucco are signs of water intrusion.
- Bubbling Paint or Soft Spots: Bubbling paint or soft spots in the stucco indicate trapped moisture and potentially rotted framing beneath.
- Mold or Mildew: Visible mold on exterior stucco suggests persistent moisture. Mold inside the home is a critical sign of severe water intrusion.
- Extensive or Patterned Cracks: Large, interconnected, or patterned cracks can indicate structural movement or significant moisture damage. For more on this, see our guide on Stucco Cracks.
These signs mean it’s time to put down the drill and pick up the phone.
Why a Professional Stucco Inspection is Crucial
If you see signs of deeper problems or are planning a heavy attachment, we strongly recommend calling a professional.
- Assessing Wall Integrity: A professional inspector from Stucco Safe can perform a forensic investigation. We use specialized tools like moisture meters to detect hidden moisture and assess underlying structures without causing damage.
- Preventing Costly Water Damage: Many stucco installations from 1993-2006 have a high failure rate due to poor drainage systems. An inspection can identify these issues before they cause tens of thousands in damage.
- Ensuring Structural Safety: For heavy attachments, a professional can ensure the wall’s structural capacity is respected and advise on safe, code-compliant methods.
- Certified Inspectors: Choose a certified inspector (like an EDI Level 2 professional) for expert diagnosis. Inspections in our service areas (Southeastern PA, NJ, and DE) typically range from $495 to $1595+, a small investment to prevent much larger expenses.
Don’t hesitate to seek professional help. It’s a smart move to protect your home and your investment.
Frequently Asked Questions about Anchoring Wood to Stucco
Here are answers to common questions about how to anchor wood to stucco.
Is it OK to screw directly into stucco?
Yes, but only if you follow the correct procedure. You cannot drive a regular screw directly into the hard stucco surface. You must:
- Pre-drill pilot holes: Use a masonry bit slightly smaller than your screw to prevent cracking.
- Use masonry screws: These are hardened and designed to grip dense stucco.
- Seal all penetrations: Use exterior-grade sealant in the pilot hole and around the wood to block water.
- Check behind the wall: Use a stud finder to avoid hitting pipes or wires. Drill slowly to feel for obstructions.
For lighter items, you can use plastic anchors designed for masonry.
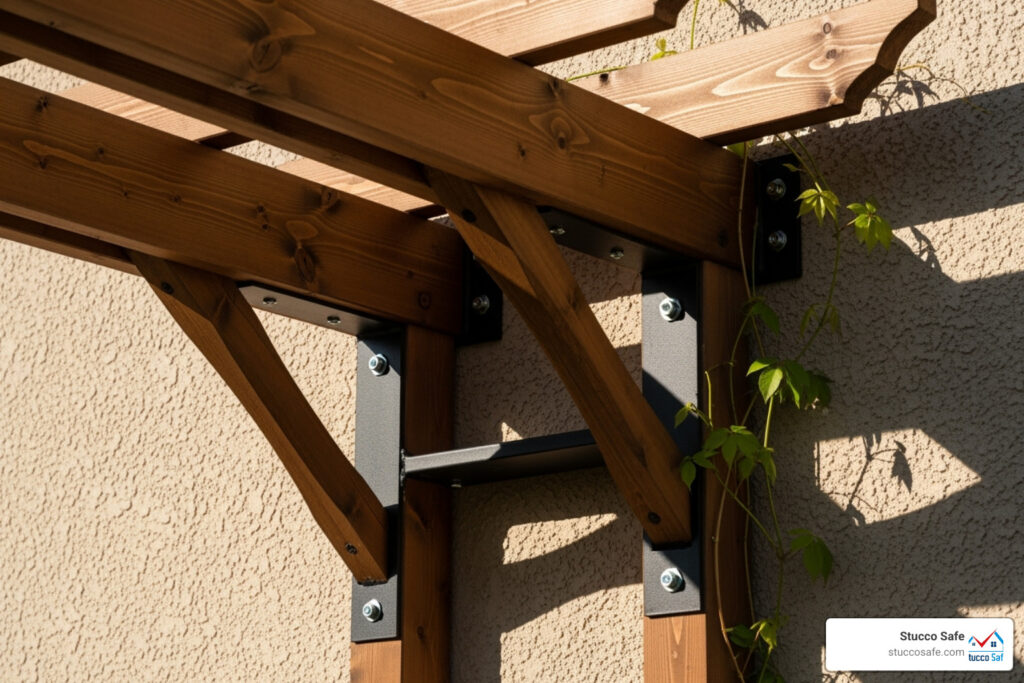
How do you attach heavy objects like a pergola to a stucco wall?
Attaching heavy objects like a pergola requires anchoring into the home’s structural framing, not just the stucco. This is a major project where small screws or adhesives are not an option. Key considerations include:
- Anchor to framing: You must anchor into wall studs or rim joists. Fasteners only in the stucco will fail under heavy loads.
- Use heavy-duty fasteners: Use lag bolts or structural anchors long enough to penetrate the stucco and sheathing and embed deeply into the wood framing.
- Install proper flashing: Use metal flashing and sealants to direct water away from any penetration, which is a high-risk area for leaks.
- Use spacers: Spacers create an air gap between the wood and stucco, allowing drainage and preventing trapped moisture.
- Consult an engineer: For very heavy loads, a structural engineer can calculate loads and specify the correct, code-compliant attachment method.
- Hire a professional: If you are unsure, hire an experienced contractor to handle complex attachments safely.
How do you seal wood to a stucco wall to prevent leaks?
A proper seal is critical to prevent moisture damage. The goal is to block water from entering while allowing any trapped moisture to escape.
- Seal the top and sides: Use a high-quality exterior sealant (silicone or polyurethane) to apply a continuous bead along the top and side edges where wood meets stucco.
- Leave the bottom open: Do not seal the bottom edge. This creates a drainage gap, allowing any trapped moisture to escape and preventing rot.
- Caulk pilot holes: Before inserting fasteners, inject sealant into each pilot hole to waterproof the penetration.
- Inspect seals annually: Check your seals yearly for cracks or deterioration and reapply caulk as needed. This is key to good Stucco Exterior Maintenance.
Conclusion
Attaching wood to stucco is achievable with the right knowledge and a careful approach. By understanding your wall, choosing the correct fasteners, and following proper techniques, you can create a strong, secure, and weather-tight connection.
Our key takeaways are:
- Safety first: Wear proper safety gear.
- Know your wall: Identify your stucco type and structure.
- Choose the right fasteners: Select fasteners appropriate for the load.
- Drill carefully: Drill slow pilot holes to prevent cracks.
- Seal correctly: Weatherproof all penetrations and leave a bottom drainage gap.
Protecting your home from water intrusion is paramount. If your project involves heavy loads, or if you see any signs of stucco damage, don’t hesitate to call the professionals. Our certified inspectors at Stucco Safe are experts in detecting moisture and structural issues, ensuring your home’s integrity.
Ready to tackle your project or want to learn more about the best fasteners for your specific needs? Learn more about the best fasteners for your project.