
How to fix a hole in stucco: 5 Simple Steps
Why Stucco Holes Need Immediate Attention
How to fix a hole in stucco is a common question when impact, weathering, or settling creates a gap in your exterior. Here’s the quick answer:
Quick Fix for Small Holes (under 2 inches):
- Clean – Remove loose debris.
- Widen – Create beveled edges at least 1/4 inch wide.
- Fill – Apply pre-mixed stucco patch in 1/4 inch layers.
- Texture – Match the surrounding finish before it dries.
- Cure – Wait 7 days before painting.
For Large Holes (over 2 inches):
- Install new metal lath and builder’s paper.
- Apply a scratch coat and score the surface.
- Add a brown coat after 7 days.
- Apply a finish coat to match the texture.
- Cure for 28 days before painting.
Stucco is a durable surface, but its rigidity makes it vulnerable to damage. Once a hole develops, you must seal it from water intrusion to prevent deterioration of the underlying structure. A small cosmetic issue can become a gateway for moisture damage, mold, and costly repairs to your home’s sheathing and framing.
I’m Gabe Kesslick, founder of Stucco Safe and an EDI Level 2 Certified Stucco Inspector. Since 2001, I’ve helped homeowners learn how to fix a hole in stucco and identify when a simple patch is enough versus when underlying moisture issues demand a professional.
This guide provides a straightforward DIY approach to patching stucco holes. You’ll learn which repairs you can tackle yourself and which warning signs mean it’s time to call a certified inspector.

Understanding Stucco Damage and Gathering Your Supplies
Before learning how to fix a hole in stucco, it helps to know why holes appear and what supplies you’ll need. Stucco is a durable, cement-based plaster, but its rigid nature makes it susceptible to damage.
Common causes of holes in stucco include:
- Impact Damage: From objects like a stray baseball or falling branch.
- House Settling: Shifts in the foundation can stress the stucco, causing cracks that widen into holes.
- Weathering: Constant exposure to heat, cold, and rain can create cracks and blisters that grow over time.
- Water Intrusion: Water getting behind the stucco can freeze and expand or cause rot, leading to crumbling. This often signals a more serious issue.
Regardless of the cause, it’s crucial to seal any breach from water to prevent further deterioration.
Tools You’ll Need
Gathering the right tools makes the repair process smoother. Here’s what you’ll need:
- Safety: Safety glasses and gloves.
- Preparation: Chisel, hammer, wire brush, scraper or putty knife, and a 5-in-1 painter’s tool.
- Mixing & Application: Bucket, margin trowel, finishing trowel, rubber float, caulk gun, and a spray bottle or hose.
- For Large Repairs: Wheelbarrow, mortar hoe, tin snips, and a staple gun.
Materials for the Job
Having the right materials is key to a durable, seamless repair.
- Stucco Patching Compound: Use a high-quality, pre-mixed patch for small repairs or mix your own for larger jobs.
- Exterior Caulk: A paintable, high-quality caulk is excellent for hairline cracks.
- Acrylic Bonding Agent: Helps new stucco adhere to old surfaces.
- Reinforcement (for large holes): Grade-D builder’s paper, galvanized metal lath, and roofing nails.
- Traditional Stucco Mix (for large repairs): Portland cement, mason’s sand, and hydrated lime.
- Water: For mixing and keeping the patch moist.
- Paint: A permeable, alkaline-tolerant exterior paint.
How to Fix a Hole in Stucco: A Step-by-Step Guide
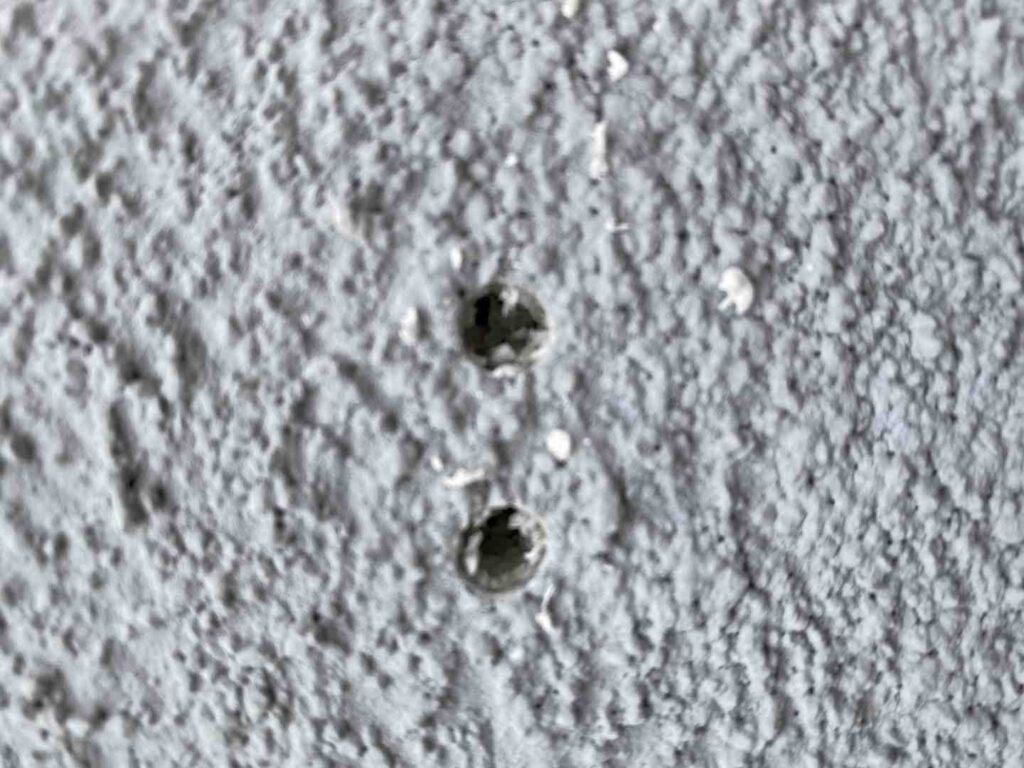
The process for how to fix a hole in stucco depends on the size of the damage. A tiny crack requires a different approach than a large hole. With patience and attention to detail, most homeowners can tackle these repairs.

Step 1: Prepare the Area Around the Hole
Proper preparation is 90% of a successful stucco repair. Skipping this step can cause the patch to fail.
- Clean the Area: Use a wire brush or scraper to remove all loose paint, crumbling stucco, and debris. You need a clean, stable surface for the new material to bond to.
- Widen the Hole: Use a hammer and chisel to widen cracks to at least 1/4 inch. Create vertical or slightly beveled edges (an inverted ‘V’ shape) to give the new stucco a surface to grip.
- Remove Dust: Brush away all dust and fine particles. A blower can be used for a thorough cleaning, as even invisible dust can prevent proper adhesion.
- Prepare for Large Holes: If the hole exposes the lath or sheathing, remove any damaged lath and paper. Cut two layers of Grade-D builder’s paper to overlap the existing wrap by several inches and fasten them with roofing nails. Cut galvanized metal lath to fit over the paper and fasten it securely to the wall studs.
- Dampen the Area: Lightly spray the repair area with water. This prevents the old stucco from drawing moisture out of the new patch too quickly, which can cause cracking.
Step 2: How to fix a hole in stucco when it’s small (under 2 inches)
Small holes and hairline cracks are DIY-friendly repairs. For fine cracks, a coat of matching exterior acrylic paint may be enough. For slightly wider cracks, fill them with a paintable caulking compound first.
For most small repairs, a pre-mixed stucco patch is the most convenient option. If using a powdered patch, mix only what you can use in 15-20 minutes, as it dries quickly.
Using a putty knife or rubber float, press the patching material firmly into the hole. Apply the patch in thin layers, no more than 1/4 inch thick at a time, allowing each layer to become firm before adding the next. Build up layers until the patch is almost flush with the wall.
Before the final layer dries, use a damp trowel or rubber float to feather the edges, blending the new patch into the existing texture.
Step 3: Repairing Large Holes in Stucco
Large holes (over 2 inches) require a traditional three-coat stucco repair for structural integrity. After preparing the area with new builder’s paper and metal lath (Step 1), you’ll mix and apply the stucco.
Mixing: For large repairs, mix your own stucco in a wheelbarrow. A typical mix includes Portland cement, sand, hydrated lime, and an acrylic bonding agent. The mix should be workable for 30-90 minutes.
- Apply the Scratch Coat: Lightly wet the edges of the old stucco. Apply a 3/8-inch layer of stucco mix over the wire lath, packing it firmly. When the wet sheen is gone, score the surface horizontally with a trowel to create “teeth” for the next coat. Cover with plastic and allow it to cure for seven days.
- Apply the Brown Coat: After seven days, mist the scratch coat with water. Apply another 3/8-inch layer (the brown coat), bringing the patch almost flush with the existing wall. Trowel the surface smooth. Cover with plastic and let it cure for three days.
- Apply the Finish Coat: After three days, mist the brown coat. Apply the final finish coat, texturing it to match the existing stucco (see next section). Smooth it flush with the wall and let it cure for at least a week before painting.
For a more comprehensive look at traditional stucco repair techniques, this detailed guide to repairing stucco offers excellent additional insights.
Achieving a Seamless Finish: Texture and Color Matching
The goal of a stucco repair is to make it invisible. This final phase combines texturing, curing, and painting to create a professional-looking result.

Step 1: How to fix a hole in stucco and match the texture
Replicating your wall’s existing texture is key to a seamless repair. Start by identifying your texture. Common types include:
- Dash Finish: Characterized by small peaks and valleys.
- Sand Finish: A uniform, gritty appearance, like fine sandpaper.
- Smooth Finish: Flat and even, achieved with a steel trowel.
Always practice your texture on a scrap board first. This allows you to perfect the motion and pressure without risking your actual repair. Apply the texture when the stucco is firm but still workable.
- For a dash finish, use a stiff-bristled brush to flick small amounts of the finish coat onto the patch.
- For a sand finish, work a rubber or wood float in circular motions across the surface.
- For a smooth finish, use a steel trowel in long, even strokes.
Don’t be afraid to experiment with tools like sponges or crumpled plastic to replicate unique textures.
Step 2: Curing, Finishing, and Painting the Repaired Area
Proper curing is what makes a repair last. A patch might feel dry, but it needs time to gain full strength.
- Curing Time: Small patches need at least 7 days to cure before painting. Large, multi-coat repairs need a full 28 days.
- Keep it Moist: In hot, dry, or windy weather, a patch can dry too quickly and crack. Mist the area with water several times a day for the first few days. Covering the patch with plastic sheeting also helps trap moisture and ensures a stronger bond.
Once cured, it’s time for paint. Never use regular house paint on stucco. Stucco is porous and needs to breathe; standard paint traps moisture, leading to blistering and peeling. Instead, choose a permeable, alkaline-tolerant exterior paint designed for masonry, such as an acrylic elastomer, mineral paint, or fog coat.
A fog coat, a thin wash of diluted paint, is excellent for subtle color matching. For the best result, consider painting the entire wall section to ensure a uniform color.
For more detailed guidance on preparing and applying patching material to achieve professional results, check out More tips on repairing stucco surfaces.
Beyond the Patch: Prevention and When to Call a Professional
Knowing how to fix a hole in stucco is important, but understanding when a patch isn’t enough is critical. Sometimes, a hole is a symptom of a larger problem.

Preventing Future Damage
Preventive maintenance can save you from future repairs. Follow these tips:
- Inspect Regularly: Walk around your home twice a year to look for new cracks, holes, or discoloration.
- Maintain Gutters: Keep gutters and downspouts clean and ensure they direct water away from your foundation.
- Check Flashing: Ensure the metal strips (flashing and weep screeds) around windows, doors, and at the base of your walls are intact and unobstructed so water can escape.
- Address the Root Cause: If water intrusion caused the damage, find and fix the source to prevent the problem from recurring.
When to Consider a Professional Stucco Inspection
While many repairs are DIY-friendly, some situations require a professional. Call an inspector if you see:
- Widespread Damage: Numerous cracks or holes across your stucco can signal systemic issues like faulty installation or significant house settling.
- Large Patches: Repairs over a few square feet require specialized techniques to ensure structural integrity.
- Dark Stains: Discoloration around holes, especially below windows or doors, is a classic sign of chronic water intrusion that can cause rot and mold behind the wall.
- Interior Water Damage: Damp drywall or mold on interior walls adjacent to the stucco exterior means water is getting in.
If your home was built between 1993 and 2006, particularly in Southeastern PA, New Jersey, or Delaware, be extra vigilant. Homes from this era have a high failure rate due to improper building practices. If you see damage, the problem is likely systemic.
At Stucco Safe, we provide professional stucco inspection and testing services throughout Southeastern Pennsylvania, New Jersey, and Delaware. Our certified inspectors use forensic methods to detect hidden moisture and structural issues. We can diagnose the true cause of the problem, telling you if a simple patch is enough or if more comprehensive remediation is needed. Inspections range from $495 to $1595, a small investment compared to the potential cost of unaddressed moisture damage.
If you’re unsure, get a professional opinion before patching or painting. Painting over a moisture problem can trap water and make it worse.
Frequently Asked Questions about Stucco Repair
Here are answers to some common questions about stucco repair.
What is the best type of patching compound for stucco holes?
The best compound depends on the size of the repair.
- For small holes (under 2 inches): A high-quality, pre-mixed stucco patch is ideal for its convenience and ease of use.
- For large, traditional repairs: You will need to mix your own compound from Portland cement, sand, and hydrated lime for greater strength and control.
- For tiny cracks: A paintable exterior caulk often works well.
Always choose a product rated for exterior use.
How long does it take for a stucco patch to dry?
A patch must cure fully to reach maximum strength, which takes longer than simply drying to the touch.
- Small patches require at least 7 days to cure before painting.
- Large, multi-coat patches can take up to 28 days to cure completely.
Always follow the manufacturer’s instructions. During the curing period, keep the patch moist by misting it with water, especially in warm or dry weather, to prevent cracking.
Can I repair stucco in any weather?
No, weather conditions are critical for a successful repair. The ideal temperature range is between 40°F (4°C) and 90°F (32°C).
Avoid repairing stucco in direct sunlight, high winds, or rain. These conditions can cause the patch to dry too quickly and crack, or wash away completely. Temperatures that are too low can prevent the stucco from curing properly, leading to a failed repair. Plan your work for a mild, overcast day if possible.
Conclusion
You now have a guide for how to fix a hole in stucco. With the right materials and careful attention to detail, you can handle many small to medium repairs yourself. The keys to success are proper preparation and allowing for adequate curing time.
Addressing holes promptly is about more than aesthetics; it’s about protecting your home’s structural integrity and value. A small hole can become a gateway for water, leading to rot, mold, and costly damage. A few hours spent on a patch now can prevent major issues later.
However, not every stucco problem is a DIY project. Widespread cracking, dark water stains, or signs of interior moisture point to deeper issues that a surface patch won’t solve. In these cases, it’s time to call a professional. At Stucco Safe, we use forensic testing to find the root cause of the problem. Our inspections, which range from $495 to $1595, can determine if you need a simple repair or a more comprehensive solution, saving you from the high cost of undiagnosed moisture damage.
Whether you do it yourself or call an expert, the most important step is to take action. Don’t let a small hole become a big problem.
For more information on maintaining your home’s exterior, explore our resources on stucco painting and repair.