
Moisture Detector: Top Picks for 2025
Why Hidden Moisture is Every Homeowner’s Worst Nightmare
A moisture detector is a handheld device that measures water content in building materials like wood, drywall, and concrete to help identify potential water damage before it becomes visible. These tools use either pins that penetrate the material or electromagnetic sensors that scan the surface without causing damage.
Top moisture detector types:
- Pin-type meters – Insert probes into materials for precise readings (best for wood and lumber)
- Pinless meters – Scan surfaces without damage (ideal for drywall and finished surfaces)
- Combination meters – Offer both pin and pinless functionality in one device
Key features to consider:
- Measurement range (typically 0-50% for wood, 0-33% for building materials)
- Material-specific calibration settings
- Digital display with backlight
- Audible alarms for high moisture levels
- Price range from $20 for basic models to $200+ for professional-grade units
Hidden moisture problems don’t announce themselves with flashing lights. By the time you see water stains, peeling paint, or smell that musty odor, the damage is often already extensive and expensive to fix. The global moisture detector market has grown to $1.1 billion as more property owners realize these simple tools can prevent thousands in repair costs.
Whether you’re dealing with a basement that feels damp, checking firewood before burning, or concerned about moisture behind your home’s exterior walls, the right moisture detector gives you the power to catch problems early.
I’m Gabe Kesslick, and I’ve been detecting and repairing moisture issues since 2001 with certifications in building envelope forensics and stucco inspection. Throughout my career, a reliable moisture detector has been an essential first step in diagnosing water intrusion problems before they compromise structural integrity.

Why Every Property Owner Needs a Moisture Detector
Picture this: you’re enjoying your morning coffee when you notice a small water stain on your ceiling. By the time moisture problems become visible, you’re often looking at thousands of dollars in repairs. That’s exactly why every property owner needs a moisture detector – it’s like having X-ray vision for hidden water damage.
Mold prevention is probably the biggest reason to invest in one of these handy tools. Mold needs just three things to thrive: moisture, organic material, and time. Your home has plenty of organic materials like wood and drywall, and time is always ticking. The only thing you can control is moisture levels.
A moisture detector helps you catch liftd moisture before mold gets started. Think about those sneaky spots where mold loves to hide – behind bathroom tiles, under kitchen sinks, or in that corner of the basement that always feels a bit damp. By the time you smell that telltale musty odor, mold colonies are already well-established.
Protecting your home’s structural integrity is another crucial reason to have a moisture detector on hand. Wood rot might sound like something that only affects old houses, but it can happen anywhere moisture lingers too long. Those beautiful hardwood floors, the wooden framing in your walls, even deck boards – they’re all vulnerable when moisture levels stay high.
I’ve seen homeowners find serious wood rot in floor joists that looked perfectly fine from the outside. A simple moisture reading could have caught the problem months earlier when it was still a minor repair instead of a major structural issue.
Your home’s indoor air quality depends heavily on keeping moisture in check. When humidity levels get too high, it doesn’t just feel uncomfortable – it creates the perfect breeding ground for dust mites, bacteria, and other allergens. That persistent stuffiness or the way your allergies seem worse at home? Often, it traces back to moisture problems.
For anyone doing renovations or repairs, verifying the dryness of materials before installation can save you from headaches down the road. Installing new flooring over damp subfloors or hanging drywall that hasn’t fully dried leads to warping, cracking, and adhesion failures.
Don’t ignore those early warning signs your house might be trying to tell you about moisture problems. Peeling paint often means moisture is pushing through from behind. Musty odors are usually your nose detecting mold spores before your eyes can see the growth.
A moisture detector transforms you from reactive to proactive. Instead of waiting for expensive problems to announce themselves, you can catch moisture issues while they’re still manageable and affordable to fix.
Pin vs. Pinless: A Head-to-Head Comparison

When it comes to choosing a moisture detector, you’re essentially picking between two different philosophies. Think of it like choosing between a precise scalpel and a broad scanner – both have their place, but knowing when to use each one makes all the difference.
This section compares the two main types of moisture detectors to help you choose the right one for your needs. Understanding their strengths and quirks will save you both time and frustration down the road.
Pin-Type Meters: For Invasive, Pinpoint Accuracy
Pin-type moisture detectors are the old-school champions of moisture measurement. They work on a beautifully simple principle called electrical resistance. When you press those two sharp pins into wood or drywall, the meter sends a tiny electrical current between them. Since water conducts electricity much better than dry materials, the wetter the material, the easier the current flows.
What makes pin-type meters shine is their ability to tell you exactly what’s happening at a specific depth. When you push those pins half an inch into a piece of lumber, you’re getting a reading from that exact spot – not the surface, not an average, but right where those pins sit. This precision makes them absolutely fantastic for woodworking, checking firewood moisture content, or inspecting structural framing where you need to know if that beam is truly dry.
The downside? Those pins leave tiny holes. They’re small – we’re talking pinprick size – but they’re there. On a piece of rough lumber or firewood, nobody cares. On your beautiful hardwood floor or freshly painted wall? That’s a different story. Pin-type meters work best when accuracy matters more than keeping surfaces pristine.
Pinless Meters: For Quick, Non-Damaging Scans
Pinless moisture detectors are the smooth operators of the moisture detection world. Instead of poking holes, they use electromagnetic fields to peer beneath the surface. The meter sends out a low-frequency signal that creates an invisible field in the material, then measures how moisture affects that field’s behavior.
The magic of pinless meters lies in their gentleness and speed. You can glide one across an entire wall in minutes, scanning for problem areas without leaving a single mark. They’re perfect for finished surfaces like drywall, painted walls, or that expensive hardwood floor you definitely don’t want to puncture. Many professionals use them for quick surveys of large areas, identifying hot spots that might need closer investigation.
But pinless meters have their moody moments. They measure the average moisture content within their scanning depth – usually about three-quarters of an inch – so you’re getting a general reading rather than a pinpoint measurement. They can also get confused by metal objects like pipes or studs hiding behind walls, and certain surface treatments can throw off their readings.
Combination Meters: The Best of Both Worlds?
Here’s where things get interesting. Combination meters pack both pin and pinless technology into one device, giving you the flexibility to switch between methods as needed. Start with a quick pinless scan to survey the area, then switch to pins for precise readings in suspicious spots.
Many hybrid models come loaded with extra features that make them incredibly versatile. Built-in thermo-hygrometers measure ambient temperature and humidity, helping you understand the complete moisture picture. Some advanced units even offer data logging capabilities, letting you track moisture levels over time – invaluable for monitoring drying progress after water damage.
The trade-off for all this versatility is cost and complexity, but for anyone dealing with various materials and situations, combination meters often prove their worth quickly.
| Attribute | Pin-Type Moisture Meters | Pinless Moisture Meters |
|---|---|---|
| Method | Electrical resistance between pins | Electromagnetic field measurement |
| Surface Damage | Leaves small holes | No surface damage |
| Best For | Wood, lumber, firewood, framing, precise spot checks | Drywall, finished floors, concrete, quick area scans |
| Accuracy Factors | Highly accurate at pin depth, depends on good pin contact | Average reading over scan area, affected by surface density and nearby metal |
The key is matching your moisture detector to your specific needs. Are you primarily checking lumber and don’t mind tiny holes? Pin-type is your friend. Need to scan finished surfaces without damage? Pinless is the way to go. Want maximum flexibility? A combination meter might be worth the investment.
From Basic to Pro: Key Features That Define a Great Moisture Detector

Think of shopping for a moisture detector like buying a car. Any vehicle will get you from point A to point B, but the right features can make your journey so much smoother and more reliable. Once you’ve decided whether you want a pin-type, pinless, or combination meter, it’s time to look under the hood at what separates a basic model from a professional-grade tool.
This section breaks down the essential features to consider when selecting your device, helping you understand what you’re paying for and what will actually make your moisture detection more effective.
Accuracy and Material Scales
The heart of any great moisture detector lies in its ability to give you numbers you can trust. After all, what good is a meter that tells you there’s moisture if you can’t rely on how much?
Measurement range is your first consideration, typically shown as a percentage of moisture content (%MC). Most meters handle wood moisture from 0-50%, while building materials like concrete or drywall usually range from 0.2-33%. For example, the Brennenstuhl Moisture Detector MD measures wood from 5-50% and building materials from 1.5-33%. Understanding these ranges helps you pick a meter that matches your specific needs.
Accuracy tolerance tells the real story about reliability. Look for specs like ±0.5% or ±2% – this shows how close your reading will be to the actual moisture content. The S8603 boasts impressive ±0.5% accuracy, while the Laserliner DampCheck offers ±2% for wood and ±0.3% for building materials. Tighter tolerances mean more reliable results, but they usually come with a higher price tag.
Here’s where things get really important: pre-programmed material settings. Different materials hold and conduct moisture in completely different ways. A quality moisture detector will have specific settings for wood (often broken down into hardwood, softwood, or even specific wood groups), drywall, concrete, and masonry. Using the wrong setting can throw your readings way off – imagine trying to measure concrete using a wood setting. You’d get numbers that are essentially meaningless.
Measurement Depth and Display
How deep can your meter “see,” and can you actually read the results clearly? These practical features make the difference between a tool that works and one that sits in your toolbox unused.
For pin-type meters, pin length determines how deep you can measure. Pinless meters typically have a fixed scan depth of about 3/4 to 1 1/4 inches. Some advanced models offer a dual-depth function, letting you compare shallow and deep readings. This is incredibly useful for figuring out if moisture is just on the surface or if it’s penetrated deeper into the structure.
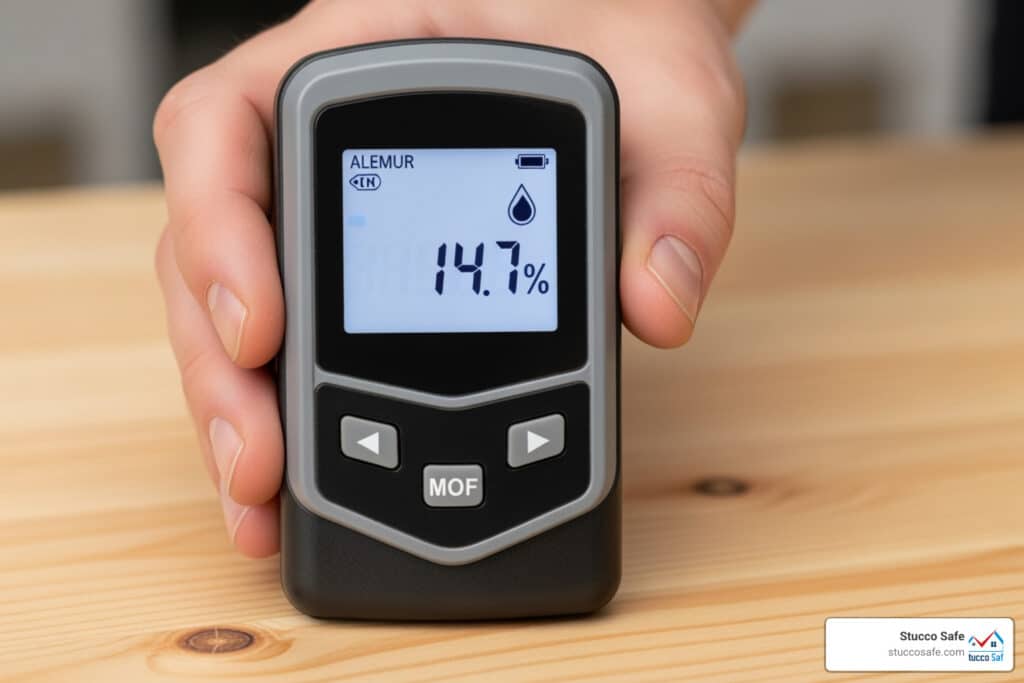
A clear digital LCD screen isn’t just nice to have – it’s essential. Precise numerical readings tell you so much more than simple indicator lights ever could. Many meters, like the S8603, feature a backlit screen that makes readings easy to see in dark basements, crawl spaces, or other dimly lit areas where moisture problems love to hide.
LED color indicators provide that quick visual feedback we all appreciate. Green typically means dry, yellow suggests moderate moisture, and red signals wet conditions. While the numbers on the display give you precision, these color codes let you scan quickly without constantly staring at the screen.
Advanced Features and Price Point
Beyond the basics, certain features can transform your moisture detector from a simple tool into a comprehensive moisture management system.
Audible alarms are game-changers for rapid scanning. When the meter beeps at high moisture levels, you can cover large areas quickly without constantly checking the display. It’s like having the meter tap you on the shoulder when it finds something concerning.
The data hold function might seem minor until you’re trying to take a reading in an awkward corner behind a water heater. This feature freezes your reading on the screen, so you don’t have to contort yourself to see the display while holding the meter in position.
An auto-off feature saves battery life by shutting down the meter after a few minutes of inactivity. Models like the Brennenstuhl MD and S8603 include this thoughtful addition that prevents the frustration of dead batteries when you need the tool most.
Professional-grade meters might include Bluetooth connectivity for data logging, temperature compensation for environmental factors, or integrated thermo-hygrometers for measuring ambient conditions. These features are incredibly valuable for professionals who need to document findings or track moisture changes over time.
Price ranges vary dramatically based on features and target users. Basic DIY models start around $20-$30 and offer essential functionality for occasional use. Mid-range combination meters for serious homeowners or light professionals fall into the $50-$250 range. Professional-grade units with superior accuracy and robust construction can range from $250 to over $1,000.
The key is matching your investment to your needs. A basic model works fine for checking firewood or occasional home maintenance, but if you’re dealing with ongoing moisture concerns or need reliable data for insurance claims, investing in a feature-rich, accurate device will pay for itself quickly.
How to Get Reliable Readings and Avoid Common Mistakes

Owning a moisture detector is just the first step; knowing how to use it correctly is what truly empowers us to make informed decisions about our property. Like any diagnostic tool, using your moisture detector properly is key to getting trustworthy results and avoiding costly misinterpretations.
Proper Technique for Using Your Moisture Detector
Getting accurate readings isn’t just about pointing and clicking. There are a few best practices we should always follow:
- Perform a Calibration Check: While many meters are factory calibrated, it’s good practice to check your meter regularly. Some devices come with a built-in calibration check, or you can test it on a material with a known moisture content (e.g., a perfectly dry piece of wood if you have one). This ensures your meter is giving consistent and reliable readings.
- Set the Correct Material Mode: This is perhaps the most critical step. As we’ve discussed, different materials have different electrical properties. Our moisture detector needs to be set to the appropriate scale for the material we are testing (e.g., wood, drywall, concrete, masonry). Using the wrong setting will give us completely meaningless numbers. The S8603 Digital Wood Moisture Meter, for example, allows selection between four types of tree species for more accurate readings, emphasizing the importance of this step.
- Take a Dry Baseline Reading for Comparison: Before we start scanning for problems, we should always take a reference reading on a known dry area of the same material. This gives us a baseline for comparison. For drywall, the Tramex blog on drywall testing advises taking a reference reading on a known dry area before scanning. If our suspect area reads significantly higher than this baseline, we know we have a problem. Without a baseline, a reading of “10%” might seem low, but if our dry baseline is “2%”, then “10%” is a significant issue.
- Ensure Proper Contact: For pin-type meters, make sure both pins penetrate the material adequately and firmly. For pinless meters, ensure the entire sensor pad is flat against the surface. Uneven contact can lead to inaccurate readings.
- Take Multiple Readings: Moisture problems are rarely uniform. Take several readings in the suspect area and surrounding areas to map out the extent of the moisture. This is especially useful for understanding the spread of a leak or the effectiveness of a drying process.
Interpreting Results and Spotting False Positives
Understanding what our moisture detector tells us is as important as how we use it.
- Relative vs. Absolute Readings: Some meters provide relative readings (e.g., a scale from 0-100 indicating relative dampness), while others give absolute moisture content percentages (%MC). For precise diagnostics, %MC is usually preferred.
- Understanding Acceptable Moisture Levels: What constitutes “wet” varies by material. For instance, drywall moisture readings over 0.5% Moisture Content are generally considered unacceptable and indicate a problem, as per the Tramex blog. For wood, acceptable levels vary depending on the climate and intended use (e.g., 6-8% for furniture in a dry climate). It’s crucial to research the acceptable moisture content for the specific material you are testing.
- Factors Causing Inaccuracies (False Positives):
- Surface Coatings: Latex paint, sealants, or other coatings can sometimes interfere with pinless meters, as they might block the electromagnetic signal or give a misleading surface reading. A Reddit discussion highlighted that latex paint might require a piercing meter for accurate readings.
- Metal Objects: Hidden metal studs, pipes, or electrical conduits behind the surface can significantly skew pinless readings, causing false positives, as they can interfere with the electromagnetic field.
- Material Density/Thickness: Pinless meters are calibrated for specific material densities. If the material is unusually dense or thin, it can affect the reading.
- Temperature and Humidity: While some advanced meters offer temperature compensation, extreme ambient temperatures and humidity can sometimes influence readings.
- Concrete’s Nature: As a Reddit discussion vividly explained, concrete inherently holds a significant amount of moisture, and many general-purpose meters are not designed to accurately read concrete, even if they have a “masonry” setting. High readings on concrete might just be normal for the material, especially if there are no other signs of water intrusion or efflorescence. Concrete needs some moisture to prevent it from becoming brittle.
- Efflorescence: While efflorescence (white, powdery salt deposits) on concrete walls indicates moisture presence, it’s often a cosmetic issue rather than a structural concern, as noted in the Reddit discussion. It means water is moving through the material and leaving salt behind, but it doesn’t necessarily mean active structural damage.
To avoid false positives, we should always:
- Use the correct material setting.
- Take multiple readings in various spots.
- Look for other signs of moisture (stains, odors, visible water).
- Consider the context of the material (e.g., concrete is naturally damp).
- For complex or critical situations, consult a professional.
- For a deeper dive into the science of moisture measurement and its challenges, we can explore scientific research on moisture measurement.
Care and Maintenance for Lasting Accuracy
Like any tool, our moisture detector needs a little love to stay accurate and reliable.
- Cleaning Probes and Sensors: For pin-type meters, keep the pins clean and free of rust or debris. For pinless meters, wipe the sensor pad clean after each use to prevent residue buildup that could affect readings.
- Proper Storage: Store your moisture detector in a dry, safe place, ideally in its original case, to protect it from dust, moisture, and impact.
- Battery Replacement: Most meters are battery-powered (e.g., 9V or AAA batteries). Replace batteries as soon as the low battery indicator appears to ensure consistent performance. An auto-off feature helps conserve battery life.
By following these best practices, we can ensure our moisture detector remains a trusted ally in our fight against hidden dampness, giving us accurate insights into our property’s health.
Conclusion: Take Control of Moisture Before It Takes Control of You
Throughout this guide, we’ve journeyed together through moisture detectors – from understanding why these tools are essential for every property owner to mastering the art of getting reliable readings. What we’ve learned is that these compact devices pack a powerful punch in our ongoing battle against hidden water damage.
The golden rule here is simple: early detection is key. Think of your moisture detector as a smoke alarm for water damage. Just as we wouldn’t wait to smell smoke before checking for fire, we shouldn’t wait to see water stains or smell mustiness before checking for moisture problems. That small investment of time today with your moisture meter could save you from facing a five-figure mold remediation bill or major structural repairs down the road.
Choosing the right tool for the job means understanding your specific needs. Are you primarily checking firewood and lumber? A pin-type meter might be your best friend. Need to scan large areas of drywall without leaving marks? Go pinless. Want the flexibility to handle any situation? A combination meter gives you both worlds, though at a higher price point.
The fanciest moisture detector in the world won’t help if we don’t use it correctly. Taking that dry baseline reading, setting the right material mode, and understanding what those numbers actually mean – these steps separate useful information from confusing data that might lead us astray.
For complex issues, especially with exterior systems like stucco, a professional assessment is vital. While your moisture detector is excellent for identifying potential problems, some situations require specialized knowledge and professional-grade equipment. Stucco systems, in particular, can be tricky because they’re designed to absorb and release moisture naturally, making it challenging to distinguish between normal moisture levels and problematic water intrusion.
At Stucco Safe, we’ve seen how early moisture detection can make the difference between a minor repair and a major renovation. Our forensic testing methods and certified inspectors help property owners across Southeastern Pennsylvania, New Jersey, and Delaware understand exactly what’s happening with their building envelope. While stucco inspections vary in cost from $495 to $1595 or more for very large homes, this investment often prevents much costlier surprises later.
Your moisture detector is your first line of defense – use it regularly, trust what it tells you, and don’t hesitate to call in the professionals when you need deeper answers. After all, moisture problems don’t get better with time, but they certainly get more expensive.
When in doubt, get a certified moisture inspection for your property.