
Stucco Anchor Screws: Top 3 Secure Types
Introduction: Why Your Stucco Wall Needs Special Attention
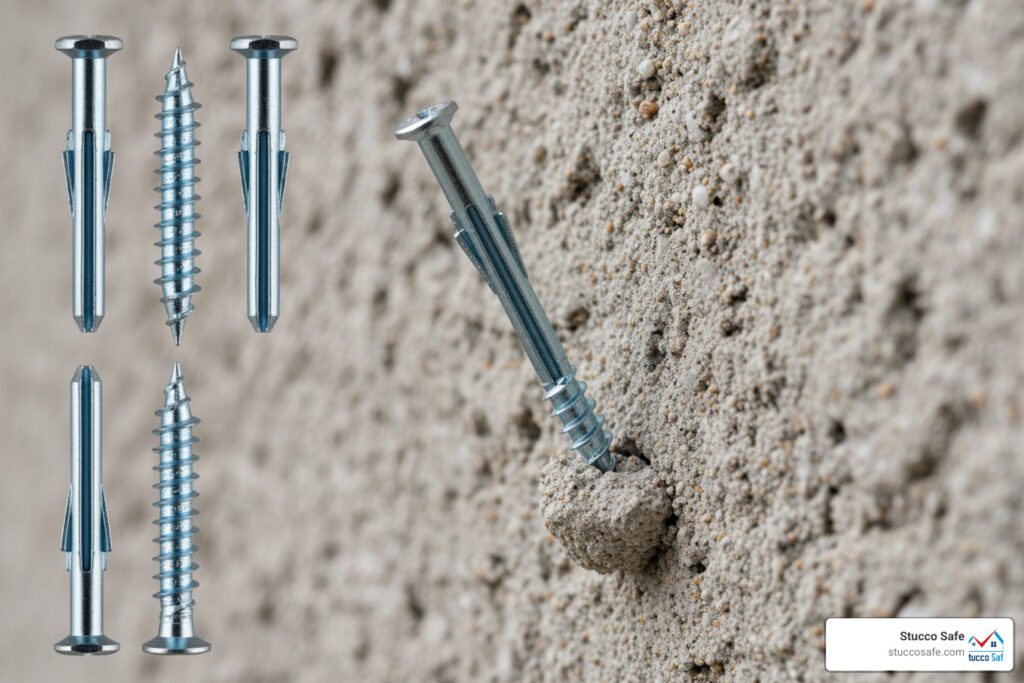
Stucco anchor screws are specialized fasteners designed to expand behind the brittle stucco finish, distributing load across a wider area to prevent cracking and ensure secure mounting. Unlike standard wood or drywall screws that can pulverize stucco’s cement-based surface, proper anchors create a mechanical grip that holds firmly without damaging your wall.
Quick Answer: Choosing the Right Stucco Anchor Screws
- Light loads (under 10 lbs): Plastic or nylon sleeve anchors
- Medium loads (10-50 lbs): Metal sleeve anchors or concrete screws
- Heavy loads (50+ lbs): Wedge anchors or multiple anchor points
- Outdoor use: Stainless steel or galvanized finish for corrosion resistance
- Common sizes: 3/16-in or 1/4-in diameter, with lengths from 1-1/2-in to 2-1/2-in
Many homeowners don’t realize that grabbing regular screws from the garage to hang something on stucco is setting themselves up for failure. Stucco is hard but brittle—it cracks under concentrated stress. That crack becomes a pathway for water, and moisture intrusion behind stucco can lead to hidden damage that erodes your property value.
The right anchor matters because stucco is fundamentally different from wood or drywall. It’s a layered system of Portland cement, sand, and wire lath applied over various substrates. When you drill into it, you’re not just making a hole—you’re creating a potential weak point that needs proper reinforcement.
I’m Gabe Kesslick, and as an EDI Level 2 Certified Stucco Inspector with over two decades in leak detection and repair, I’ve seen countless cases where improper use of stucco anchor screws led to moisture problems and structural issues. Through hundreds of forensic investigations, I’ve learned exactly which anchors work—and which ones fail—in real-world stucco applications.

Understanding the Anatomy of a Stucco Wall and Its Challenges
Before we dive into the nitty-gritty of stucco anchor screws, let’s first understand the unique material we’re working with. Stucco isn’t just a simple wall covering; it’s a multi-layered system, much like an onion, but hopefully less likely to make you cry (unless you try to screw into it incorrectly!).
A typical stucco wall consists of several components:
- Stucco Layers: This is the visible exterior finish, a mix of Portland cement, sand, and water. It’s durable, insect-resistant, and rot-resistant, making it a popular choice for homes in areas like Southeastern Pennsylvania, New Jersey, and Delaware.
- Wire Lath Reinforcement: Beneath the surface, there’s often a layer of wire or metal lath. This mesh provides a base for the stucco to adhere to and adds structural integrity. However, it can also be a tricky obstacle when drilling, as drill bits can “walk” or get caught, potentially enlarging the hole.
- Substrate Types: The stucco and lath are applied over a structural backing, or “substrate.” This can vary significantly, influencing how you approach anchoring. Common substrates include:
- Solid Masonry: Brick, concrete, or cinder block. These offer a strong, dense material for anchors to grip.
- Wood Sheathing: Plywood or OSB (Oriented Strand Board) directly behind the lath.
- Hollow Spaces: Sometimes, especially with older construction or certain wall designs, there might be an empty cavity behind the stucco and lath before you hit a stud.
The brittle nature of stucco is its Achilles’ heel when it comes to fastening. While it’s hard, it’s not forgiving. Concentrated stress from a poorly chosen or improperly installed screw can easily lead to cracks. And these cracks, no matter how small, are an open invitation for moisture. We’ve seen countless times how unsealed penetrations become the starting point for serious moisture problems, leading to hidden rot in the framing and ultimately eroding property value. It’s a problem that often goes unnoticed until significant damage has occurred, especially in homes built between 1993 and 2006, which are particularly vulnerable due to certain stucco system designs from that era.
Understanding these layers and their characteristics is crucial. It informs our choice of stucco anchor screws and the installation techniques we use to ensure a secure hold that protects your home from both falling objects and insidious moisture damage. For more in-depth information about the various anchoring solutions available, check out our guide on More info about Stucco Anchor Types.
A Guide to the Main Types of Stucco Anchors
When it comes to securing items to stucco, one size definitely does not fit all. The type of stucco anchor screw you choose depends on the weight of the object you’re hanging and the nature of the wall behind your stucco. Let’s explore the most common types:
Plastic & Nylon Sleeve Anchors

These are your go-to for light-duty applications. Imagine hanging a small picture frame, a lightweight house number, or a decorative plaque. Plastic or nylon sleeve anchors are designed to expand when a screw is driven into them, creating a snug fit within a pre-drilled hole in the stucco. They are usually made of plastic or nylon, which helps distribute the load evenly and prevent direct stress on the brittle stucco surface.
- Load Capacity: Typically 5-25 lbs.
- Ideal Substrate: Works well in solid masonry, but can also be effective in stucco over wood sheathing, provided the screw reaches the wood.
- Common Uses: Picture frames, small mirrors, light decorations, small signs.
Metal Expansion Anchors (Sleeve & Wedge)

When you need to hang something with a bit more heft—like a handrail, a hose reel, or a larger outdoor light fixture—metal expansion anchors step up to the plate. These are robust solutions designed for medium to heavy loads.
- Sleeve Anchors: These consist of a threaded bolt surrounded by an expandable metal sleeve. As you tighten the nut, the sleeve expands, gripping the sides of the drilled hole. They are ideal for supporting heavier loads and work best in solid masonry.
- Load Capacity: Generally 25-75 lbs.
- Ideal Substrate: Solid masonry (concrete, brick, block).
- Common Uses: Handrails, heavier shelving, larger light fixtures, outdoor speakers.
- Wedge Anchors: Offering the highest level of holding power, wedge anchors are designed for the heaviest applications. They consist of a stud bolt, a nut, and a washer, with a wedge at one end. As the nut is tightened, the wedge pulls up, expanding the anchor against the concrete or masonry.
- Load Capacity: Can hold 50-200+ lbs, especially when driven into solid masonry. For very heavy items (over 100 lbs), we often recommend using multiple anchor points to distribute the load.
- Ideal Substrate: Strictly solid concrete or very dense masonry.
- Common Uses: Satellite dishes, large wall-mounted TVs, heavy outdoor equipment, structural supports.
Concrete Screws (Masonry Screws)
Often recognized by their distinctive blue color, concrete screws (also known as masonry screws or Tapcon anchors) are self-tapping fasteners specifically designed for use in concrete, brick, and block. While they are technically screws, their unique thread design allows them to cut into masonry, providing a strong hold without the need for an expansion plug. They are excellent for light to medium-duty applications and are a popular choice for their ease of installation.
- Load Capacity: Typically 20-80 lbs.
- Ideal Substrate: Concrete, brick, block, and even stucco over these solid materials.
- Common Uses: Attaching electrical boxes, conduit, furring strips, window frames, and other fixtures directly to masonry.
Here’s a quick comparison of these common stucco anchor screw types:
| Anchor Type | Load Capacity (approx.) | Ideal Substrate | Common Uses |
|---|---|---|---|
| Plastic & Nylon Sleeve | 5-25 lbs | Solid Masonry, Wood | Picture frames, house numbers, small decorations |
| Metal Sleeve | 25-75 lbs | Solid Masonry | Handrails, heavier light fixtures, medium shelving |
| Wedge | 50-200+ lbs | Solid Concrete, Dense Masonry | Satellite dishes, large TVs, heavy outdoor equipment (often with multiple points) |
| Concrete Screws (Tapcon) | 20-80 lbs | Concrete, Brick, Block | Electrical boxes, conduit, window frames, light-to-medium fixtures |
How to Choose the Right Stucco Anchor Screws
Choosing the best stucco anchor screws isn’t just about picking the strongest one; it’s about matching the anchor to your specific needs. It’s a bit like choosing the right tool for a job – you wouldn’t use a sledgehammer to hang a picture, would you? (Unless you’re really having a bad day, and even then, we wouldn’t recommend it for stucco!)
Assess Load Weight
This is your first and most critical consideration. How heavy is the item you want to hang?
- Light Loads (under 10 lbs): For these, plastic or nylon sleeve anchors are usually sufficient and prevent over-engineering the solution. Think small decorative items, lightweight signs, or outdoor thermometers.
- Medium Loads (10-50 lbs): This category includes things like medium-sized planters, hose reels, mailboxes, or larger wall-mounted speakers. Here, metal sleeve anchors or concrete screws are excellent choices.
- Heavy Loads (50+ lbs): For items like a heavy outdoor TV, a large pergola attachment, or a substantial handrail, you’ll need the robust holding power of wedge anchors. For anything over 100 lbs, it’s always a good practice to use several anchor points to distribute the weight evenly, preventing undue stress on any single point of your stucco.
Identify Wall Substrate
Knowing what’s behind your stucco is just as important as knowing the weight of your item.
- Solid Masonry (Concrete, Brick, Cinder Block): This is the ideal scenario for most heavy-duty anchors. Wedge anchors, metal sleeve anchors, and concrete screws perform exceptionally well here.
- Wood Sheathing (Plywood, OSB): If you’re drilling through stucco and hit wood, you might use a plastic sleeve anchor with a screw long enough to bite deeply into the wood, or even specialized wood screws designed for exterior use, ensuring they penetrate past the stucco and into the solid wood.
- Hollow Spaces: If you drill through the stucco and find an empty cavity, traditional expansion anchors won’t work effectively. In these rare cases, a toggle bolt (a type of anchor that expands behind the wall) might be considered, but generally, we advise against hanging heavy items in hollow stucco walls. It’s always best to try and find a stud or solid backing. A stud finder can be a helpful tool here, though they can sometimes struggle to read through thick stucco and lath.
Outdoor vs. Indoor Use
Stucco is often an exterior finish, which means your anchors will be exposed to the elements.
- Corrosion Resistance: For outdoor applications, you absolutely must prioritize corrosion-resistant materials. Zinc-plated steel offers decent rust resistance, but for long-term durability and to avoid unsightly rust stains running down your beautiful stucco, stainless steel (especially Type 316 for superior resistance to chlorides and sulfurous acids) or heavily galvanized finishes are the champions. Think of it as an investment in the longevity and appearance of your home.
- Sealing: Regardless of the anchor type, proper sealing is paramount for outdoor use. We’ll dive into this more in the installation section, but every penetration is a potential entry point for water.
For more detailed guidance on selecting the perfect fasteners, explore our Best Screws for Stucco Guide.
Key Features of Stucco Anchor Screws to Consider
Beyond the basic type, several features of stucco anchor screws contribute to their performance and ease of use:
- Head Style:
- Flat-head: Designed to sit flush or slightly recessed, offering a clean finish. Often used when the screw needs to be concealed or covered.
- Hex-washer-head: Features a hexagonal head with an integrated washer. This provides a larger bearing surface, which can be beneficial for distributing load and preventing pull-through, especially with softer materials or when securing brackets. They are easy to drive with a socket or hex bit.
- Round-washer-head: Similar to hex-washer-heads but with a rounded top, also offering a good bearing surface.
- Drive Style: This refers to the shape of the recess in the screw head that accepts the screwdriver or bit.
- Phillips: The classic cross-shaped drive. Common and widely available, but can be prone to cam-out (the driver slipping out) if not enough downward pressure is applied.
- Torx (Star Drive): A six-point star shape that offers superior torque transfer and significantly reduces cam-out, making installation smoother and less frustrating. Many professionals prefer Torx for its reliability.
- Hex: Used with hex-head screws, requiring a hex bit or socket.
- Material:
- Carbon Steel: The most common material, offering good strength. For exterior use, it must be coated (zinc-plated, galvanized, or proprietary coatings like Stalgard®) to prevent corrosion. The DEWALT technical guide highlights coatings like Stalgard® SUB which can withstand 2000 hours of salt spray testing (ASTM B117), demonstrating the importance of quality coatings for durability.
- Nylon: Primarily used for plastic sleeve anchors, nylon is flexible, corrosion-resistant, and non-conductive. It’s excellent for light loads and helps prevent damage to the stucco itself.
Common Sizes and Dimensions for Stucco Anchor Screws
The dimensions of your stucco anchor screws are critical for a secure hold. We’re talking about diameter and length here.
- Diameter:
- 3/16-in: A common diameter for lighter to medium-duty anchors, often seen in plastic sleeves or smaller concrete screws. Buildex offers a 3/16-in x 1-1/2-in steel round-washer-head Phillips stucco anchor, for example.
- 1/4-in: This is a popular diameter for medium to heavy-duty anchors, including many concrete screws and metal expansion anchors. Buildex also has a 1/4-in x 2-1/2-in steel hex-washer-head stucco anchor.
- Length: The length of the screw or anchor needs to be sufficient to pass through the stucco, any lath, and then embed securely into the substrate behind it. Common lengths range from 1-1/4-in to 3-in or more.
- 1-1/2-in: Often suitable for thinner stucco systems over solid substrates.
- 2-1/2-in to 2-7/8-in: Good for penetrating stucco and lath to reach wood sheathing or to get a deeper bite into masonry.
- Choosing Length: Consider the thickness of your stucco, the depth of any air gap, and the required embedment depth into the solid backing. You want enough length to ensure the anchor’s active gripping mechanism (expansion, threads) is fully engaged in the solid material, not just floating in the stucco layer.
Step-by-Step: How to Install Anchors in Stucco Securely
Installing stucco anchor screws correctly is the difference between a securely mounted fixture and a potential headache (or worse, water damage). It’s a process that requires precision and attention to detail.
Essential Tools & Safety
Before you begin, gather your gear. Safety first, folks!
- Safety Glasses: Stucco dust is no joke for your eyes.
- Dust Mask: Protect your lungs from fine masonry dust.
- Hammer Drill: Absolutely essential for drilling into stucco and masonry. A regular drill might suffice for very small holes in soft stucco, but a hammer drill makes the job much easier and cleaner, especially when encountering wire lath.
- Masonry Bits: Carbide-tipped masonry drill bits are a must. Make sure the bit diameter matches the specifications for your chosen anchor.
- Measuring Tape & Pencil: For accurate marking.
- Stud Finder: To locate wood or metal framing behind the stucco, if applicable.
- Exterior-Grade Silicone Caulk: Your secret weapon against moisture intrusion.
- Appropriate Driver Bit: Phillips, Torx, or hex, to match your screw head.
- Hammer: For gently tapping anchors flush.
Step 1: Mark and Drill
- Mark Your Spot: Use your measuring tape and pencil to precisely mark where you want to install the anchor. If you’re aiming for a stud or specific structural element, use a stud finder first.
- The Painter’s Tape Trick: Apply a piece of painter’s tape over your marked drilling location. This simple trick helps prevent the drill bit from wandering and can minimize chipping of the stucco surface as you start drilling.
- Drill the Pilot Hole:
- Attach the correct size carbide-tipped masonry bit to your hammer drill. The anchor manufacturer will specify the exact drill bit diameter.
- Begin drilling slowly, applying steady, firm pressure. Allow the hammer drill to do its job.
- Drill to the specified depth for your anchor. Many hammer drills have a depth stop, or you can mark the bit with a piece of tape.
- Be prepared for some resistance if you hit wire lath. Drill bits can sometimes “walk” when hitting embedded wire, potentially enlarging the hole. Go slow and steady.
Step 2: Clean and Seal Hole
- Remove Debris: After drilling, pull the bit out and clear any dust and debris from the hole. You can use compressed air, a vacuum, or a small brush. A clean hole ensures the anchor can expand and grip properly.
- Exterior-Grade Silicone Caulk: This step is crucial, especially for outdoor installations in our service areas of Southeastern PA, New Jersey, and Delaware, where moisture is a constant concern. Apply a small blob of exterior-grade silicone caulk into the drilled hole. This creates a waterproof seal around the anchor, preventing water from seeping behind your stucco.
Step 3: Insert and Fasten
- Insert the Anchor: Push the stucco anchor screw (or the sleeve if it’s a two-part anchor) into the pre-caulked hole. It should fit snugly. If it doesn’t go in easily, you can gently tap it with a hammer until it’s flush with the stucco surface.
- Fasten Your Item: Position the item you’re mounting and drive the screw into the anchor. Use your drill/driver at a slow speed to avoid over-tightening. Over-tightening can strip the anchor, crack the stucco, or even damage the item you’re trying to hang. The goal is secure, not super-tight. Finish by applying a bead of clear silicone around the edges of the mounted item or bracket to create an additional seal against moisture.
Proper installation is key to both the security of your mounted item and the integrity of your stucco wall. We cannot stress enough the importance of sealing each penetration to prevent moisture intrusion, which can lead to significant and costly damage over time. For more visual guidance, refer to our comprehensive guide on How to Install Anchors in Stucco. You can also View this technical guide on masonry anchors for in-depth technical specifications on various masonry fastening solutions.
Frequently Asked Questions about Stucco Anchors
We hear a lot of questions about working with stucco, and rightly so – it’s a unique material! Here are some of the most common questions we get regarding stucco anchor screws.
Can you screw directly into stucco without an anchor?
You can, but we strongly advise against it. Think of it this way: stucco is hard, but it’s brittle, like a very thick, hardened crust. If you try to drive a regular screw directly into it, you’re essentially trying to cut threads into a material that doesn’t want to hold them. This usually results in pulverizing the stucco, creating stress cracks, and ultimately, a very weak hold. The screw will likely loosen or pull out within months, leaving you with a damaged wall and a falling object. Always use a purpose-designed stucco anchor screw with a pre-drilled pilot hole, and crucially, always seal that penetration to prevent moisture.
How much weight can a stucco anchor hold?
The amount of weight a stucco anchor screw can hold varies significantly based on the type of anchor, its size, and the quality of the substrate behind your stucco. There’s no single magic number, but here’s a general breakdown:
- Plastic/Nylon Sleeve Anchors: These are best for light items, typically holding 5-25 lbs. They’re great for picture frames, lightweight decorations, or small signs.
- Metal Sleeve Anchors: Stepping up in strength, these can usually support 25-75 lbs. They’re suitable for items like handrails, medium-sized light fixtures, or heavier wall decor.
- Concrete Screws (Masonry Screws): These versatile fasteners can hold between 20-80 lbs, depending on their diameter and length, and the density of the masonry.
- Wedge Anchors: These offer the highest holding power, capable of supporting 50-200+ lbs when properly installed into solid concrete or dense masonry. For anything over 100 lbs, we always recommend distributing the load across multiple anchor points to improve stability and reduce stress on any single area of the stucco.
The strength of the anchor is only as good as the material it’s anchored into. A heavy-duty wedge anchor won’t perform to its potential if it’s only gripping thin stucco over a hollow cavity.
How do you fix a hole in stucco after removing an anchor?
Life happens, and sometimes you need to remove an anchor, leaving an unsightly hole. Fixing it is a multi-step process to ensure a seamless repair and protect your stucco:
- Remove the Screw and Anchor: Carefully back out the screw. If it’s an expansion anchor, the sleeve might come out with it. If not, you might need to gently pry it out with pliers.
- Clean the Hole: Brush out any loose debris or dust from the cavity. You want a clean surface for your patch to adhere to.
- Patch the Cavity: Fill the hole with an exterior stucco patch or a good quality masonry repair compound. Apply it in layers if the hole is deep, allowing each layer to set slightly.
- Texture to Match: Before the patch fully dries, use a sponge, trowel, or brush to try and match the existing stucco texture. This takes a bit of an artistic eye, but practice makes perfect!
- Cure, Prime, and Paint: Allow the patch to cure fully according to the product instructions (this can take 24-48 hours or more). Once cured, prime the patched area, and then paint it to match your existing stucco color. This will help the repair blend in beautifully.
Conclusion: Protect Your Investment with Proper Anchoring
We’ve covered a lot of ground today, from the delicate dance of drilling into stucco’s layers to the robust grip of a well-chosen stucco anchor screw. The takeaway is clear: proper anchoring in stucco is not just about hanging a picture; it’s about safeguarding your home.
Choosing the right anchor, understanding your stucco wall’s anatomy, and following careful installation steps are crucial for two main reasons:
- Preventing Costly Stucco Damage: Using the wrong fastener or technique can lead to cracks, spalling, and deterioration of your stucco finish, which are expensive to repair.
- Moisture Prevention: Every penetration into your stucco is a potential pathway for water. An improperly sealed or installed anchor can become a tiny, insidious leak point, allowing moisture to infiltrate behind your stucco and cause hidden damage like wood rot and mold. We’ve seen in our forensic investigations across Southeastern PA, New Jersey, and Delaware how these seemingly small issues can escalate into significant structural problems, costing homeowners thousands in repairs.
If you ever see cracks, stains, or any signs of moisture around fasteners or penetrations in your stucco, don’t delay. These are red flags that could indicate underlying issues. A professional inspection, like those we provide at Stucco Safe, can accurately identify any moisture intrusion or structural problems. Our EDI Level 2 Certified Stucco Inspectors use forensic testing methods to give you a clear picture of your stucco’s health. Our stucco inspection services typically range from $495 to $1595 or more for very large homes, a small price to pay for peace of mind and protecting your most valuable asset.
Protect your investment and ensure the longevity of your stucco. For a comprehensive resource on all things stucco anchoring, dig into our Stucco Anchoring Ultimate Guide.