
Stucco Moisture Remediation: 5 Essential Steps for Success 2025
Why Stucco Moisture Problems Demand Immediate Action
Stucco moisture remediation is the complete removal and replacement of damaged stucco systems to eliminate trapped water and prevent structural damage. Unlike simple repairs that patch surface cracks, remediation addresses the root cause by installing proper drainage systems and waterproof barriers.
Quick Answer: What is Stucco Moisture Remediation?
– Complete removal of old, damaged stucco down to the substrate
– Repair of underlying damage including rotted wood and compromised sheathing
– Installation of proper drainage with flashing, weep screeds, and moisture barriers
– Reapplication of new stucco or alternative siding materials
– Cost range: $6-$9 per square foot, typically $1,000-$9,000 total
– Timeline: 10-18 days for most residential projects
Your stucco might look fine from the street, but moisture can hide behind that cement plaster for years. Research shows that stucco has a full absorption rate of about 15 seconds – meaning water can soak completely through in less time than it takes to read this sentence.
Here’s the scary part: Homes built between 1985 and 2003 have failure rates as high as 90% due to improper installation and outdated building codes. What starts as a hairline crack can lead to wood rot, black mold, and even termite infestations inside your walls.
The good news? Proper stucco moisture remediation solves these problems permanently when done correctly. It’s not cheap, but it’s far less expensive than dealing with structural damage, health issues, or a failed home sale down the road.
I’m Gabe Kesslick, and I’ve been detecting and repairing stucco leaks since 2001 with certifications from EDI, BESI, and AWCI. Through thousands of stucco moisture remediation projects, I’ve seen how early intervention saves homeowners tens of thousands in repair costs and protects their families’ health.

Why Stucco Gets Wet (and What Happens Next)
Here’s something that surprises most homeowners: stucco is supposed to get wet. This cement-based plaster made from Portland cement, sand, and water is naturally water-resistant, but it’s definitely not waterproof. Think of it like a concrete sidewalk – when it rains, that sidewalk darkens as it absorbs moisture. Your stucco does the same thing.
What’s concerning is how fast this happens. With that 15-second absorption rate, water soaks completely through stucco faster than you can tie your shoes. The moisture quickly reaches what we call the drainage plane – the barrier behind your stucco that’s supposed to channel water safely away from your home’s structure.
The real trouble starts when this system breaks down. Proper flashing, weep screeds, and kick-out diverters are like your home’s raincoat – they’re supposed to keep water moving in the right direction. When these components are missing or poorly installed, water gets trapped behind the stucco with nowhere to go.
I’ve seen this pattern hundreds of times in our moisture intrusion detection work: water enters through hairline cracks from normal building settlement, then sits against your wood sheathing like a wet sponge. Vapor drive and capillary action keep pulling more moisture into the wall system, creating the perfect storm for serious damage.
Settlement cracks are particularly sneaky. Your house naturally shifts and settles over time, creating tiny openings that invite water inside. Without adequate ground clearance (that 6-8 inch gap between stucco and soil), ground moisture also wicks up into your walls like water climbing a paper towel.
Telltale Signs of Moisture Damage
After thousands of inspections across our service area, I can spot moisture problems from across the street. Your home might be sending you these distress signals right now:
Stucco tears are often the first giveaway – those dark, streaky stains that appear under windows and doors after rain. They look innocent enough, but they’re actually evidence that water is finding its way behind your stucco system.
Bulging panels that feel soft when you press them tell a more serious story. The stucco is literally pulling away from the wall as moisture breaks down the bond between layers. Efflorescence – that white, chalky residue on your stucco surface – happens when water carries minerals from inside the wall to the outside.
Inside your home, the signs can be even more alarming. Interior drywall stains on exterior walls (after you’ve ruled out plumbing issues) often indicate moisture has penetrated completely through the wall system. That musty odor you can’t quite identify? It’s often the first sign of mold growth inside your walls.
Insect activity is another red flag we see frequently. Termites are particularly attracted to moisture-damaged wood, and they can cause thousands of dollars in additional damage before you even know they’re there.
One client in Cherry Hill called us about some dark spots around their exterior light fixtures. What looked like minor staining turned out to be significant wood rot. The moisture had been trapped for years, silently destroying the structure behind their stucco.
How Water Sneaks Behind Stucco
Water is incredibly persistent – it finds openings you’d never think to look for. In our forensic testing, we’ve mapped exactly how moisture infiltrates stucco systems.
Window and door penetrations are the number one culprit. Every opening in your stucco needs proper flashing to channel water away from the substrate. When that flashing fails or was never installed correctly, water takes a direct path behind your stucco system. Poor caulk around these openings makes the problem even worse.
Roof-wall intersections are another major vulnerability. This is where kick-out diverters should redirect water from your roof away from the wall. Without them, water cascades down your stucco like a waterfall, overwhelming the system’s ability to stay dry.
Utility cut-outs for pipes, electrical conduits, and cable lines create dozens of potential entry points. Each penetration needs careful sealing, but we often find these spots were sealed with basic caulk that shrinks and cracks over time.
Clogged gutters turn your home’s drainage system against itself. Instead of carrying water safely away, overflowing gutters dump thousands of gallons directly onto your stucco surfaces during heavy rains.
The scientific research on common exterior materials%2C%20brick%20or%20brick%20veneer%20()) shows that stucco remains one of the most popular siding choices, but proper installation and maintenance are critical for long-term performance.
When these moisture intrusion points aren’t addressed, the damage compounds quickly. What starts as a small leak becomes wood rot, mold spores, and eventually creates termite risk that threatens your home value. That’s why understanding these warning signs and acting quickly is so important for protecting your investment.
Stucco Moisture Remediation 101

Think of stucco moisture remediation like heart surgery for your home’s exterior walls. While a simple repair might patch a visible crack (like taking aspirin for chest pain), true remediation gets to the root of the problem and fixes it permanently.
The science behind effective stucco moisture remediation is actually pretty straightforward. Your stucco acts as the primary barrier against weather, but there absolutely must be a secondary drainage system working behind the scenes. When that backup system fails or was never installed properly, water gets trapped and the real problems begin.
This is where certified forensic testing becomes crucial. We’re not just poking around and making educated guesses. Using specialized moisture meters, infrared cameras, and invasive probes, we map exactly where moisture has penetrated and how far the damage extends. It’s like getting an MRI for your walls – we see problems that are completely invisible from the outside.
Our stucco remediation guidelines follow strict protocols that ensure nothing gets missed. After twenty years of forensic testing, I can tell you that assumptions in this business are expensive mistakes.
Inspection & Detection Steps for Stucco Moisture Remediation
Every stucco moisture remediation project starts with detective work. We follow a systematic inspection process that reveals exactly what’s happening behind your walls.
The visual walk-around comes first, where we document every crack, stain, and suspicious area with photographs. We’re looking for critical details like expansion joints, weep screeds, flashings, and caulk joints around windows and doors. What looks minor from a distance often tells a much bigger story up close.
Surface moisture scanning uses calibrated electronic moisture meters to identify areas with liftd readings across the entire stucco surface. Our Extech meters read from 1-100% moisture content, giving us precise data about surface conditions. A reading above 20% gets our immediate attention.
Invasive probe testing is where things get serious. We drill small 3/16″ holes at strategic locations and insert moisture probes directly into the wood substrate behind the stucco. This tells us exactly how much moisture has penetrated and where it’s concentrated. It’s the difference between suspecting a problem and knowing for certain.
Substrate firmness testing uses hammer probes to test the structural integrity of the sheathing. When wood has been wet for months or years, it becomes soft and spongy. These readings tell us which areas will need complete replacement during remediation.
Thermal imaging reveals temperature differences that indicate moisture patterns invisible to the naked eye. Water-damaged areas show up as cooler spots on the infrared camera, helping us trace leak paths back to their source. It’s fascinating technology that takes the guesswork out of leak detection.
Finally, we create detailed moisture maps and written reports with specific recommendations for remediation scope and priorities. Our moisture intrusion detection methods ensure you understand exactly what needs to be fixed and why.
What Makes Stucco Moisture Remediation Different from Simple Repairs?
Here’s the honest truth: the difference between repair and stucco moisture remediation is like the difference between putting a Band-Aid on a wound versus performing surgery to fix the underlying problem.
Stucco repair patches surface damage for $500-$2,000 and takes 1-3 days. It’s a cosmetic fix that might look good temporarily, but it doesn’t address drainage issues or trapped moisture. You’ll likely need repeated repairs as the underlying problem continues.
Stucco moisture remediation involves complete system removal and replacement for $1,000-$9,000 and takes 10-18 days. It addresses root causes by installing proper drainage systems and provides a permanent solution when done correctly.
I’ve seen too many homeowners spend thousands on repeated repairs, only to face the same problems again within a few years. It’s like patching a tire with multiple holes – eventually, you need to replace the tire entirely.
Repair makes sense when damage is truly surface-level and our testing confirms no moisture has penetrated behind the stucco. But when we find trapped moisture, wood rot, or systemic drainage failures, only full remediation provides a lasting solution.
The Five-Step Stucco Moisture Remediation Process
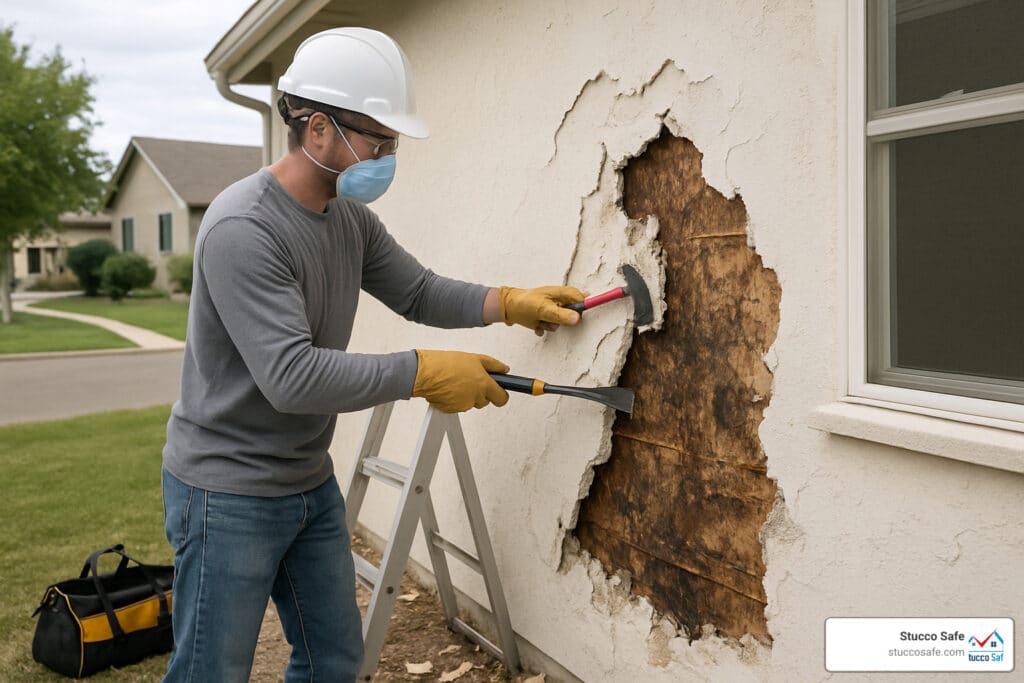
Demolition and disposal starts the process, where we carefully remove all damaged stucco down to the substrate. We take care to protect landscaping and adjacent surfaces, but this step reveals the full extent of moisture damage and allows us to assess the underlying structure.
Substrate repair and replacement addresses any rotted or compromised sheathing with new materials. We also fix any structural framing issues finded during demolition. This step is absolutely critical – applying new stucco over damaged substrate is like building on a weak foundation.
Drainage system installation is where the magic happens. We install proper flashing around all penetrations, apply weather-resistant barriers with correctly sealed seams, and ensure weep screeds are properly positioned at the base of walls. This is the backup system that prevents future moisture problems.
Rainscreen or drainage plane installation creates an air gap between the stucco and the sheathing. Modern stucco moisture remediation often includes this system because it allows any moisture that does penetrate to drain out rather than getting trapped against the wood.
New cladding application completes the process with new stucco using proper three-coat techniques, or alternative siding materials like fiber cement if you prefer. The key is ensuring the new system includes all necessary drainage components and is installed correctly from day one.
Tools & Technologies Pros Use
Professional stucco moisture remediation requires specialized equipment that goes far beyond basic construction tools. Calibrated moisture meters provide precise readings of wood moisture content – those cheap meters from hardware stores simply aren’t accurate enough for forensic diagnostics.
Thermal imaging cameras reveal moisture patterns and temperature differentials that indicate water intrusion paths. They’re particularly useful for tracing leaks to their source without tearing into walls unnecessarily.
Borescopes are tiny cameras that allow us to see inside wall cavities without extensive demolition. This helps us assess the extent of damage before beginning work, so there are no surprises once we start tearing things apart.
Hammer probes test substrate firmness by measuring resistance when driven into the sheathing. Soft readings indicate rot that requires replacement, while firm readings suggest the wood is still structurally sound.
For complex cases, we use blower door testing to identify air leaks that often correspond with water intrusion paths. When we pressurize the house and use thermal imaging, leak sources become obvious even when they’re hidden behind finished surfaces.
Dollars, Delays & Insurance: Know the Stakes

I won’t sugarcoat it – stucco moisture remediation is a significant investment that hits your wallet hard upfront. According to current cost data, you’re looking at $6-$9 per square foot for professional remediation work. For most residential projects, this typically ranges from $1,000 to $9,000 total.
But here’s the hard truth I’ve learned after 20+ years in this business: the cost of waiting grows like compound interest. I’ve seen homeowners try to “ride it out” with a $3,000 problem, only to face a $15,000 structural nightmare two years later. The moisture doesn’t take a break – it keeps working 24/7 to destroy your home’s structure.
The timeline for proper stucco moisture remediation runs 10-18 days for most homes. This isn’t a weekend DIY project. Quality remediation requires careful demolition, substrate repair, proper drainage installation, and adequate curing time for new materials. Rush the process, and you’ll be doing it again in a few years.
Factors That Drive Cost Up or Down
Your final bill depends on several key factors that we evaluate during our initial inspection. Home size obviously matters – a 1,200 square foot ranch costs less than a 3,000 square foot colonial. But there’s more to it than just square footage.
Story count significantly impacts pricing because multi-story homes require scaffolding, safety equipment, and more complex logistics. Window and door count also drives costs up since each opening needs careful flashing work and weatherproofing details.
The extent of substrate damage often surprises homeowners. When moisture has been trapped for years, we frequently find rotted sheathing that needs complete replacement. I’ve opened walls that looked fine from outside, only to find wood so soft I could push my finger through it. That’s when a straightforward remediation becomes a more extensive reconstruction project.
Material choices give you some control over final costs. Basic stucco replacement offers the most economical option, while upgrading to fiber cement siding costs more upfront but provides superior long-term moisture resistance. Think of it as buying a reliable car versus the cheapest option on the lot.
Contractor certification affects pricing too. Certified professionals with proper insurance and training typically charge more than the guy with a pickup truck, but this is absolutely not the place to bargain hunt. I’ve seen botched remediation jobs that cost twice as much to fix properly.
Risks of Delaying Stucco Moisture Remediation
The consequences of postponing necessary stucco moisture remediation extend far beyond your exterior walls – they creep into your family’s health, your home’s structure, and your financial future.
Black mold loves moisture-damaged stucco systems like teenagers love social media. Once it establishes itself behind your walls, it releases spores that can cause respiratory problems, allergic reactions, and other health issues. Children and elderly family members are particularly vulnerable to these effects.
Wood rot doesn’t respect boundaries. What starts as damaged sheathing spreads to floor joists, wall studs, and even foundation elements. I recently worked on a home in Marlton where delayed remediation led to compromised structural framing that required extensive carpentry work beyond the original scope.
Termite attraction is another nasty surprise. These destructive insects can detect moisture-damaged wood from impressive distances. A small crack in your stucco becomes an invitation for thousands of hungry termites to set up shop in your walls.
The financial risks multiply quickly. Insurance companies often deny claims for damage they consider preventable maintenance issues. Home sales fall through when buyers’ inspections reveal moisture problems. Property values drop when potential buyers learn about ongoing moisture issues. As covered in our guide on homeowners insurance and stucco problems, coverage varies significantly depending on the cause and timing of the damage.
One client in West Chester learned this lesson the expensive way. He delayed a $4,500 remediation project for three years, hoping the problem would somehow resolve itself. By the time he called us, the project had grown to $12,000 and included floor joist replacement, professional mold remediation, and pest treatment. Sometimes being penny-wise really does make you pound-foolish.
Prevention & Long-Term Maintenance

Here’s the truth: the best stucco moisture remediation is the one you never need. After twenty years of inspecting damaged stucco systems, I can tell you that most moisture problems are completely preventable with proper maintenance and early intervention.
Think of your stucco like the roof over your head. You wouldn’t ignore missing shingles or clogged gutters, right? Your stucco system deserves the same attention because it’s working just as hard to protect your home from the elements.
Proper grading around your foundation is your first line of defense. Water should flow away from your house like it’s running downhill – because it should be. We recommend at least a 6-inch drop over the first 10 feet from your foundation. If water pools against your stucco, you’re asking for trouble.
Gutter maintenance might seem unrelated to stucco health, but clogged gutters are one of the biggest culprits we see. When gutters overflow, they dump water directly onto your stucco surfaces, overwhelming even well-designed drainage systems. Clean those gutters twice a year and extend downspouts at least 6 feet from your foundation.
Your annual caulk audit takes maybe an hour but can save you thousands. Walk around your home each spring and fall, checking the caulk around every window, door, and utility penetration. Quality polyurethane caulks typically last 7-10 years, but our harsh winters and hot summers can cause premature failure.
Ground clearance is another simple but critical factor. Keep 6-8 inches between your stucco and soil level. When landscaping pushes mulch or soil against stucco, ground moisture wicks up into the wall system like a sponge. Plus, it gives termites and other pests a highway into your home’s structure.
We also recommend scheduled moisture testing every couple of years, especially for homes built between 1985 and 2003. Our stucco leak detection services can catch problems before they become expensive disasters. It’s like getting a physical for your house – early detection makes all the difference.
For homes in particularly challenging locations – those facing driving rain or with complex roof lines – consider a rainscreen retrofit. This creates an air gap behind the stucco that allows any moisture to drain out rather than getting trapped against your sheathing.
Best Practices After Successful Stucco Moisture Remediation
Once you’ve invested in professional stucco moisture remediation, protecting that investment becomes your top priority. We’ve seen homeowners spend thousands on proper remediation only to let maintenance slide and face the same problems again.
Two-year inspection cycles are your insurance policy against future moisture problems. For homes with previous issues or those in high-risk categories, annual inspections make even more sense. Our moisture testing equipment can detect problems long before they become visible to the naked eye.
Document everything related to your remediation work. Keep photos, moisture readings, contractor warranties, and material specifications in a file. This documentation proves invaluable for insurance claims, warranty issues, and future home sales. Buyers love seeing a well-maintained home with proper records.
Maintain that 6-8 inch ground clearance religiously. Landscapers often pile mulch against stucco without realizing the damage they’re causing. Make sure everyone working on your property understands this critical requirement.
Paint or seal every 7-10 years to maintain the protective qualities of your stucco system. High-quality water-repellent coatings don’t replace proper drainage systems, but they provide an additional layer of protection against moisture intrusion.
Most importantly, stay connected with certified professionals who understand forensic moisture detection. We’ve built relationships with homeowners who call us at the first sign of trouble – a small stain here, a hairline crack there. Catching these issues early means simple repairs instead of full remediation.
Your stucco system is only as strong as its weakest link. A $20 tube of caulk applied at the right time can prevent thousands in damage. That’s not just good maintenance – that’s smart homeownership.
Frequently Asked Questions about Stucco Moisture Remediation
What does “non-invasive” stucco testing mean?
When homeowners hear “non-invasive,” they often think it means we won’t make any holes in their stucco. That’s partly true, but let me explain what really happens during a comprehensive moisture inspection.
Non-invasive testing starts with electronic moisture meters and thermal imaging cameras that scan your stucco surface without any drilling. These tools are fantastic for initial screening and give us a roadmap of where moisture problems might be hiding. The thermal camera shows temperature differences that often indicate wet areas, while surface moisture meters detect liftd readings in the stucco itself.
But here’s the reality: to get truly accurate data about what’s happening behind your stucco, we need to take some invasive probe readings. This means drilling small 3/16″ holes – about the size of a pencil lead – at strategic locations to insert moisture probes directly into the wood substrate.
I know that sounds scary, but these tiny holes are filled with color-matched caulk when we’re done. Most homeowners can’t even find them afterward. The trade-off is worth it because surface readings can be misleading. We’ve seen cases where the stucco surface reads normal, but the wood behind it is soaking wet.
Think of it like going to the doctor – they might start with a visual exam, but sometimes they need to draw blood to really know what’s going on inside.
How long will a full stucco moisture remediation last?
This is probably the most important question homeowners ask, and I’m happy to give you the straight answer: properly executed stucco moisture remediation should last 50-80 years or more.
The key phrase there is “properly executed.” When we rebuild your stucco system with correct drainage planes, proper flashing, and quality materials, we’re essentially giving your home a brand-new exterior wall system. It’s not a patch job – it’s a complete rebuild using modern techniques and building science.
I’ve personally inspected remediation work we did in the late 1990s that’s still performing perfectly today. No moisture intrusion, no new damage, and the homeowners haven’t had to think about their stucco since we finished the job.
The difference comes down to addressing the root causes rather than just fixing symptoms. When we install proper kick-out diverters, weep screeds, and drainage systems, we’re preventing water from getting trapped in the first place. That’s why stucco moisture remediation lasts so much longer than simple repairs.
Of course, you’ll still need basic maintenance like refreshing caulk every 7-10 years and keeping gutters clean. But the major moisture problems should be solved permanently.
Can I switch to another siding instead of new stucco?
Absolutely! In fact, about 30% of our stucco moisture remediation clients choose to upgrade to different siding materials. It’s actually a perfect time to make this switch since we’re already removing the old stucco and preparing the substrate.
Fiber cement siding is a popular choice because it looks great, requires less maintenance than stucco, and has excellent moisture resistance. We’ve also installed vinyl, engineered wood, and even brick veneer during remediation projects.
The beauty of switching materials during remediation is that the substrate preparation work is nearly identical regardless of what goes back on. We’re already installing proper flashing, weather barriers, and drainage systems. Whether we apply new stucco or install fiber cement boards, that foundation work is the same.
Some homeowners are just tired of stucco maintenance requirements – the periodic painting, caulk refresh, and crack monitoring. Others want the peace of mind that comes with more moisture-resistant materials. There’s no wrong choice here.
The cost difference varies depending on materials, but it’s often surprisingly small when you factor in the long-term maintenance savings. Plus, many homeowners love the fresh, updated look it gives their home.
We can walk you through the options during your inspection and help you understand the pros and cons of each material for your specific situation.
Conclusion & Next Steps
When you’re dealing with stucco moisture remediation, you’re not just fixing a wall – you’re protecting everything that matters most. Your family’s health depends on clean, mold-free air. Your home’s structural integrity relies on dry, solid framing. And your financial security is tied to maintaining your property’s value.
Think of it this way: would you rather make one smart investment now, or keep throwing money at the same problem year after year? That’s the real difference between comprehensive stucco moisture remediation and endless patch jobs. Remediation costs more upfront, but it’s typically the last time you’ll need to address moisture issues in those walls.
We’ve seen this pattern hundreds of times over the past two decades. Homeowners who choose proper remediation sleep better at night, knowing their walls are truly dry and protected. Meanwhile, those who keep patching often find themselves dealing with bigger, more expensive problems down the road.
Here’s what proper stucco moisture remediation gives you:
The permanent protection that comes from fixing root causes, not just symptoms. Healthier indoor air without the musty odors and mold spores that hide behind damaged stucco. And higher resale value when it’s time to sell – buyers love seeing documentation of professional moisture remediation.
At Stucco Safe, we’ve built our reputation on forensic-level accuracy. Our certified EDI and BESI protocols mean you get the real story about your stucco’s condition, not guesswork. We serve homeowners throughout Southeastern Pennsylvania, New Jersey, and Delaware because we understand the unique moisture challenges in our region.
Ready to get answers about your stucco?
If you’re seeing warning signs like staining, cracks, or musty odors – or if it’s been more than two years since your last professional inspection – don’t wait for the problem to get worse. Our comprehensive stucco inspections vary in cost from $495 to $1595 depending on your home’s size, but this investment often saves thousands in unnecessary remediation work.
The best part? Our non-invasive inspection techniques mean we can give you detailed moisture maps without damaging your walls. You’ll know exactly where you stand and what your options are.
Contact us today to schedule your inspection. Because when it comes to stucco moisture remediation, the best time to act is before you absolutely have to. Your home – and your peace of mind – are worth protecting the right way.