
How to Fix Hairline Cracks in Stucco Without Losing Your Mind
Identifying Hairline Cracks vs. Structural Issues
How to fix hairline cracks in stucco is something most stucco homeowners will need to tackle at least once. The good news? For true hairline cracks, it’s usually a straightforward DIY job.
Quick answer — how to fix hairline cracks in stucco:
- Clean the crack with a stiff brush and remove all loose debris
- Widen very narrow cracks slightly (to about 1/4 inch) for better adhesion
- Wet the wall surface before applying repair material
- Apply elastomeric or latex-silicone caulk, pressing it firmly into the crack
- Smooth the surface with a damp finger or rubber float to blend with surrounding texture
- Let it cure, then paint with two coats of elastomeric or acrylic latex paint
Hairline cracks — typically between 1/16 and 1/8 inch wide — are extremely common in stucco exteriors. They form naturally as your home settles, as temperatures swing between seasons, and simply because stucco is a rigid, cement-based material that doesn’t flex much. There’s even an old saying among contractors: “If you don’t want stucco to crack, don’t open the bag.”
Most hairline cracks are cosmetic. But some cracks are a warning sign of something more serious hiding beneath the surface — especially if you’re in Southeastern Pennsylvania, where stucco moisture problems are widespread.
I’m Gabe Kesslick, founder of Stucco Safe and an EDI Level 2 Certified Stucco Inspector with over two decades of experience in leak detection and building envelope forensics — including countless cases where knowing how to fix hairline cracks in stucco was just the starting point for uncovering hidden moisture damage. Read on for everything you need to make a smart, lasting repair — and to know when a crack is telling you something bigger.

Easy how to fix hairline cracks in stucco word list:
Before you grab a ladder and a bucket of patch, we need to play detective. Not every crack is created equal. In our inspections across Philadelphia and the Main Line, we see everything from minor settling lines to “roadmap” patterns that indicate major failure.

The Size Test
A true hairline crack is typically 1/16 of an inch to 1/8 of an inch wide. A good rule of thumb is the “credit card test”: if the crack is thinner than the edge of a credit card, it’s likely a minor stucco crack caused by natural shrinkage or minor settling.
If the crack is wider than 1/8 inch—about the thickness of a dime—it moves out of the “hairline” category. These larger gaps are more likely to allow significant moisture intrusion, which can rot the wood sheathing behind your walls.
Types of Cracks
- Shrinkage Cracks: These often look like a spiderweb. They happen during the initial curing process if the stucco dried too fast.
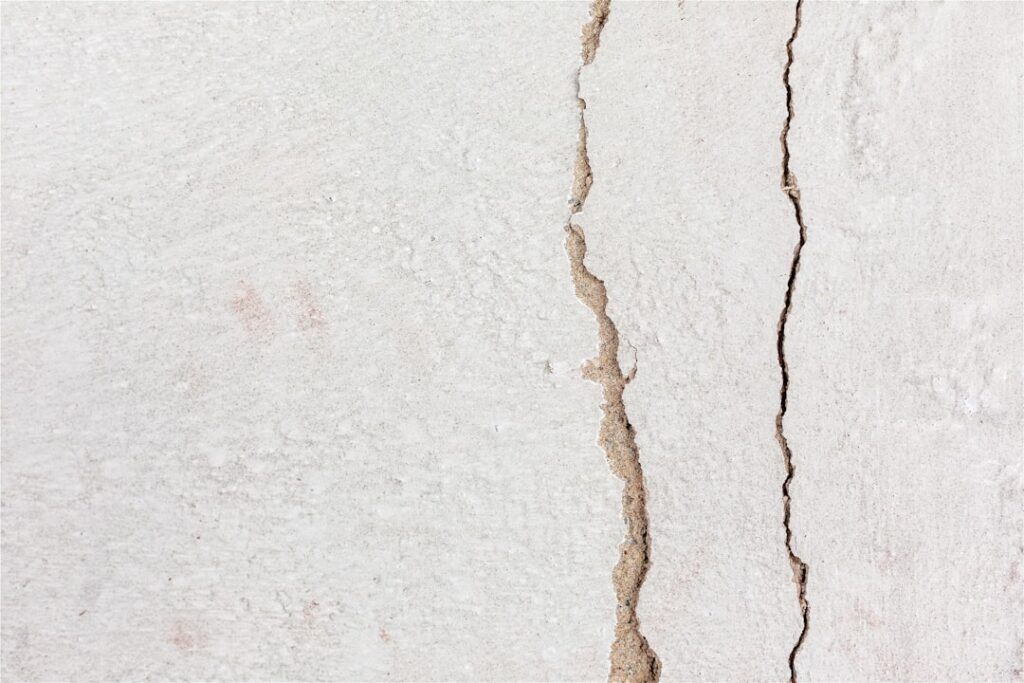
- Settling Cracks: Usually straight vertical or horizontal lines. These occur as the house finds its “seat” in the soil.
- Structural Cracks: These are often jagged, stair-stepped (especially near corners of windows), or wider than 1/4 inch. These are red flags.
| Feature | Hairline Crack | Structural Crack |
|---|---|---|
| Width | Less than 1/8 inch | Greater than 1/8 inch |
| Cause | Shrinkage, minor settling | Foundation shift, major stress |
| Risk | Mostly aesthetic | High risk of water damage |
| Repair | DIY Friendly | Professional Required |
Knowing when to worry about cracks in stucco causes and solutions is the difference between a $200 weekend project and a $50,000 remediation.
Essential Tools and Materials for DIY Repair
If you’ve determined your cracks are indeed hairline, it’s time to gather your supplies. For a professional-looking finish, don’t just grab whatever is on the “clearance” shelf at the big-box store.

The Shopping List
- Caulking Gun: A high-quality, dripless model will save your forearms.
- Repair Material: For hairline cracks, an elastomeric caulk or a latex-silicone base (often rated for 40 years) is best. These stay flexible, allowing the house to breathe without the crack reopening.
- Sanded Caulk: If your stucco has a heavy, rough texture, use a “sanded” version of the caulk to help the repair blend in.
- 5-in-1 Tool or Cold Chisel: To clean and slightly widen the crack.
- Rubber Float: Essential for matching the existing texture.
- Bonding Agent: If you are using a cement-based patch instead of caulk, a liquid bonding agent helps the new material stick to the old.
For more detailed product advice, check out The DIY Guide to Patching Your Stucco Like a Pro or follow specific manufacturer instructions like those found in this How-to Repair a Crack on Exterior Stucco Surface – Behr guide.
Step-by-Step Guide: How to Fix Hairline Cracks in Stucco
Now, let’s get to work. Success in stucco repair is 90% preparation and 10% application.
Timing and Environment
In April 2026, the weather in places like West Chester or Cherry Hill can be fickle. You want a day that is “Goldilocks” weather: 50°F to 90°F with 30-50% humidity. Avoid working in direct, scorching sunlight or right before a rainstorm.
Pro Tip: Try to work in the morning. When the house is cooler, the stucco actually contracts, making the cracks slightly wider and easier to fill. As the sun hits the wall and the material expands, it will “lock” your repair material into place.
Cleaning the Area
You can’t patch over dirt. Use a stiff wire brush to scrub the crack, removing loose sand, moss, or old paint. For larger areas, a light pressure washing is helpful, but ensure the wall is bone-dry (wait at least 24 hours) before applying any caulk. If you’re tackling multiple spots, our ultimate guide to fix cracks in exterior stucco walls offers deeper insights into large-scale prep.
Preparing the Surface to Fix Hairline Cracks in Stucco
It sounds counterintuitive, but to repair small cracks in stucco, you often have to make them bigger first.
If a crack is extremely thin—like a strand of hair—the repair material will just sit on the surface like a “scab” and peel off in six months. Use your 5-in-1 tool or a small chisel to widen the crack to about 1/4 inch.
The Inverted V-Groove: Try to angle your tool so the crack is wider on the inside than it is on the surface. This creates a “mechanical key.” Once the patch dries inside that wider base, it’s physically locked in and won’t pop out. This is a standard recommendation in how to repair exterior stucco cracks for a long-lasting bond.
Applying Patch to Fix Hairline Cracks in Stucco
Once the crack is cleaned and widened:
- Mist the Wall: Lightly spray the crack with water. This prevents the dry, porous stucco from sucking the moisture out of your patch too quickly, which causes it to shrink and crack again.
- Apply the Bead: Cut the tip of your caulk tube at a small angle. Run a generous bead along the crack.
- The Finger Rub: Use a wet finger (or a damp rag) to press the caulk deep into the crevice. Don’t just wipe it over the top; you want it packed in there.
- Layering: If you are using a thicker stucco patch, apply it in layers no more than 1/4 inch thick. Let each layer set before adding the next until it is flush with the surface.
- Texture Matching: This is where the art comes in. While the material is still damp, use a rubber float or a damp sponge in a circular motion to match the surrounding wall. Practice on a piece of cardboard first!
- Curing and Painting: Let the repair cure for at least 24 hours (or as directed by the product). Once dry, apply a high-quality masonry primer followed by two coats of elastomeric or 100% acrylic latex paint. This seals the repair and makes it invisible. For more on the finishing touches, see how to fix cracked exterior stucco.
Frequently Asked Questions about Stucco Maintenance
We get a lot of questions from homeowners in Newark, NJ, and Villanova, PA, about whether their DIY efforts are enough.
Should I widen a hairline crack before fixing it?
Yes, in most cases. As mentioned, widening the crack to 1/4 inch and creating that inverted V-shape ensures the material has enough surface area to bond. Without widening, the “patch” is often too thin to survive the natural expansion and contraction of the seasons.
What is the best weather for repairing stucco?
Stick to temperatures between 50 and 90 degrees Fahrenheit. If it’s too cold, the material won’t cure; if it’s too hot, it will dry too fast and crack. Overcast days are actually better than sunny days because the shade provides a more consistent temperature for the curing process.
When should I stop DIY and call a professional?
Use the Dime Test. If you can fit the edge of a dime into the crack, or if the crack is accompanied by:
- Dark, “tear-like” staining under window corners.
- Bulging or “spongy” feeling stucco.
- Crumbling material that falls away when touched.
- Cracks that are wider than 1/8 inch.
…then it’s time to stop the DIY and call for a professional inspection. These can be signs of “stucco failure,” where water is already trapped behind the facade. In these cases, a surface patch is just a “band-aid on a broken leg.” Check out are stucco cracks normal? Stucco inspection in West Chester for more local context.
Conclusion
Learning how to fix hairline cracks in stucco is a vital skill for any homeowner. It keeps your home looking sharp and provides a first line of defense against the elements. However, stucco is a complex system. In our service areas—from Philadelphia and King of Prussia to Toms River and Wilmington—the humid climate makes moisture management critical.
At Stucco Safe, we don’t just look at the surface. We provide professional stucco inspection and forensic testing services for home buyers and property owners. We use specialized equipment and moisture probes (leaving only tiny 3/16″ holes that we seal with color-matched caulk) to see what’s happening behind your walls.
Whether you are in Berwyn, Edison, or Hamilton Township, a professional inspection can provide peace of mind that your home is structurally sound. Our inspections typically range from $495 to $1595, depending on the size of the property.
If you’ve patched your cracks but still have concerns about what lies beneath, we are here to help. More info about professional stucco inspections is just a click away. Keep those walls sealed, keep the water out, and your stucco will serve you well for decades to come!