
Best way to drill into stucco: 4 Easy Steps Guide
Why Knowing the Best Way to Drill into Stucco Matters
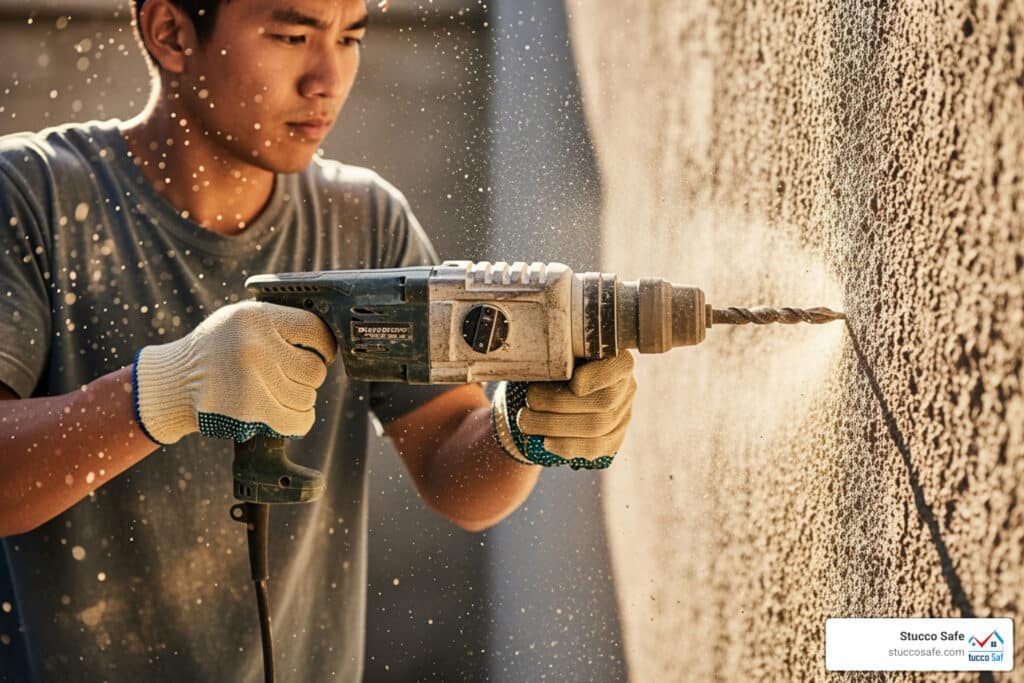
The best way to drill into stucco involves using a hammer drill with carbide-tipped masonry bits, starting with a pilot hole, drilling slowly, and sealing the hole to prevent moisture intrusion.
Quick Answer for Drilling into Stucco:
- Use the right tools: Hammer drill and carbide masonry bits.
- Start small: Drill a pilot hole first.
- Go slow: Let the drill do the work; don’t force it.
- Use painter’s tape: Prevents chipping around the hole.
- Seal immediately: Use waterproof caulk to prevent water damage.
Many homeowners hesitate to drill into stucco, fearing they might crack, chip, or cause expensive damage. The good news is that with the right approach, drilling into stucco is a manageable DIY project. The key is understanding that stucco is a brittle, concrete-like material requiring specific tools and techniques.
Traditional stucco is made from cement, sand, and water, while synthetic stucco (EIFS) uses a foam base with an acrylic coating. Both can be drilled successfully, but they require different approaches. This guide will walk you through identifying your stucco type, choosing the right tools, and completing your project without damaging your home’s exterior.
I’m Gabe Kesslick, an EDI Level 2 Certified Stucco Inspector with experience since 2001. I’ve seen how knowing the best way to drill into stucco is crucial for preventing costly moisture damage and structural issues.
, preparation steps (marking and taping), drilling technique (pilot hole first, steady pressure), and finishing steps (cleaning debris, inserting anchor, sealing with caulk) - best way to drill into stucco infographic")
Best way to drill into stucco terms made easy:
Understanding Stucco Before You Drill
Stucco is a plaster-like material made from cement, sand, and water, applied in layers to create a hard, durable finish. The main challenge is that stucco is both incredibly hard and surprisingly brittle. Using the wrong technique can lead to chips, cracks, or more serious damage.
Not all stucco is the same. Knowing which of the two main types covers your home is crucial for determining the best way to drill into stucco.
Traditional stucco is a mix of sand, Portland cement, and lime, applied over a moisture barrier and wire mesh. It feels rock-solid when tapped, and drilling into it is similar to drilling into masonry.
Synthetic stucco, or EIFS (Exterior Insulation Finishing System), uses a layer of foam insulation board covered with fiberglass mesh and an acrylic finish coat. It is more flexible than traditional stucco and may feel hollow when tapped.
To tell them apart, use the tapping test. Tap the wall with your knuckles. Traditional stucco sounds and feels like concrete. EIFS may sound hollow or feel softer. Homes built after the early 1980s with a smooth finish likely have EIFS, while older homes with rougher textures usually have traditional stucco.
The wall substrate behind the stucco—such as wood sheathing, concrete block, or foam board—is also important, as it affects drilling depth and anchor choice.
| Feature | Traditional (Cement) Stucco | Synthetic Stucco (EIFS) |
|---|---|---|
| Composition | Cement, sand, water, lime (often over lath and sheathing) | Foam insulation, fiberglass mesh, acrylic finish coat |
| Hardness | Very hard, brittle, like concrete | Softer, more flexible, can feel hollow |
| Drilling | Requires hammer drill and masonry bits | Can often use standard drill with wood bit (for foam) |
| Anchor Suitability | Plastic anchors, metal screw anchors, toggle bolts for heavy items | Requires specific EIFS anchors or long screws to hit framing |
| Moisture Risk | Can crack, allowing water in if not sealed | Improper drilling can void warranty, lead to mold behind system |
The cracking risk is real for both types. Traditional stucco can get hairline cracks from vibration, while EIFS can be damaged by aggressive drilling. Any unsealed hole becomes an entry point for moisture, which can lead to expensive repairs.
Gathering the Right Tools and Materials
Having the right tools and materials is the first step to success. This is a beginner-level project that typically costs $10 to $20 in materials and takes 15 to 30 minutes.

Essential Toolkit:
- Drill: A standard drill for small holes (< 3/8 inch) or a hammer drill for larger holes or hard stucco.
- Drill Bits: Carbide-tipped or diamond-tipped masonry bits are essential.
- Marking Tools: Measuring tape, pencil, and a level.
- Painter’s Tape: Prevents chipping around the hole.
- Safety Gear: Safety goggles and a dust mask are non-negotiable.
- Fasteners: Anchors suitable for the item’s weight and corrosion-resistant screws (stainless steel or galvanized).
- Sealant: A caulk gun with waterproof caulk.
Choosing the Right Drill and Drill Bit for Stucco
The best way to drill into stucco depends on your drill choice. A standard drill is fine for small holes, but a hammer drill is better for larger holes or hard traditional stucco. Its hammering action breaks through the material efficiently, saving time and wear on your bits.
Always use masonry drill bits. Regular bits won’t work on stucco’s hard surface. Carbide-tipped bits are great for traditional stucco, while diamond-tipped bits offer more durability for tougher jobs. For bits 1/2 inch or larger, consider a rotary hammer drill. For more details, see our drill bit for stone guide.
Choosing the Right Anchors and Screws
Stucco itself has very little holding power, so you must use anchors to distribute the load.
- Plastic sleeve anchors are perfect for light to medium-duty tasks like hanging small fixtures. The sleeve expands as you drive the screw, gripping the stucco.
- Metal screw anchors offer more holding power for heavier items like light fixtures. Their threads cut into the stucco for a strong connection.
- Toggle bolts are the best solution for very heavy items like awnings. They require a larger hole but expand behind the wall for exceptional support.
Always use corrosion-resistant screws (stainless steel or galvanized) for exterior work to prevent rust stains. For more help with selection, see our guide on the best anchors for stucco.
The Best Way to Drill Into Stucco: A Step-by-Step Guide
The best way to drill into stucco is manageable for most homeowners by following these simple steps. The key is to take your time and not rush the process.
Step 1: Prepare and Mark Your Drilling Spot
Proper preparation prevents cracks and ensures a clean result.
- Clean the surface where you plan to drill with a damp cloth or stiff brush.
- Mark the exact location with a tape measure and pencil. Use a level to ensure your marks are straight for items like house numbers.
- Apply painter’s tape over the mark. This prevents the stucco from chipping and keeps the drill bit from “walking” across the surface.

Step 2: The Best Way to Drill the Pilot and Main Hole
Patience and the right technique are crucial here.
- Drill a pilot hole. For example, if you’re using a 5/16-inch anchor, start with a 3/16-inch pilot hole. This guides the larger bit and reduces the risk of cracking.
- Position your drill perpendicular to the wall, with the bit centered on your mark.
- Start slowly with gentle, steady pressure. Let the drill do the work. You can gradually increase the speed as the bit bites into the stucco.
- Clean as you go by periodically pulling the bit out to clear dust and debris.
For a visual demonstration, check out A helpful video tutorial on drilling stucco.
Step 3: Clean the Hole and Insert the Anchor
Once the hole is drilled, prepare it for the anchor.
- Remove all debris from the hole using compressed air or a small brush. A clean hole ensures the anchor can grip properly.
- Insert the anchor by gently pushing it into the hole until it is snug. If needed, tap it lightly with a hammer until it sits flush with the stucco surface.

Step 4: Seal the Hole and Drive the Screw
This final step is critical for preventing water damage.
- Seal the hole by injecting a small amount of waterproof caulk (silicone or acrylic) into the hole before inserting the screw. This creates a waterproof barrier.
- Drive the screw slowly and steadily. As it tightens, the anchor will expand and grip the stucco. Do not overtighten, as this can strip the anchor or crack the stucco.
- For extra protection, add a final seal with a small bead of caulk around the screw head or the base of the mounted item.
Advanced Scenarios and When to Call a Professional
Even with the best preparation, you may encounter challenges. Here’s how to handle them and when to call a professional.
What to Do If You Hit an Obstruction
If your drill suddenly stops, you’ve likely hit an obstruction.
- Metal lath: This wire mesh behind traditional stucco can often be pierced with a sharp masonry bit.
- Rebar or structural metal: If you hit something solid and immovable, you may have found a reinforcing bar or structural beam. Stop drilling immediately.
- Pipes or electrical wires: If you suspect you’ve hit a utility line, stop everything. Hitting utilities is dangerous and expensive.
The safest solution is to reposition your hole a few inches away. If you must drill in the same spot and are sure it’s not a utility line, you can try a metal-cutting bit. When in doubt, consult a professional. You can find insights from other DIYers in this forum discussion on hitting metal in stucco.
Sealing and Repairing Drilled Holes
Never leave a hole in your stucco unsealed, as it’s an invitation for moisture damage.
- For small holes, use a high-quality, exterior-grade caulk.
- For larger holes, use a stucco patch compound. These can be textured and painted to match your existing stucco for a seamless repair.
For a guide on making these repairs, see our article on patching a hole in stucco.
When to Hire a Professional for Stucco Work
Sometimes, calling a professional is the smartest move. Hire an expert for:
- Hanging heavy items: Large awnings, satellite dishes, or deck ledger boards require professional installation for structural safety.
- Suspected moisture damage: If you see dark stains, damp spots, or mold, stop. Drilling could worsen the problem.
- Visible cracks or crumbling stucco: These are signs of underlying issues that need professional assessment.
- Uncertainty about wall contents: If you’re unsure about plumbing or wiring, don’t risk drilling blindly.
- EIFS systems: Improper drilling can void warranties. A professional will use the correct methods to prevent moisture intrusion and maintain your warranty.
A professional evaluation can identify hidden issues before you start. At Stucco Safe, our certified inspectors use forensic testing to detect moisture and structural problems. An inspection is a small investment compared to potential repair bills. Learn more about invasive stucco inspections.
Frequently Asked Questions about Drilling into Stucco
Here are answers to the most common questions about drilling into stucco.
How can I drill into stucco without cracking it?
Cracking is preventable. The best way to drill into stucco without causing damage is to:
- Use painter’s tape over the drilling spot to prevent chipping.
- Use a sharp masonry bit to avoid vibration.
- Start with a small pilot hole to create a clean entry point.
- Drill slowly with steady, even pressure, letting the drill do the work.
Is it okay to screw directly into stucco?
No. Stucco is brittle and has very little holding power on its own. A screw will likely pull out or cause the stucco to crumble. You must use a properly sized anchor to distribute the load and create a secure mount. The anchor grips the wall, providing the strength needed to hold the screw and the item you’re hanging.
Do I need to seal holes drilled in exterior stucco?
Yes, this is a critical step. Any unsealed hole allows moisture to get behind the stucco, which can lead to water damage, wood rot, and mold. This can cause major, expensive problems down the road. Always use a high-quality waterproof caulk or sealant around the anchor and screw to create a watertight seal. This simple step can save you thousands in future repairs.
Conclusion
Drilling into stucco is a manageable project with the right approach. By using the proper tools, technique, and a little patience, you can achieve professional-looking results without causing damage.
The best way to drill into stucco is to respect the material. Remember these key takeaways:
- Identify your stucco type (traditional or EIFS) to guide your approach.
- Use the right tools: A hammer drill and sharp masonry bits are essential.
- Prepare properly: Use painter’s tape to prevent chipping.
- Drill slowly and steadily, starting with a pilot hole.
- Always seal the hole with waterproof caulk to prevent moisture damage.
Most importantly, know when to call a professional. For heavy items, suspected moisture issues, or visible stucco damage, expert help is necessary.
If you are unsure about your stucco’s condition, a professional evaluation can prevent costly surprises. At Stucco Safe, our certified inspectors use forensic testing to detect hidden moisture and structural issues. An inspection is a wise investment compared to the cost of major repairs.
Ready to proceed with confidence? Schedule a comprehensive stucco inspection with our certified experts and get the peace of mind you deserve.