
Repair small cracks in stucco: Fast 2025
Understanding Small Stucco Cracks
Gather Your Tools and Materials
Ready to get your hands a little dirty? Before you dive into the nitty-gritty of how to repair small cracks in stucco, a little preparation goes a long way. Having all your tools and materials ready to go makes the whole process smoother and much more efficient. Trust us, scrambling for a forgotten item in the middle of a repair is no fun!
So, what should you gather? First things first, safety glasses and gloves are non-negotiable – always protect your eyes and hands. You’ll need a wire brush or a stiff-bristle brush to clean out those cracks. A scraper or a handy 5-in-1 painter’s tool is great for removing loose bits and pieces. For those really stubborn or tight cracks, a chisel and hammer can be useful to carefully widen them just a touch (but remember, this is optional and for careful use!).
If you’re opting for caulk, a caulking gun is a must-have. For stucco patch compounds, grab a putty knife or a margin trowel for smooth application. You’ll also want a bucket for water (for cleaning and mixing) and plenty of sponges or rags for wiping and blending. If your patch needs mixing, a stir stick will come in handy. Don’t forget a sturdy ladder if those cracks are out of reach, and some drop cloths or tarps to protect anything below, especially if you’re like us and tend to be a little messy!
Choosing the Right Filler to Repair Small Cracks in Stucco
Now, let’s talk about the star of the show: your repair material! Choosing the right filler is super important for a repair that truly lasts. When you repair small cracks in stucco, you’re looking for two main qualities: flexibility and strong adhesion. This ensures your patch can move with your house as temperatures change, preventing new cracks from popping up in the same spot.
For those incredibly fine, almost invisible, hairline cracks (think less than 1/16 of an inch wide), an elastomeric caulk is your best friend. This stuff is incredibly flexible, designed to stretch and contract right along with your stucco. It’s super durable and specifically made for outdoor use, standing up to all sorts of weather.
If you’re on a budget for hairline cracks, a good quality acrylic latex caulk can also work. Just make sure it’s exterior-grade and paintable. While it offers good flexibility, it might not quite match the elasticity of true elastomeric caulk.
What if your stucco has a bit of texture? No problem! A sanded caulk can be a lifesaver. It contains tiny sand particles that help your repair blend in seamlessly with that gritty stucco finish, making it much less noticeable.
For cracks that are a little wider (say, up to 1/8 of an inch) or for small areas where the stucco has flaked off, a premixed stucco patch compound is an excellent choice. These compounds are usually cement-based (often incorporating Portland cement) but are formulated to be easy to use. They often include polymers for better stickiness and a bit more flexibility. They’re perfect when you really need to match the existing texture of your stucco.
Want to learn more about those flexible repair options? Check out our detailed guide on Elastomeric Patching Compound for Stucco.
Here’s a quick comparison to help you pick the perfect material for your specific stucco crack:
| Material Type | Crack Size Suitability | Texture Matching | Flexibility | Best For |
|---|---|---|---|---|
| Elastomeric Caulk | Hairline (< 1/16\”) | Smooth | High | Very fine, superficial cracks. |
| Acrylic Latex Caulk | Hairline (< 1/16\”) | Smooth | Medium-High | Economical option for hairline cracks. |
| Sanded Caulk | Hairline to 1/8\” | Rougher | Medium-High | Hairline cracks on textured stucco. |
| Premixed Stucco Patch | 1/16\” to 1/8\” (or small holes) | Excellent | Low-Medium | Wider cracks, minor spalls, texture matching. |
How to Repair Small Cracks in Stucco: A Step-by-Step Guide
Alright, you’ve gathered your tools and picked the perfect repair material. Now, let’s get to the good stuff: the actual hands-on process to repair small cracks in stucco. This isn’t just about slapping on some filler; it’s about proper surface preparation, careful application, and patience during curing. Get these steps right, and you’ll have a repair that not only seals out water but also blends in beautifully with your home. For a broader overview of stucco repair, you can consult our How to Repair Stucco guide.
Step 1: Prepare the Cracked Area
This first step is super important – don’t skip it! A clean and ready surface is the secret to making your repair last.
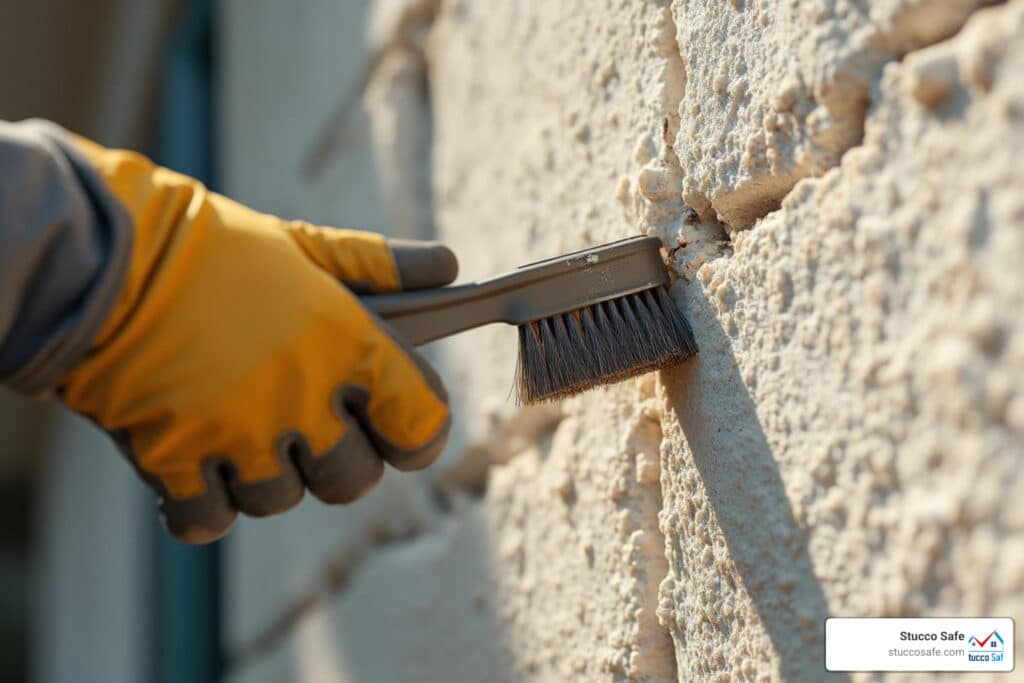
First, grab your scraper or 5-in-1 tool. Use it gently to scrape away any loose bits of stucco, old paint flakes, dirt, or anything else that doesn’t belong. We want a clean, stable surface for our repair material to stick to.
Next, grab that trusty wire brush or a stiff bristle brush. Use it to thoroughly scrub inside the crack and the area around it. This gets rid of any stubborn dirt or chalky residue.
Now, here’s a little trick for very fine hairline cracks: you might want to widen them slightly into a “V” shape. This is called “V-grooving.” It gives your repair material a bigger surface to grab onto and allows flexible fillers more room to do their job as your stucco expands and contracts. You can do this carefully with the sharp edge of a 5-in-1 tool or a small chisel and hammer. Aim for a width of about 1/4 inch at the surface.
After all that cleaning, give the crack and the stucco around it a light rinse with water. This washes away any remaining dust or tiny particles. For some stucco patches, having the surface slightly damp actually helps with application and curing.
Finally, and this is key, make sure to allow the surface to dry properly before you start applying your filler. Most repair materials need a reasonably dry surface to bond correctly. Always check the manufacturer’s instructions for specific drying times.
Step 2: Apply the Repair Material
With your area prepped, it’s time to fill that crack! Getting the material deep into the crack is important for a strong, lasting bond.
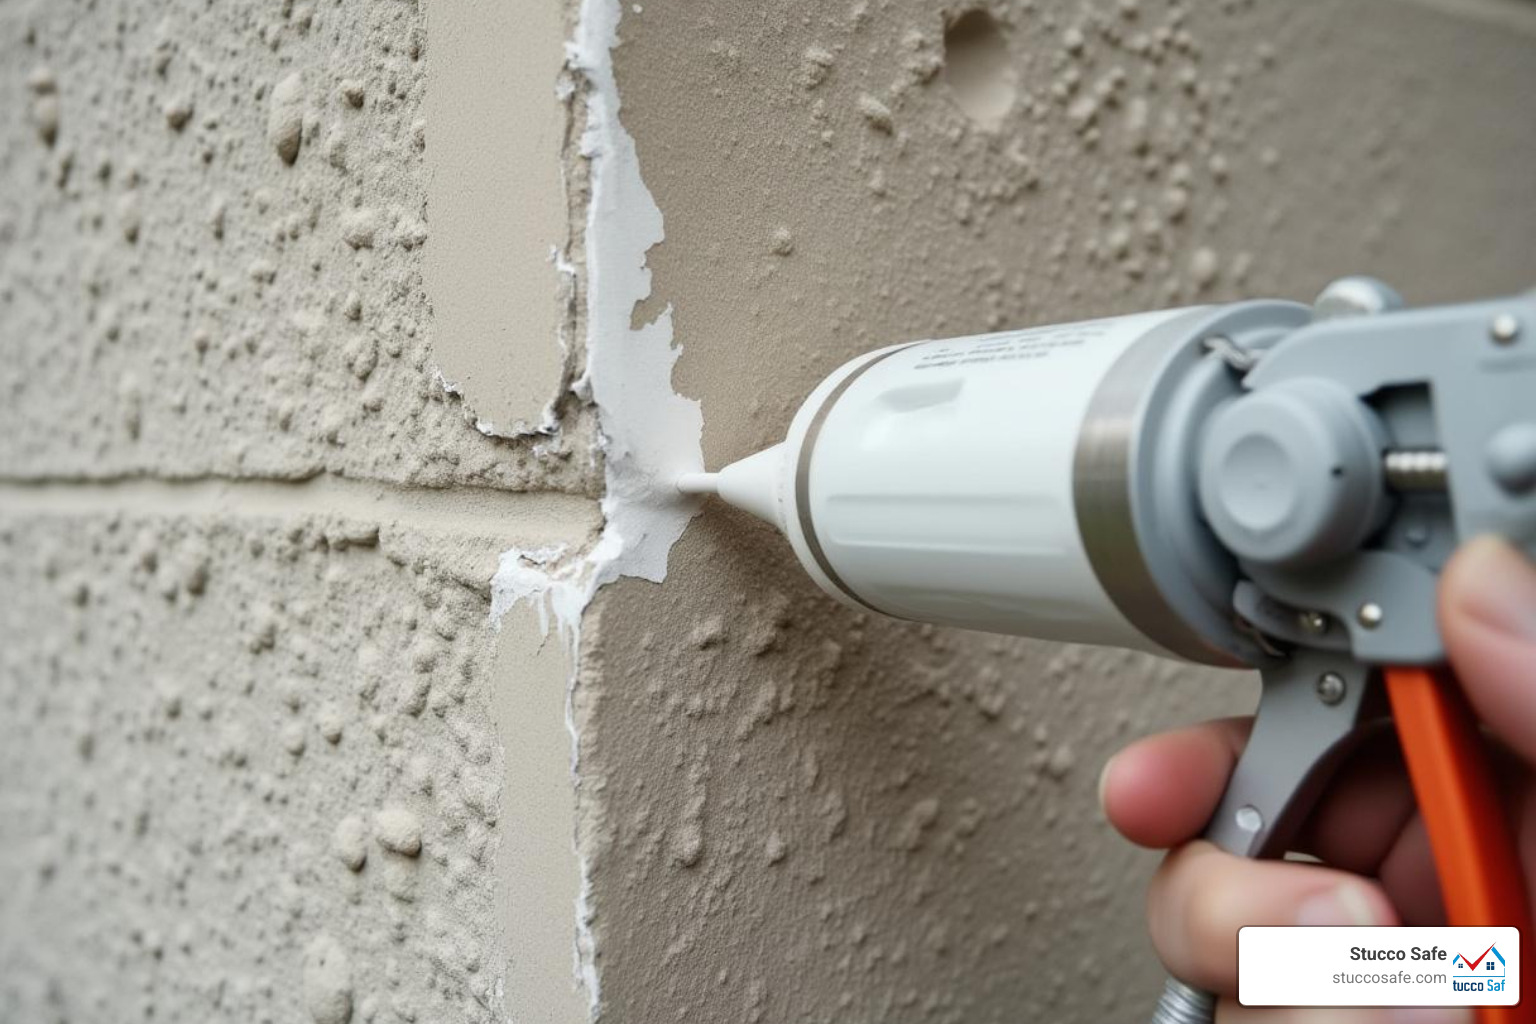
If you’re using caulk (elastomeric or acrylic), cut the tip of your caulk tube as small as you can and at an angle. Load it into your caulking gun. Then, apply a steady, even bead directly into the crack. The goal here is to really force the material deep inside – don’t be shy! We want to fill the whole void. For super tiny cracks, you can even apply a bead and then immediately use a gloved finger to press and spread the caulk into the crack. This ensures it really gets in there and sticks to the sides.
For those slightly wider cracks or small spalls where you need to build up material, your premixed stucco patch compound comes in handy. Use a putty knife or margin trowel to firmly press the patching material into the crack. It’s best to apply it in thin layers, no more than about 1/4 inch thick at a time, especially for deeper cracks. This lets each layer cure properly and helps prevent shrinkage. If you’re dealing with bigger holes or spalls, you might need a few layers, letting each one dry before you add the next. You can find more detailed instructions for larger repairs in our guide on Patching a Hole in Stucco.
Step 3: Blend the Texture and Finish
This is where you make your repair disappear! The trick is to match the texture of the stucco around it so it looks like nothing ever happened.
The artistry here is all about matching your existing stucco texture.
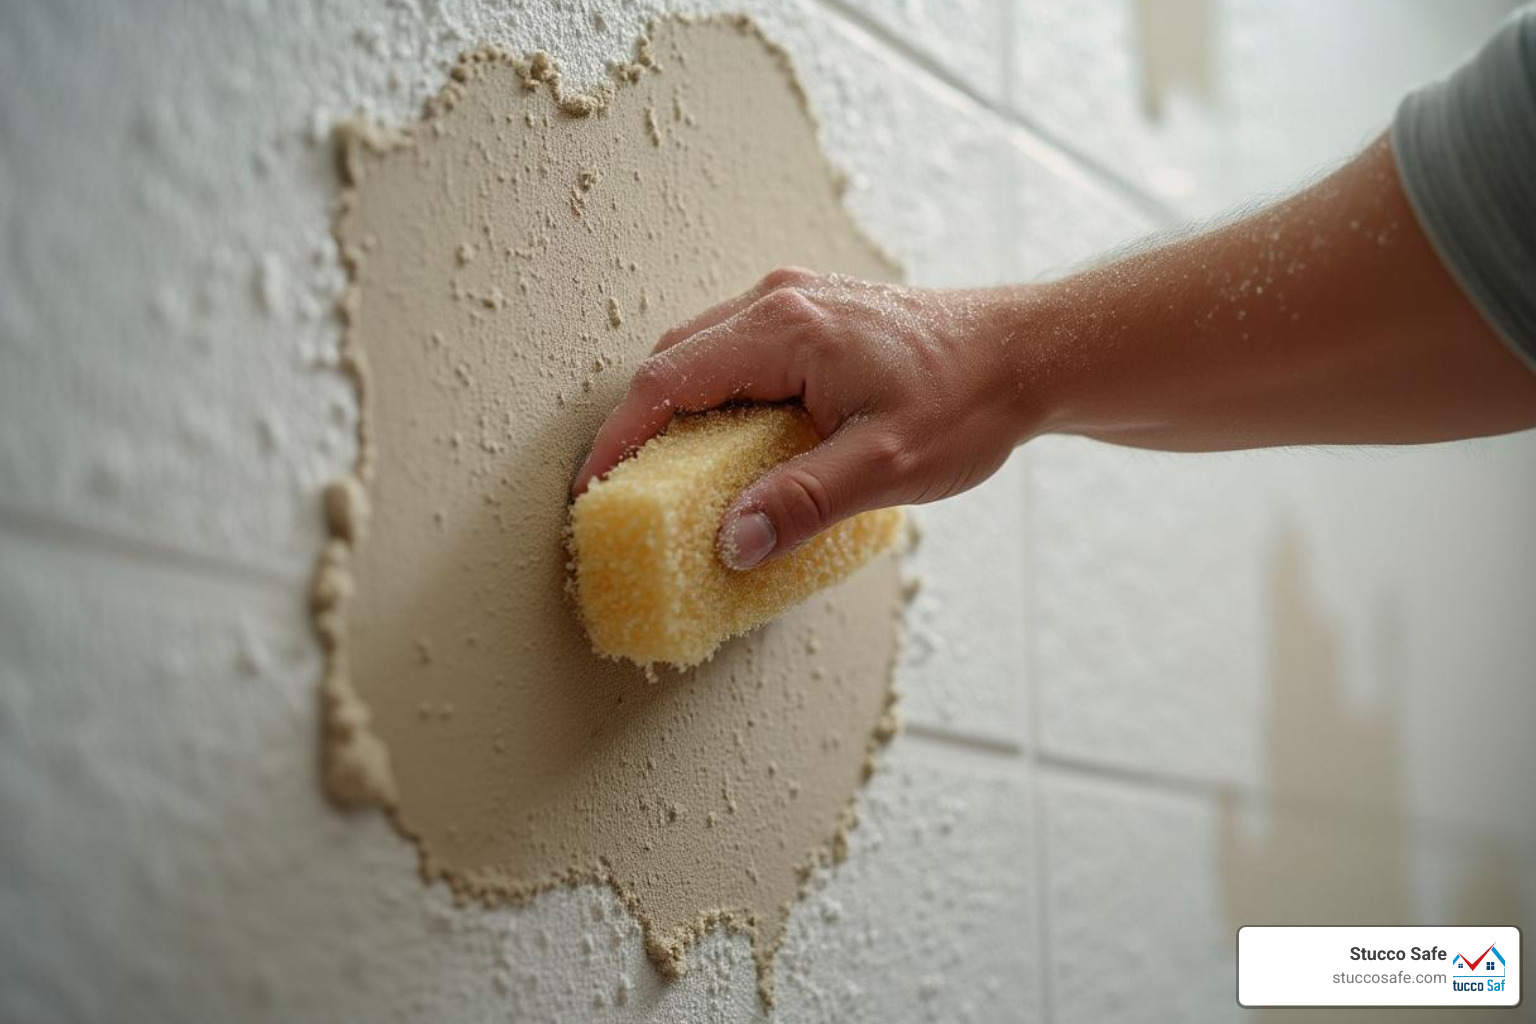
If your stucco has a smooth finish, immediately after you apply the material, use a damp sponge or the flat side of your putty knife. Use a circular motion to smooth out the patch and gently blend its edges into the existing stucco.
But what if your stucco has that lovely, rougher texture? This is where you get creative! You can use a stiff-bristled brush, a broom, or even a special stucco texture tool. Dab, swirl, or lightly broom the wet patch to copy the texture around it. Some folks even carefully press coarse sand or fine gravel into wet caulk to get that textured look. It’s a good idea to practice on a scrap piece of cardboard first to get the hang of it!
No matter the texture, always feather the edges of your repair outwards. This means gently blending the repair into the surrounding stucco so there’s no noticeable lump or line.
Finally, use a clean, damp sponge or rag to gently wipe away any excess material from the edges of your repair before it dries. This cleanup makes a big difference in the final look.
Step 4: Curing and Painting
Patience is a virtue, especially in this last step. Rushing things here can undo all your hard work!
It’s important to understand the difference between drying time and curing time. “Dry to the touch” doesn’t mean your repair is fully hardened and ready for anything. Stucco patches, especially those cement-based ones, need time to chemically cure and become strong. Always follow the manufacturer’s instructions carefully for both drying and curing times. This can be just a few hours for caulk, or 24 to 48 hours (or even longer) for stucco patches. If it’s hot and dry outside, you might even need to lightly mist cement-based patches with water during the curing process. This helps them cure properly and stops them from drying too quickly and cracking.
Make sure to protect your fresh repair from rain or heavy moisture until it has fully cured. You don’t want all your hard work to wash away!
Once your repair is fully cured, it’s a good idea to prime the patched area before painting. This helps the paint stick better and gives you a more even finish.
Lastly, for a truly seamless repair, you’ll need to paint to match the wall color. Matching existing stucco color can be a bit tricky because of weathering and the natural variations in the material. For the best look, you might find yourself needing to paint the entire wall, or at least a larger section around the repair. Using a high-quality exterior paint, especially an elastomeric one, will add another layer of protection and flexibility, which can even help prevent future hairline cracks. Regular Stucco Exterior Maintenance is always a good idea to keep your home’s facade looking its best.
Common Mistakes and When to Call a Professional
While learning to repair small cracks in stucco can feel empowering, it’s also easy to stumble into common traps. These mistakes can either mess up your careful repair or, even worse, hide bigger problems lurking underneath. We’ve seen it all, and trust us, we’d rather you avoid these pitfalls! If you’re curious about why stucco can sometimes be a bit of a headache, you can learn more by checking out our article on Why Does Stucco Have Problems?.
Common Mistakes to Avoid When You Repair Small Cracks in Stucco
First off, let’s talk about some common missteps. One big one is using interior-grade caulk. This type of caulk isn’t built for the outdoors. It won’t stand up to harsh weather, the sun’s strong rays, or the way your stucco expands and shrinks with temperature changes. It’ll just break down quickly, making your repair useless. Always, always use an exterior-grade, flexible caulk for any outdoor work.
Another common slip-up is not cleaning the crack thoroughly. Think about it: if there’s dirt, dust, or loose bits in the crack, your repair material won’t stick properly. It’s like trying to glue two pieces of wood together with sawdust in between – it just won’t hold! Take the time to make sure that crack is spotless.
Then there’s the artistic side of things. Many people make the mistake of creating a smooth patch on a textured wall. This is a dead giveaway that a repair has been made. If your stucco has a rough texture, your patch needs to match! Don’t leave a smooth spot where a bumpy one should be. It’s a good idea to practice your texturing technique on a scrap piece of material first.
Patience is a virtue, especially when it comes to rushing the curing process. “Dry to the touch” doesn’t mean it’s ready for anything. Putting paint on too soon, or adding another layer before the patch has fully hardened, can lead to bubbles, flaking, or a weak repair. Always follow the manufacturer’s directions for how long the material needs to dry and cure.
Finally, a big mistake we often see is using rigid materials for flexible cracks. Stucco moves, and your repair material needs to move with it. If you try to patch a hairline crack with something stiff like rigid mortar, it often leads to the crack simply reappearing right next to your new patch. That’s because the underlying movement of the house hasn’t been handled. Also, it’s best to avoid materials like plastic stucco cement for patching, as they have a lot of water and can shrink, causing new cracks. And urethane caulking usually isn’t the best choice for stucco either, because it doesn’t absorb water like portland cement stucco, which can make your patched areas stand out when they get wet.
Warning Signs: When a Crack Is More Than a DIY Job
While we love helping homeowners tackle minor repairs, it’s super important to know when to call in the pros. Some cracks are like flashing lights, signaling deeper, more serious problems that simple DIY fixes just can’t handle. Ignoring these warning signs could lead to really big, expensive damage down the road.
Watch out for cracks wider than 1/4 inch. These are generally too big for a simple caulk or patch job and can point to major movement or problems with your home’s structure. Also, pay close attention to diagonal cracks that start from the corners of windows or doors. Cracks that branch out from these openings often mean there are stress points in the structure or that the framing isn’t quite right.
If you see bulging or bubbling stucco, that’s a classic sign that moisture is trapped behind the stucco. This moisture can cause wood rot, mold, and serious damage to your home’s frame. A simple patch won’t fix this; you need to find and stop the water leak first.
Another red flag is stains or dark streaks around cracks. If you notice water stains, white powdery spots (called efflorescence), or dark streaks below cracks, it’s a clear sign that water is getting into your stucco system. This moisture can damage the wood sheathing and framing underneath.
And if you’ve patched a crack and it reappears or grows quickly, that’s a strong hint that the real problem hasn’t been fixed. It could be ongoing structural movement or a persistent water leak. Finally, if you see multiple cracks or extensive cracking all over a large area of your stucco, it might mean there are widespread issues with how the stucco was installed, or problems with moisture or the home’s structure.
When you spot these kinds of warning signs, it’s definitely time to get an expert involved. These issues often need a special kind of stucco inspection, called a forensic inspection, to find the true root cause. This could be anything from problems with your flashing to poor drainage. For more details on moisture issues, you can read our guide on Moisture Problems with Stucco.
As certified stucco inspectors and building envelope forensic inspectors, we at Stucco Safe are experts at finding hidden moisture and structural problems in homes across Southeastern Pennsylvania, New Jersey, and Delaware. We use advanced testing methods to pinpoint the source of problems that simple visual checks might miss.
Frequently Asked Questions about Repairing Stucco Cracks
What is the best material to fill small stucco cracks?
Choosing the right material is key to a lasting repair. For those super fine hairline cracks (we’re talking less than 1/16 inch wide – imagine a single strand of hair!), your best bet is a high-quality elastomeric or acrylic latex caulk. Why these? Because stucco loves to move a little with temperature changes, and these caulks are super flexible. They can stretch and shrink right along with your stucco, keeping that crack sealed tight.
If your stucco has a bit of texture, like a rougher finish, you might find that a sanded caulk works wonders. It has tiny sand particles that help it blend in beautifully with the existing texture.
Now, for those slightly wider cracks, say up to 1/8 inch, or if you have a small divot you need to fill, a premixed stucco patch compound is often the way to go. These compounds are designed to adhere well and can be textured to match your wall.
The main takeaway? Always pick a material that’s flexible and specifically made for exterior use. Skip the rigid stuff, like basic cement patches, or anything meant for indoors. They just won’t stand up to the elements or your home’s natural movements, and you’ll find yourself repairing the same crack again sooner than you’d like!
Do I have to paint the entire wall after repairing a few cracks?
It’s a common question, and honestly, while it’s not always a must, painting the repaired area is highly recommended. Think of it as giving your repair the best chance to blend in and last longer. Stucco is porous, and even the most perfectly applied patch can look a little different from the aged, weathered stucco around it.
For that truly seamless look, where you can’t tell there was ever a crack, painting the entire wall (or at least a large section of it) is often the way to go. It’s really tough to match the exact color and how old paint has weathered over time. Plus, uneven surfaces can play tricks with how colors appear, making touch-ups stand out.
Here’s a little bonus tip: using a high-quality elastomeric paint after you repair small cracks in stucco can be a smart move. It offers an extra layer of protection and flexibility, which can actually help bridge future hairline cracks that might try to pop up.
How long does a stucco patch last?
That’s the million-dollar question, isn’t it? When you repair small cracks in stucco properly, using the right materials and techniques, your repair can absolutely last for many, many years. It really comes down to a few key things: how well you cleaned and prepped the crack, whether you chose a flexible filler (like that trusty elastomeric caulk or a good stucco patch), and if you let it cure completely according to the manufacturer’s instructions.
However, it’s important to have realistic expectations. Stucco homes, by their very nature, are prone to cracking. Why? Because stucco is a rigid material, and your house is always experiencing some kind of movement – from settling over the years to expanding and contracting with daily and seasonal temperature changes.
So, while a good repair is durable, if the underlying reason for the crack (like ongoing house settling or persistent structural movement) continues, new cracks might eventually form nearby, or the original one could even reappear. From our experience in the field, a stucco crack repair typically has about a 70-80% success rate on average. It’s not 100%, because no material can completely stop all the natural movement your home goes through. But that 70-80% is still a huge win for protecting your home!
Conclusion
We hope this guide has given you a clear path and the confidence to repair small cracks in stucco around your home. Taking care of these tiny imperfections isn’t just about making your house look good; it’s a super smart step to prevent little problems from becoming huge, costly headaches down the road. Think of it as giving your home a little hug – a quick, easy, and affordable way to keep it healthy and beautiful!
However, it’s also really important to know when a crack is telling you something more serious. While we absolutely love seeing homeowners like you take charge of your property, some cracks are whispering (or sometimes even shouting!) about deeper issues hiding behind your walls. If you spot cracks that are wider than 1/4 inch, or diagonal cracks coming from the corners of windows or doors, or even signs of moisture like bulging stucco or dark streaks, a simple DIY patch simply won’t cut it. These are big warning signs that definitely need a professional eye.
For our wonderful homeowners in Southeastern Pennsylvania, New Jersey, or Delaware, if you’re ever concerned that your cracks might be hinting at something more serious, a professional evaluation from Stucco Safe can bring you real peace of mind. Our team of certified inspectors uses advanced forensic testing methods. This means we can uncover hidden moisture and structural problems that might be lurking behind your stucco, finding issues that a simple look might miss. Stucco Inspections typically vary in cost from $495 to $1595 or more for very large homes. It’s a small investment when you think about protecting your most valuable asset.
Don’t let a small crack become a giant worry. If you have any doubts at all, or if those warning signs we talked about sound familiar, please don’t hesitate. We encourage you to Schedule a professional stucco inspection today. We’re genuinely here to help you keep your home safe, sound, and looking its best!